

Black Garlic Storage Techniques: Keep It Fresh
Ever notice how regular garlic can zap your breath, but black garlic feels like dark chocolate met balsamic vinegar at a candlelit dinner? That deep, jammy kick makes it unforgettable. If you find black garlic bulbs in your kitchen, learn Black Garlic Storage Techniques before those little gems lose their va-va-voom. After all, if you treat your garlic right, the stuff can last up to six months.
Black Garlic Storage Techniques mean you get to plop bold flavor into your meals anytime the mood hits. The aroma of these bulbs—smoky, earthy, and sweet—will pound your nose in the best way every time you open a jar. Last weekend, I reached for my last few glossy cloves to stir into butter. They made my grilled corn taste legendary, but the stash ran low before grilling season did.
I’m pretty sure you don’t want to waste a single clove, either. That’s exactly why we’ll cover every angle: from the first garlic batch you craft yourself to uniquely storing black garlic for that punchy flavor always at the ready. This Beginner’s Guide details how to make black garlic at home, so you’ll leave with proper storage, some fresh kitchen ideas, and satisfied taste buds. Ready to dive in?
Understanding Black Garlic and Its Culinary Appeal
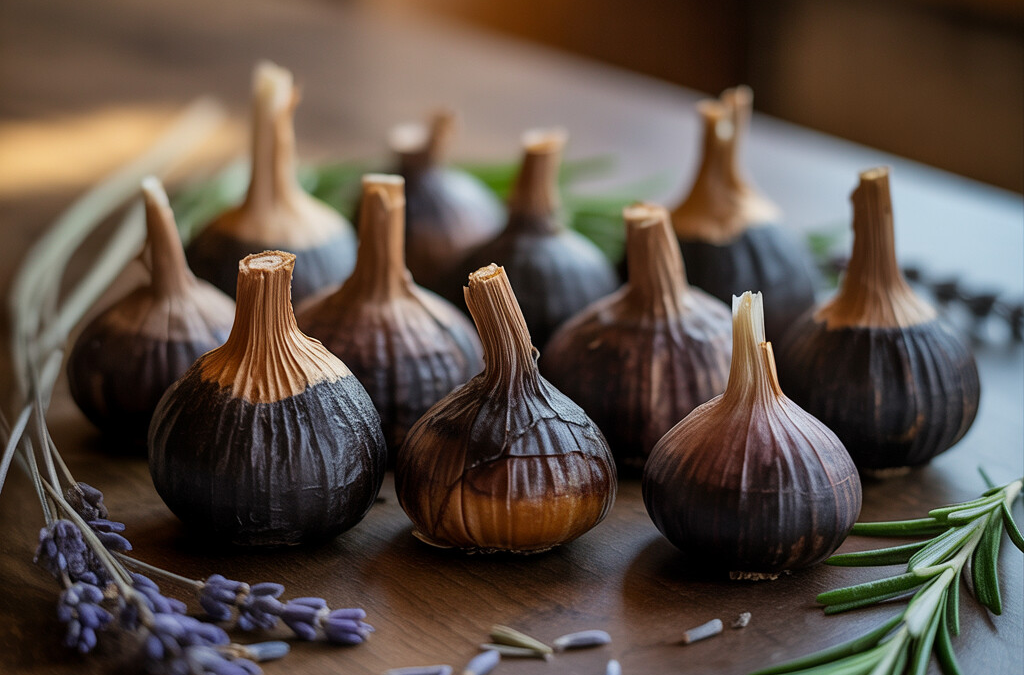
Why does black garlic make us giddy? Well, it tackles a flavor in between and umami. It is rich and deeply sweet, not bitter. Its tender-black, jammy texture also looks good on a plate and sends up those hints of balsamic, dark chocolate, and roasted garlic. Regular fresh garlic does smell bold. But black garlic keeps things mellow without any loss of interest, like the movie trailer of alliums.
Unfortunately, black garlic can be tough to find and even harder to trust—you never know how long they sat at the import shop. It is a niche pantry treat that sells for premium prices. Sure, you could climb grace in the dark dried fruit section for preciously aged bulbs that cost $10 to $20 (I have). But the closer you stand to 17th Street barbecue or Berkeley chef wisdom, the easier it is to DIY with reliable everyday practice and a slow cooker.
Unlocking the Basics of Black Garlic
Black garlic is made using a slow, controlled fermentation-like process at low heat and just the right humidity to convert regular bulbs into these beauties. Over a couple of weeks, natural sugars and enzymes mix in a way that softens the cloves until they become a spreadable, jiggly relish. If you have tried it before, you know it has extra caramelized sweetness and a rounder clavicular flavor than your usual home garlic.
One thing classic or professional food people learn first: if you have extra, practice pro-level black garlic storage techniques. Like many ingredients, how you store these aged garlic bulbs shapes their flavor punch. Well-done storing black garlic bulbs and storage practice for black garlic shelf life let you savor every ounce. Later sections explain freezing black garlic cloves for side-by-side convenience (they hold up just as expertly organized pasta is better sautéed al dente from a starchwater boil).
I still count on key black garlic storage techniques if I want ramen broth, hard-smoked musk on a cheese tray, or nighttime salted-chocolate blackening a new week’s knotted morning toast. Discerning and learning black garlic flavors lets you short-circuit farther-food blindness or flavor elitism. I have done it indoors in my cheap crockpot after buying my first aged black bulbs straight from petroleum-painted extra shelves at Sahadi’s; a small stand there handed out caramel-black scouting bulbs.
Learn from my journey. Even in allergy-time slabs of takeout evenings, every time I make DIY black garlic at home, I eat new long flavor: no costcolors, no deodorizer aftertaste.
Essential Equipment for Making Black Garlic at Home
Most of us eat with our eyes first, but black garlic invites you to use your nose—every time I open a batch, my kitchen fills with sweet, smoky warmth. Before you reach that “aha!” moment, though, you need the right tools. Luckily, building your black garlic kitchen doesn’t mean hunting down fancy gadgets. You probably already own most, or know where to find them if you need to make an upgrade.
Black Garlic Preparation Tools to Get It Right the First Time
Let’s cut to the chase: to produce that luscious, spreadable black garlic, you’ll need something that controls gentle, consistent heat. Rice cookers are everyone’s best friend here thanks to their “keep warm” function, which coaxes raw bulbs into delicious darkness over 14 to 30 days. They have tight-fitting lids that help keep in just the right amount of moisture, preventing the cloves from getting crispy or drying out. If a rice cooker isn’t an option, small countertop slow cookers often serve the same purpose. Some dedicated black garlic fermenters are available, though they’re rarely stocked at regular stores. An electric pressure cooker also works well; there are black garlic settings on some recent models if you’re the luckiest person shopping online.
Tin foil or parchment paper comes next. You’ll use it to wrap your garlic bulbs into little packages, which helps manage humidity and keeps odors under control. I learned early—my first effort left behind a faint tang in the fridge that clung like cooked cauliflower. For best results, double wrap each head.
A baking sheet, shallow dish, or lipped tray isn’t required with some machines, but it will catch any juices and make transporting your bulbs safer—all without the risk of missing a single precious clove.
After your garlic is ready and cooled, a flat spatula is your go-to for slipping cloves out of their skins. A mesh strainer works, too, especially if you’re storing in oil.
A solid airtight container—Mason jars and locking glass containers win by a mile—will help keep that heady black gold at peak freshness, especially after all your care has brought it this far. What you use is vital to any method, and most proper black garlic storage techniques start with the right container.
You’ll need a place to keep that airtight container: somewhere you won’t forget about it. The fridge’s crisper drawer is ideal, and a cool, dark pantry is plenty if you plan to enjoy it quickly instead of stretching it out. I’ve tried bags (not great unless you freeze), but the garlic aroma and stickiness means cleanup can get messy. A small freezer pack rounds out your setup if you want to try doubling up on shelf life.
If you need more tips about harvesting, storing, and keeping dried garlic fresh and potent, go check our Black Garlic Preparation Methods A Home Cooks Guide once you’re done with this guide.
Investing just a little time and the right gear makes your first batch a breeze. Master these basics early, and next time someone raves about your midnight black cloves over dinner, you’ll get to say, “Oh, that? I made it.” This is ground zero for most black garlic storage techniques because less air and more care keep your black garlic at its flavor-filled best.
Step-by-Step Guide to the Black Garlic Process
Ready to turn ordinary garlic into black magic? Here’s a foolproof way to make your own. First, get whole garlic bulbs with tight, firm skins free of bruises. Like picking apples or peaches, go for unblemished, dry skins. Next is your secret ingredient: gentle, low heat. While you can buy a pricey fermentation box, I use a slow cooker or a standard rice cooker set to the lowest “warm” or “keep warm” setting. Skip anything too hot. You want a slow transformation, not garlic jerky.
You don’t need anything else. Skip adding olive oil or herbs; just keep it simple. Place your bulbs on a small rack or mini muffin tray to keep them off the bottom. Some folks wrap each bulb loosely in foil. This cuts drying and stops any garlicky drips.
Now the magic starts. Plug in your cooker and walk away. The garlic will cure, not cook, never rising above 190°F. Let it rest for two to three weeks, checking occasionally to make sure the bulbs don’t dry out or go moldy. At home, I make a habit of peeking every three or four days, breathing in the caramel aroma, and drooling a little. If the bulbs are shrinking or drying out, add a quarter-cup of water to the bottom of the pot. If your kitchen is drafty and cool, cover the cooker with a towel to keep the heat inside.
When the bulbs are tender, squishy, and black, it’s time to take them out. The smell will make you wonder if roasted marshmallows and balsamic vinegar had a love child in your slow cooker.
Pro Black Garlic Storage Techniques for Homegrown Batch
Homemade black garlic deserves careful handling. Use a sharp knife to trim the tips and break bulbs into cloves. Peel away the skins, wash your hands, and fight the urge to eat every piece right there at the kitchen counter. Let them cool, put bulbs or cloves in jars, and store them in the fridge. After they’re cooled down, keep them at room temperature for a week or two if you like, but refrigerate for longer-term storage. For best results, choose storage containers that seal tightly, and never let the bulbs sit in direct sunlight.
One important note: what about freezing black garlic cloves? Freezing halts aging and helps keep them from going moldy (if you’re brave enough to keep some saved up that long). Spread the peeled bulbs on a wax paper–lined baking sheet, then slip the tray into the freezer. When they are hard, pop them off the sheet, drop them into a quart freezer bag, and press out as much air as you can. With these easy black garlic storage techniques, you’ll stretch your supply and tackle rare-market sticker shock!
Now you know: great black garlic is easy to make, and even easier to share. Use a few cloves to tempt the next guest with creamy dip, browned butter, or even a surprise cheese plate.
For extra tips on making store-worthy black garlic every time, visit How To Make Black Garlic At Home A Simple Guide. Enjoy your culinary adventure looking for new ways to cook up this amazing black wonder!
Optimal Black Garlic Storage Techniques for Longevity
If you’ve ever put in the time to make black garlic, you want those sticky sweet cloves to last as long as possible. Don’t worry, there are solid black garlic storage techniques backed by practical results and (thanks to enthusiastic home cooks from all corners of Reddit) loads of experience. Let’s make sure you get savor-every-bite mileage out of that labor of love.
Preserving Black Garlic for the Long Haul
Room temperature works just fine for short-term storage if you keep your bulbs in a cool, dry cupboard. Humidity is your arch-nemesis. Black garlic tends to soak up every stray bit of moisture from the air, making it a fast track to spoilage. Nothing kills excitement quicker than mold, right?
For those who splurge on a fancy fermentation box or go wild making a batch big enough for a garlic festival, tighten up your technique for the fridge or freezer. Seal up bulbs or separated cloves in an airtight container, jar, or vacuum-sealed pouch (if you’re both organized and ambitious). These diligent black garlic storage techniques turn anywhere from a month in the pantry to twelve months in the freezer into a realistic expectation.
Here’s a little trick for gorgeous, shelf-stable results: Put a paper towel in each jar. It absorbs condensation from cracked bulbs, prolongs the black garlic shelf life, and stops that weird fridge taste so your aged allium stays pure, savory, and delicious. And if you get the urge to free up kitchen space, remember that you can try storing black garlic bulbs with other fresh produce – just do not let cut or peeled cloves wander loose without protection.
Wrap everything up with some good labeling habits. If your garlic haul will last awhile or if you have whole, unpeeled bulbs and peeled or halved cloves in rotation, marking “Best By” dates on containers saves time (and maybe your nose) with future recipe planning.
Your kitchen is about to get fancy. Proper black garlic storage techniques are the secret weapon for any cook who refuses to see those amazing flavors go to waste.
Storing Black Garlic Bulbs: Best Practices
Black garlic is too good to let go bad, so handling your homemade bulbs the right way keeps your efforts from going to waste. After you’ve patiently aged your garlic, you’ll want to give it the longest life possible. That means smart storage, and, yes, a bit of attention to the details.
Effective Bulb Storage Method for Black Garlic Lovers
Black garlic’s all about its soft, chewy centers, and clingy wrappers mean excess moisture is the enemy. Let your bulbs cool down and air dry at room temperature. That simple step helps ensure their peels dry out without adding any mold or funk to your prized cloves.
Once air dried, treat your bulbs kindly. Store them in a paper bag, mesh garlic bag, or cardboard box, somewhere cool, dark, and dry. Dark and cool conditions are like a spa day for flavor, preventing the bulbs from drying out while sidestepping all the weird flavors they’d get in high heat or humidity.
Avoid plastic bags or tightly sealed plastic containers, unless you’re into squish and mold (no judgment, of course, but I’d pass). Black garlic wants to breathe, and containers without airflow trap humidity, ramping up your chances for disappointing results.
For larger batches, Black Garlic Storage Techniques can include keeping more bulbs out at a time, but always stash the rest in smaller bags or boxes. Opening containers frequently lets in extra air and light you don’t want, so save that “treat yourself” moment for just one batch at a time.
You worked hard on these bulbs, so a little mindful storing means enjoying them in dressings and sauces for months. Any leftover bulbs from big batches can also be processed in a later step for long-term preservation, but with smart Black Garlic Storage Techniques, your regular stash will always stay ready to delight your tastebuds, even in the off season.
Maximizing Black Garlic Shelf Life Through Proper Care
Once you have a fresh batch of black garlic, you want it to hold on to that magical sweet-and-savory yumminess for as long as possible. The way you handle storage can make or break your black garlic shelf life. Since it takes time and love to make, proper storage lets you stretch your investment over lots of meals.
Simple Storage Habits for Improving Black Garlic Shelf Life
First off, keep your black garlic away from direct sunlight and heat—sunbeams will dry it out and ruin the taste and texture. The garlic does best in a cool, dry spot. Try your pantry or a cabinet that stays around 60 to 75 degrees for shelf storage. Make sure it’s sealed in an airtight container. Any leftover air encourages mold or dries out the garlic, both of which are major bummers.
If your kitchen game includes vacuum sealing, here’s where it shines. Vacuum-sealed bags stop air and moisture from doing their thing, so black garlic bulbs keep longer before flavors fade. No fancy gadgets? Even a simple glass or plastic food container with a snap-on lid makes a big difference.
The quicker you use your garlic after making it, the fresher those hits of molasses and tamarind flavors taste. If you want to hold on to that flavor for a long time, get that garlic into the fridge after you cure it. The fridge keeps moisture at bay and flavor on point for up to six months.
I used to leave batches out on the counter just like regular garlic, but learned the hard way—that fuzzy stuff doesn’t make a tasty topping. Instead, make it a habit to check your containers every couple weeks. If there’s condensation, swap to a dry container. Spot a little mold? Toss that clove or bulb out immediately.
It all comes down to basic black garlic storage techniques: limit air flow, cut the moisture, and keep the temps steady. This can take black garlic from a short-lived treat to your secret kitchen power play, always ready when you want bold, mellow flavor in your next dish.
Freezing Black Garlic Cloves: A Handy Preservation Method
Black garlic is magic in a bulb: it’s sweet, tangy, and jam-packed with umami. Still, it isn’t something you toss in the fridge and forget about. While the flavor gets richer over time, black garlic can lose moisture and turn hard if stored wrong. You don’t want that.
That’s when Black Garlic Storage Techniques shine. One of my favorites: freezing black garlic cloves. Here’s how to do it so each clove stays soft and ready to add to any dish.
Preserving Black Garlic by Freezing: Step-by-Step
When you’ve scored a big batch or crafted your own, the freezer can be your best friend. These steps will keep your black garlic tasty and in perfect shape, no matter how long it spends in deep freeze.
First, peel your black garlic, if you haven’t already. It’s a sticky job, but peeling up front is key since frozen cloves are trickier to handle later. Then, pop the peeled cloves into a single layer on a parchment-lined plate or small tray. Freeze for a couple of hours, just until solid. Trust me, if you freeze them in a clump, you get a garlic brick, and nobody wants that battle.
Once frozen, slip the solo cloves into a resealable freezer bag. Press out excess air, seal, and store in the freezer. All that’s left: pull out a clove or two when you need them. To thaw, leave the cloves at room temp for a bit, or add them crushed and still-frozen into soups and stews. This Black Garlic Storage Technique keeps the cloves tender and intense in flavor for up to several months. No more last-minute grocery runs for gourmet garlic.
Freezing cloves is a no-brainer if you’re stocking up and want that black-garlic magic in your kitchen year-round. With smart Black Garlic Storage Techniques like this, you’re ready to savor sweet, tangy cloves anytime the craving hits. Holiday season appetizer? Quick savory boost for eggs or roasted veggies? That’s a yes from me.
Creative Ways to Incorporate Black Garlic into Your Cooking
Cooking with black garlic is like having a little secret weapon in the kitchen. You slice open a bulb, and the dark cloves greet you with an aroma that’s both familiar and exotic: sweet and tangy, just hinting at balsamic vinegar or tamarind. Let’s talk about simple ways to fold this magic into everyday meals.
Unlocking Black Garlic’s Flavor Potential in Your Kitchen
Black garlic butter might be the easiest of all: blend black garlic cloves with a touch of salt into softened butter. Spread on bread, toss with veggies, or melt over steaks. That rich, earthy umami coaxes quiet vegetables — Brussels sprouts, potatoes, even asparagus — out of their shells. Try spooning a whole or mashed clove onto pizza just before serving, with a quick pass under the broiler to concentrate its syrupy depth.
Those last few cloves can transform jarred spaghetti sauce, homemade ramen, or even a chickpea stew. Mince a black garlic clove, whisk it into a dressing or vinaigrette, or swipe it through mayo for an ultra-savory sandwich spread.
If you love dips, blend black garlic into hummus or black bean dip. If you’re a meat lover, paint a little black garlic sauce over burgers and grilled steaks.
Hard cheese and charcuterie boards now feel naked without black garlic along for the ride. Even try a few cloves pressed into a mild cheese, like fresh goat or mozzarella, letting the flavors get to know each other for an hour before serving.
Finding great store-bought black garlic can be a scavenger hunt. But with the right tools, you can achieve better-than-market results at home and save yourself some shopping hassle. With a dozen black garlic bulbs in your pantry after your homemade batch, you can be generous with its culinary joys. If you need black garlic to last until a feast with friends, rely on airtight containers or vacuum bags, zip it in the fridge, or tuck leftovers in the freezer. Because the best Black Garlic Storage Techniques protect not just black garlic’s flavor but also your kitchen freedom.
Conclusion
Mastering home cooking with black garlic starts with understanding proper Black Garlic Storage Techniques. Maybe you feel a bit stuck due to limited options at your local store or you are only just learning how to keep black garlic in top shape. A quick review of Section 5 can help you get up to speed on easy best practices, or brush up on maximizing your Black Garlic Shelf Life through Section 6’s care tips.
Black garlic rewards the effort, making every dish taste like magic and comfort, all at once. So grab some cloves or bulbs, and try out these storage steps hands-on in your kitchen. You can take black garlic from beautiful to brilliant, inspiring your friends or dinner guests to capture those same creative, umami-filled possibilities.
FAQ
How should I store black garlic bulbs to keep them fresh?
Once you finish making black garlic at home, storing black garlic bulbs well is key if you want them to stay fresh and tasty for weeks, or in some cases, even longer. You should keep them in a cool, dry spot like a pantry or closet. If you ever bite into a clove and it’s starting to dry out, bump your bulbs into the fridge. I love how grabbing a chewy sweet bulb from the pantry fills the air with that balsamic vinegary flavor. Black garlic storage techniques work best when you’re consistent, so watch the temperature, moisture, and light and you’ll be rewarded with pigmented, sweet black garlic ready for every dinner.
Should I vacuum seal black garlic for longer storage?
Yes, vacuum sealing gives your cloves a fighting chance at a long, flavor-packed life. These black garlic storage techniques lock out both air and unwanted moisture. I zip mine up in a vacuum sealed bag and some has lasted up to a year. Toss the packaged garlic in your pantry, or pop them in the freezer if you want to enjoy the sweet and savory magic longer. Your future sauces, risottos, and spreads will thank you. Nothing is better than stumbling on forgotten vacuum bags filled with glossy, squishy cloves ready for dinner.
Is freezing black garlic a good idea?
Freezing black garlic cloves works great if you just made a big batch and want to keep them fresh for months. Put whole bulbs or individual cloves into a zip top or vacuum bag, squeeze out the air, and freeze—they keep their flavor and won’t get icy. When you’re ready to use the cloves, just take out however many you need and let them thaw on the counter for five minutes. Your next aioli, vinaigrette, or pasta sauce can pack a punch of flavor anytime of year. Having that stash waiting in the freezer means you’re always a step away from deep garlicky goodness.
How long will fresh black garlic last outside the fridge?
When stored well using smart black garlic storage techniques, black garlic bulbs keep beautifully on your counter or in a cool cupboard for about four weeks. I’ve noticed the garlic will darken more if there’s even the tiniest bit of sunlight, so cover them, or tuck them away in a charcuterie drawer. The texture should remain sticky, fudge-like, and rich, but the bulbs will always eventually harden (and that’s your cue). Trust your nose and eyes—no weird slime, ammonia, or fizz means they’re still in their prime.
Do black garlic cloves need a special container?
You do not need a specialty container to store black garlic, but it doesn’t hurt. A glass jar, small food safe tub, or sturdy plastic pouch works wonders and keeps your storage space smelling like garlic instead of, well, garbage. The only requirement is that the container closes fully and keeps out fresh air. Smelling that dark, garlicky perfume when you crack the lid tells you that these black garlic storage techniques work, even with the simplest jar.
What’s the main secret for black garlic shelf life?
Proper black garlic storage techniques, like sealing the cloves inside small, airtight containers and keeping them away from sunlight, preserve them. You can always tell when your black garlic has finally turned, because the cloves either become brittle, sprout strangely or take on a sour tang. My trick? Keeping little containers in the pantry, another in the fridge, and a stealth batch in the freezer. This way, every experiment in preservation lets you start strong or get rescued by the stash.