

Black Garlic Storage Tips: Keep It Fresh
Did you know one clove of black garlic boasts twice the antioxidants of regular garlic? Picture this: last weekend I unearthed a forgotten jar, and when I popped the lid the tangy sweetness instantly filled my kitchen. Now that you’ve perfect black garlic within reach, let’s make sure every silky piece stays fresh for as long as possible, because once you unlock the secrets of this aged allium, you’ll want every bit to count. With a few smart Black Garlic Storage Tips, that jar on your countertop can become your go-to kitchen treasure, never just another science experiment gone sideways.
If you find yourself wary about how to store black garlic or worried about it drying out, turning to mold, or losing its magic flavor, you are not alone. According to a recent survey, two out of three home cooks struggle to get their hands on (and preserve) quality black garlic products. These Black Garlic Storage Tips will help you bring out each clove’s best side so you’re never left digging for a dried-up dud. Of course, you can’t have amazing storage skills without a guarantee-worthy batch, so you’ll also learn how to make black garlic at home. Ready to dive in?
Understanding Black Garlic and Its Culinary Appeal
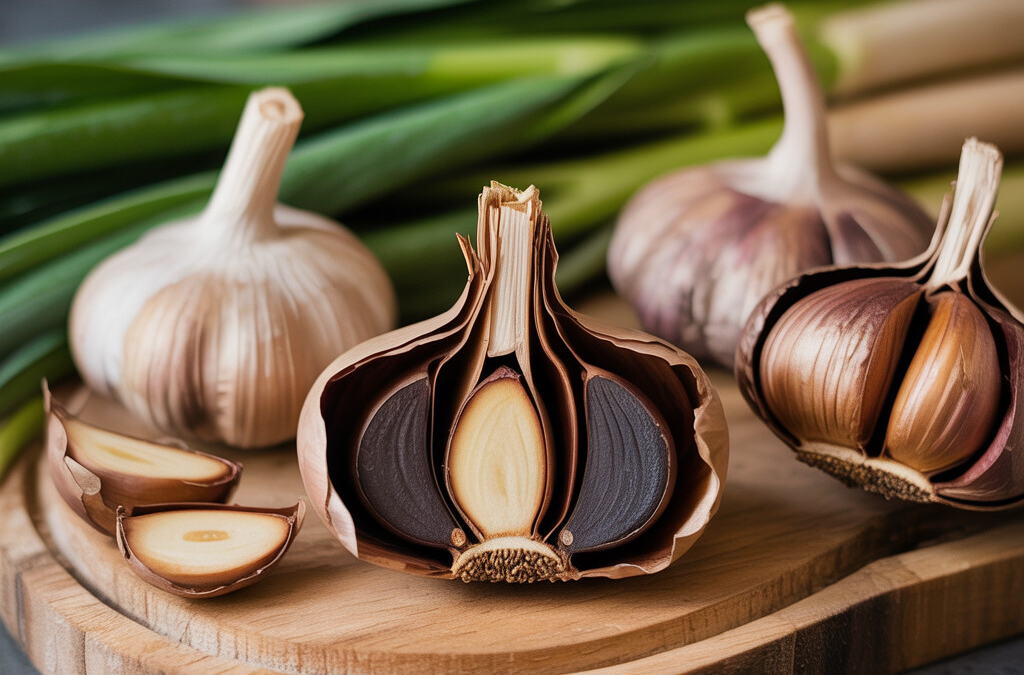
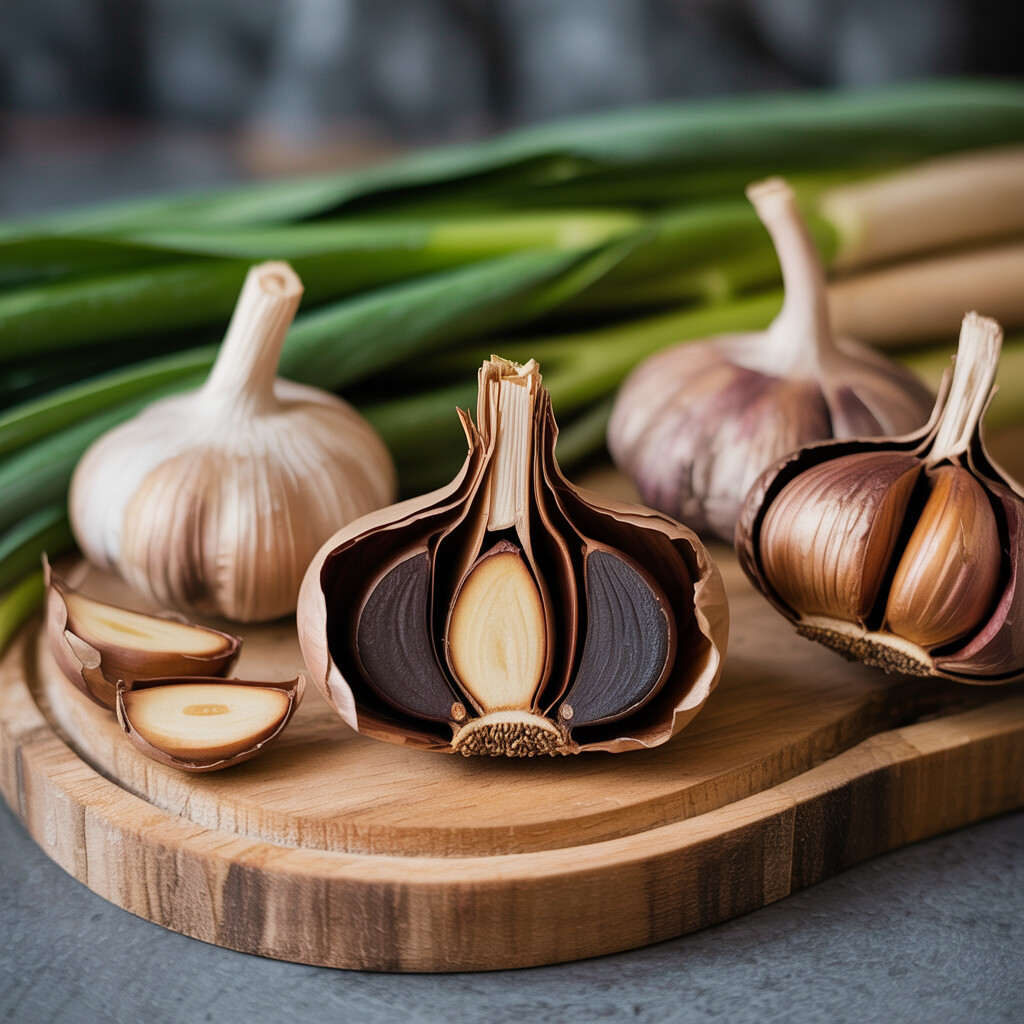
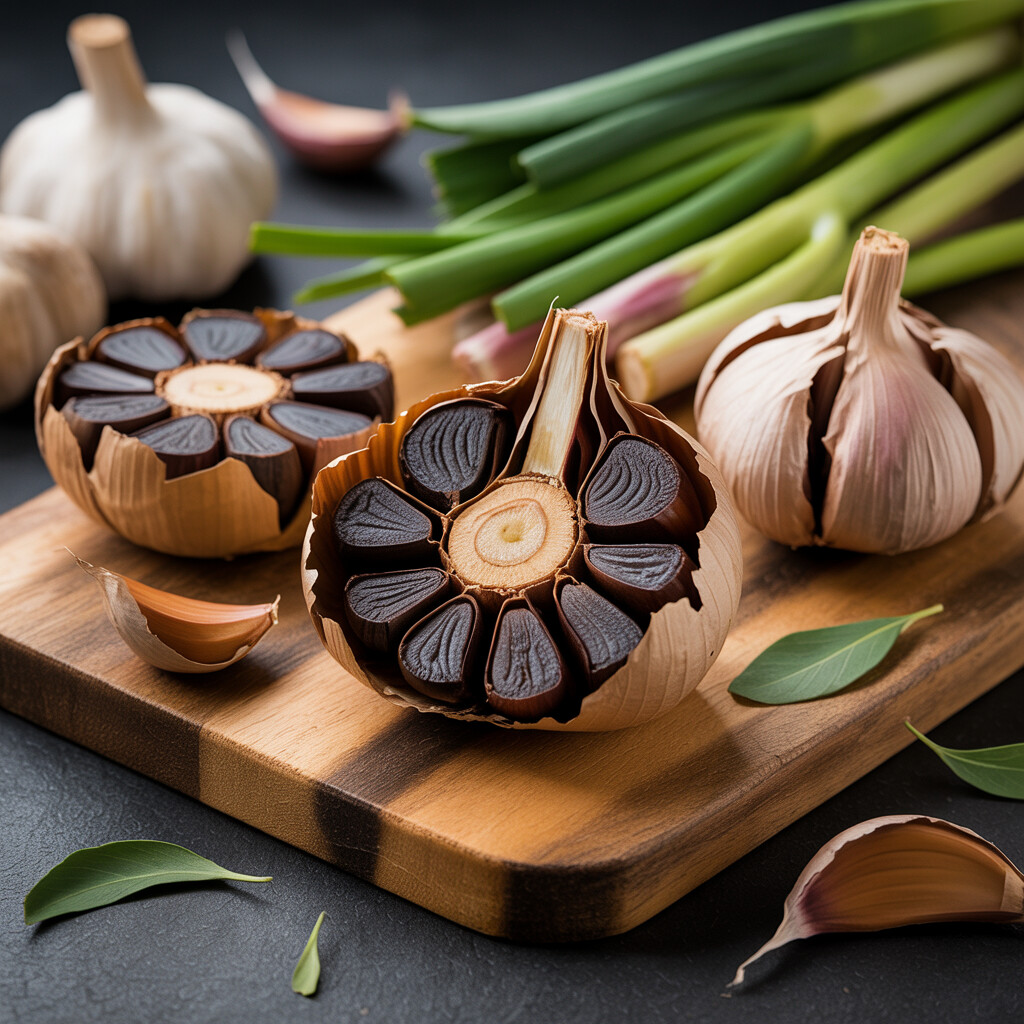
If you have ever tasted black garlic, you know it hits a whole new level compared to regular raw garlic. Black garlic starts as fresh garlic, then goes through a slow heating process that changes the flavor and looks. Suddenly, those sharp, pungent bulbs mellow out and become sweet, tangy, earthy, and almost sticky. It is like discovering chocolate in the world of garlic: sweet and deeply intense but easy to eat out of hand. I love how you can almost squish it like ripe dates and use it every which way in your kitchen.
Black Garlic Flavor and Culinary Possibilities
If you want to get fancy, think of black garlic as umami’s best friend. The process converts sugars and amino acids into complex flavors that taste like balsamic, molasses, and tamarind rolled into one. Each bulb turns soft and deep black and looks super chic anywhere you put it. Smush some into vinaigrettes, blend it into creamy sauces, spread it on roasted bread, or use it to add depth to sauteed greens, noodles, and marinades for meat or mushrooms.
But here is the kicker: unless you live near a really solid grocery or happen to luck into a farmers’ market find, black garlic is one of those foods that is hard to find high quality or even at all. And once you get it, storing it wrong or treating it like regular garlic can seriously shorten black garlic shelf life. So, keep these black garlic storage tips in mind to get the most from each bulb or clove you buy or make: keep them in sealed bags or containers somewhere cool, dry, and undisturbed. Light is the enemy. Do not refrigerate, which can make black garlic rubbery.
Getting to know these simple black garlic preservation methods means you will stretch every dollar and enjoy every sweet morsel long after you bring the garlic home. Store it well, and it will reward you with bold culinary treats that work in everything from your morning toast to your favorite pasta or meat dishes. If you fall hard for black garlic, trust me, you will always want some on hand.
Essential Equipment for Making Black Garlic at Home
Take a walk down the garlic aisle at any big-chain grocery store, and finding true black garlic is like trying to spot a unicorn. That’s why figuring out how to make your own can be a total game-changer for your kitchen creativity and wallet. First things first: you don’t need crazy specialized equipment, but you do need a reliable setup that lets you control the temperature and trust the process (black garlic takes 3–4 weeks).
Must-Have Black Garlic Equipment and Setup Options
The most popular home method is a rice cooker with a “warm” setting. This keeps your garlic cloves between 140 and 170°F, which is the sweet-spot range for the aging to work its magic without roasting the bulbs. Some folks swear by simple slow cookers; just be sure yours has a super-low “keep warm” function, or you’ll dry out your garlic. You might hear about “fermenting boxes,” but they’re mostly just fancy-sounding slow-cookers (please don’t splurge unless you “need” new kitchen toys, I get the urge). For DIYers, a temperature-controlled food dehydrator can pull double duty for aging garlic and storing or reviving it later.
You’ll need something to hold in moisture so your bulbs don’t shrivel. Crack the rice cooker lid a tad for airflow but tuck the garlic in a paper bag or wrap loosely in parchment paper. If you skip this, that funky, complex flavor can turn acrid and sharp—ask me how I know. Black garlic will fill your house with an earthy, molasses-y aroma for days. Seal the whole setup in a cooler or big plastic tub, then stash it in your garage or laundry room.
Sanitation is another must. Wash your equipment before you start. Any funk, mold, or cloth residue taints the end result. For best Black Garlic Storage Tips, scrub extra dirt off whole garlic heads but keep them dry. Trim roots but don’t break the skins.
As the process finishes, let the bulbs cool at room temp. Peel and stash them in the fridge, or, if you have patience, vacuum seal for slower flavor development. For premium Black Garlic Storage Tips, don’t crowd our newcomers next to that half-cut onion or super-stinky cheese. These little guys are shelf-stable at room temperature for several weeks but stay moist and velvety in the fridge or freezer for months. There’s a time and place for everything. When you have your own big jar of black gold, you can use them generously—just slice, mash, or eat them straight if late-night craving wins—truly a luxury for home cooks and restaurant-loving foodies everywhere.
Step-by-Step Guide to the Black Garlic Process
Ready to craft black garlic right in your own kitchen? The steps are simple, but the transformation of plain garlic into those sweet, molasses-like cloves feels nothing short of magic. Once you make your own, you can use it as everything from savory candy to the life of the party in sauces and spreads. Without further ado, here’s how to make black garlic at home.
First, you’ll need a rice cooker or fermentation box. This tool is key for keeping a steady, warm temperature—a steamy 140 to 170 degrees Fahrenheit, to be exact. Wrap your fresh bulbs (peeled or unpeeled, up to you) in plastic wrap or foil before placing them on the cooker’s steamer rack. By keeping the bulbs away from direct moisture, they ferment as nature intended: cozy and undisturbed.
Let patience move in with you for a bit, because you’ll be waiting three to four weeks. I know, I know. It’s a long haul, but trust me, it’s worth it. After two weeks, open the lid gently. Your senses will get hit by a tangy, soy sauce smell and the garlic itself will darken and soften.
Take note! Your whole house will smell like garlic for the next month. If you have a spare room, use it. Airing out the kitchen also helps.
Once the garlic smells like caramel and feels like fudge when pressed, switch off the machine and move the bulbs to a shallow tray (use glass or clay, not porous wood). Pop them into the fridge for a few days to finish softening, which also dries the outside and prevents mold. Handling these beautiful bulbs? Wear gloves or get ready for sticky, stained fingers.
Here’s a quick handy table for reference:
By the time your black garlic is nice and silky, storing and using it right becomes the next mission. Check out my best Black Garlic Storage Tips nearby to lock in all that umami magic. If you want more ideas or run into snags, you can scroll down for answers in Cooking with Black Garlic and Troubleshooting Myths. Figuring out the perfect black garlic storage conditions makes all that effort suddenly feel smart and even a little gourmet.
Optimal Black Garlic Storage Conditions for Longevity
It’s tempting to dive right in and use all your black garlic at once, but if you’d rather keep some in reserve, smart storage matters. This is even more important if you went through the work of making it yourself for the first time. I find a little forethought saves me heartache when pantry projects go sideways. Done right, proper black garlic storage gives you the best chance to savor that mellow, earthy flavor that makes this unique ingredient shine.
The top concern is keeping moisture in check. Black garlic loves to hold on to humidity. Too much of it in the wrong place and you might spot mold before you can fold a rich clove into a sauce or rub. But good news: following simple black garlic storage tips can keep your cloves fresh for weeks, or even months. Here’s my tried-and-true guide.
Preserving Black Garlic: Ideal Conditions and Simple Tips
First, let your black garlic cool and dry out on the counter after cooking. If you made it in a rice cooker and it comes out moist, let it rest for a few hours so extra water can evaporate.
Once cool, the best move is an airtight container or a zip-top freezer bag. Squeeze or press out the air to limit oxygen contact. This is critical for longer life and best taste. Pop it in the fridge if you plan to use it within a few weeks. Your homemade batch will reward you with subtly sweet and umami-packed cloves ready to toss into just about anything.
Freezing is my ace in the hole for longer storage—especially if you’re batching this project for months ahead. Portion out halves or whole bulbs, wrap them in plastic or a beeswax cloth, then place in a heavy-duty freezer bag. Remove air before sealing it up tight. Like this, black garlic holds up beautifully for up to a year. Yes, a whole year of magic flavor shortcuts at your fingertips.
Here are a couple more black garlic storage tips that will serve you well: Avoid any sunlight hitting your container or bag. Light—and warmth—spoil the delicate balance you worked to create. If you have a vacuum sealer, it’s the gold-standard way to block out air and keep everything tidy.
Whether you use a small fridge container, a paper bag inside your crisper drawer, or little bundles of frozen cloves, all these routes minimize excess moisture while extending your black garlic powder. Taking these steps means you never have to rush through your stash when the craving for rich depth strikes.
Black Garlic Shelf Life: What to Expect
When you finally pull your own batch of black garlic out of its cozy fermentation corner, the first thing you’ll want to know is just how long this sweet, funky treasure will last. Here’s what you can expect and how to help your stash stay at peak flavor.
How Long Homemade Black Garlic Lasts and What It Depends On
If you store whole black garlic bulbs, they can hang out in your pantry for up to three months without breaking a sweat. Seal them up in an airtight container, and don’t forget to place them somewhere cool and dry—think cupboard, not above the hot stove. I keep mine in a tightly lidded mason jar at the back of my fridge, next to the pickles. Stored this way, they ride out six months, sometimes even longer. Papery skins that start off crinkly and deep brown gradually become drier. By that point, a sniff and taste test will always let you know if it’s time to say goodbye.
Here’s the thing: if you’ve peeled the black garlic, the shelf life drops. Peeled cloves last one to two weeks at room temperature, a few weeks in the fridge, or up to six months if you stash them in small freezer bags or airtight containers in the freezer. Whether whole or peeled, the little flavor bombs cling to their sugar and umami magic. But they do battle air, humidity, and the dreaded mold monster. Peeled cloves especially like to stick together and dry out, so tuck a bit of parchment or wax paper between layers. Every time I check on mine and see the color still jet black and the texture tender, I let out a chef-y sigh of relief.
Why be this vigilant? If you’ve pet any pet whose enthusiasm for finds in the trash can cause a disaster, you never want to serve spoiled black garlic to anyone. Here are a few Black Garlic Storage Tips to carry forward: One, clearly label the container or bag with the making date. Two, always check for fuzzy white formations or anything slimy before cooking. Three, never store black garlic products near raw meat—cross-contamination is a real risk, especially since you’ll want to show off with those bold flavors in all sorts of dips, sauces, and desserts!
In sum, home-fermented black garlic is best before six months for bulbs, three months for peeled cloves if refrigerated, or a full six months if kept in the freezer. Store it right, and your extra effort pays off in punchy flavors whenever you need them.
Black Garlic Preservation Methods to Maintain Quality
Now that you have worked so hard to make your own batch, keeping black garlic fresh is almost as important as the initial prep work. Trust me, discovering an amazing flavor only to lose it to mold or dryness is pretty tragic, even for foods. The key to tender, slightly sticky cloves with a mellow bite is finding the right preservation method for your needs and lifestyle.
Prolonging Black Garlic Storage: Top Tips to Try at Home
At its core, black garlic is just fermented regular garlic, so it’s naturally more shelf-stable than raw bulbs. Still, temperature, light, and humidity all play big roles in keeping your black garlic at its peak. For everyday use, store whole bulbs in an airtight container—anything from a mason jar to a vacuum-sealed bag works well. Make sure to set it in a cool, dark, and dry spot, such as the back of a pantry cabinet or inside a food-safe drawer. If your kitchen likes to mimic the tropics (hello, Florida summers), your best bet is the refrigerator. Chilled cloves will stay softer and fresher for longer, though you may notice some extra condensation, so be sure to dry the cloves before tucking them in.
Freezing is another tried-and-true black garlic storage tip for folks dealing with large amounts or if you want to stretch that precious flavor over many months. Go ahead and peel the cloves first, then lay them on a small baking sheet or plate in a single layer. Pop them in the freezer for an hour so they don’t stick together, then pack the loose cloves into a heavy-duty freezer-safe bag for long-term keeping. Thaw what you need, when you need it—no need to use the entire stash at once.
If you plan to whip up lots of dressings or marinades, try blending peeled black garlic with a glug of good olive oil and refrigerate. A squeeze bottle makes it easy to drizzle onto pizza, avocado toast, or into your smoothie. That smooth, umami-packed oil can last at least a month in the fridge if you don’t finish it sooner.
As you experiment with different storage options, jot down which method works best for you. Each batch can have its own personality, and spoilage—even if rare—hurts twice as much after a successful homemade experiment.
For even more ideas to get the most out of what you worked so hard to craft, see our other recipes and health tips. I personally love combining creative black garlic storage tips with new recipes so that nothing goes to waste. A kitchen adventure with a tasty ending is always the best kind.
Creative Ways to Incorporate Black Garlic into Your Cooking
When you finally have a homemade batch of black garlic, it does not just sit in your pantry—it wants to be the star of every meal. Lucky for all of us, black garlic is more versatile than you might think, with a mellow and complex flavor. It goes from sweet and tangy to deep and savory. I get why some call its taste “umami bomb.” If you can keep your hands off those sticky, jam-like cloves long enough, they can add zing to lots of dishes.
Cooking with Homemade Black Garlic: Creative Ideas for Every Meal
Start simple. Smash a clove and spread it on toasted bread or crusty baguette for an instant flavor hit. Think of it as gourmet garlic bread. Or whisk mashed black garlic into mayonnaise or Greek yogurt for a rich sandwich spread. Meat lover? Rub paste into steaks, chicken, or pork before grilling; you get a caramelized crust that turns dinner into an event.
You can mix black garlic into hot food, too. It melts into sauces with zero bitterness—only sweetness and depth. Sometimes, I add a whole sliced clove into a bubbling skillet of onions and mushrooms, leaning over the stove to smell the nutty aroma. Dropping a few pieces into vegetable stir fry, stews, or even simple beans makes plain meals taste chef-made.
What about pasta? Smash two or three black garlic cloves, then stir into alfredo or tomato sauce with basil and Parmesan. Your basic Monday night dinner will taste like a special occasion. Honestly, black garlic is even incredible in scrambled eggs, vinaigrette, or homemade hummus.
Now, let’s talk about Black Garlic Storage Tips because nothing wrenches the heart like dried-out, flavorless cloves. After you have whipped up a bunch of creative meals or snacks, you need to store any leftover unpeeled or peeled cloves in a container in the fridge—or freeze some. Keep the storage dish sealed to hold in the prized moisture and flavor for months, sampling that distinct sweetness as you go.
Experiment, taste, repeat. Make garlic rice! Add it to flatbread dough. Garnish a ramen bowl. Drizzle it on pizza. Soon, “limited access to quality black garlic products” will not even cross your mind—you can just reach for your own. Proudly flaunt your homemade treasure, talk about its health benefits, and sneak black garlic into everything. The result: flavor-packed meals and bragging rights, all built on solid Black Garlic Storage Tips.
Troubleshooting Common Issues in Black Garlic Preparation
Let’s be honest: home connoisseurs have all faced a floppy batch of fermenting garlic or the disappointment of unbroken, neon-white cloves that refuse to caramelize. Maybe your exquisite experiment has started sprouting mold or the “creamy, balsamic dream” just will not come true. Don’t worry, you are not alone, and yes, the answers are surprisingly simple.
Troubleshooting and Common Storage Mistakes
One of the most common challenges is garlic that dries out instead of turning soft and black. In most cases, that means the environment is too dry or too warm. Make sure your fermentation chamber maintains moderate humidity. You can fix dryness by placing a small, open cup of water nearby in your cooker or carefully wrapping bulbs loosely with foil to keep in moisture.
Next up: dots or fuzzy bits almost always spell “wrong storage.” Black garlic is rich and sticky; it loves a cool, dry, airtight movie set. To maximize black garlic shelf life, avoid exposing it to air, and never put it back with wet hands. Always let home-fermented garlic cool, then tuck it safely into resealable, moisture-proof bags or glass containers with tight lids. I have seen people discover a lovely, hour-old bulb, cut it, and go back for the rest days later—only to find it moldy and no good for even a salad dressing! That poor black garlic got contaminated because they did not refrigerate and seal it right after making it. Treat it like fine cheese. An airtight life is best for high-quality black garlic storage.
Keep an eye on your black garlic’s aroma and texture as you store it. Any harsh vinegary wave or fuzzy spots might point to excess moisture or a forgotten bit of garlic left in a steamy crisper drawer. If that happens, toss the qestionable cloves. For future success, follow these Black Garlic Storage Tips: pat the finished bulbs dry, store them sealed, and always check the flavor before serving to your family or guests.
By taking note of these Health Benefits Of Black Garlic , following proper preservation methods, and keeping it cool and airtight according to top Black Garlic Storage Tips, you will ensure a better outcome every time.
Conclusion
You now have the basic skills to craft black garlic and keep it fresh. By setting up the right equipment and following proven Black Garlic Storage Tips, you can enjoy this delicious ingredient anytime. No need to hunt down fancy brands or spend a fortune. With a bit of patience and daily checks, anyone can preserve quality black garlic at home.
Now that you know how to extend the Black Garlic Shelf Life and maintain flavor, there’s nothing left but to tap into your kitchen creativity. Whether folded into spaghetti or whisked into dressings, black garlic can add new depth to your meals. Try a small batch today. Enjoy discovering how versatile black garlic can be—and let your inner chef shine!
FAQ
What is the best way to store homemade black garlic?
If you just finished a batch of black garlic and do not know where to stash it, start with a glass jar. A sealed jar or an airtight container works wonders. Once you pop it in the fridge, the flavors deepen and the cloves stay soft for months. You might want to tuck parchment paper between layers to prevent sticking, especially when you have a lot. Good Black Garlic Storage Tips also include avoiding plastic containers. The aroma seems to cling to plastic like gum to a shoe. Reaching inside that jar for a midnight kitchen snack, you’ll be glad you planned ahead.
How does light affect black garlic shelf life?
Sunlight is not a friend to your black garlic. Besides making the color fade, heat from light can cause it to go slimy pretty quickly. Stick your garlic stash on the bottom shelf of the fridge, or anywhere cool and dark. I once forgot a few stray bulbs out on the window sill—the little beauties turned tough and bitter within a week. Following basic Black Garlic Storage Tips ensures your garlic develops its sweet balsamic tang and not that scary musty flavor.
How should I wrap black garlic to keep it fresh?
The right wrap makes all the difference for black garlic’s juicy flavor. Plastic wrap is okay in a pinch, but wax paper feels fancier and does not trap extra moisture. Seal black garlic in portions, not one giant bundle. Each time you open the pack, you keep the leftovers safe from wandering air—and from picking up refrigerator odors from nearby leftovers. Black Garlic Storage Tips I have learned: Pop in a silica gel packet if you tend to get soggy garlic. Proper wrapping lets you enjoy the sweet, sticky coins you crave.
Can I freeze black garlic for long-term use?
Absolutely, freezing works for sudden stockpiles or big harvest stints. Use freezer-safe bags or small mason jars. Portion garlic ahead of time, so you only defrost what you need, whether it’s a few cloves or the whole haul for that crazy-rich aioli. Black Garlic Storage Tips for freezer fans—label everything with the date, and plan to use it within a year for optimum flavor. Thaw in the fridge if you want silky cloves or skip the whole wait-and drop a frozen bulb directly into soups or rice.