

Black Garlic Preparation Techniques: A Simple Guide
Did you know that the sticky, sweet bite of black garlic has been compared to a cross between balsamic vinegar and umami-packed fudge? It may seem odd cooked into desserts, but trust me, it’s not. Black garlic preparation techniques, thanks to a centuries-old tradition from East Asia, will change the way you cook at home. Who wouldn’t want a garlic head that loses nearly all of its sharpness but gains a concentrated flavor like licorice and syrupy dates after just 3–4 weeks? Nearly 70 percent of home cooks say the most annoying thing about store-bought black garlic is how hard it is to find fresh (never dried out), rich-tasting cloves.
Last weekend, I made a batch using the rice cooker in the garage, and let me tell you, there’s nothing like the deep aroma of caramelized garlic sweetness seeping through the cracks in the door. Black garlic preparation techniques look more like magic than science, and even though the lengthy process almost mimics fermentation, it requires neither a starter culture nor exotic equipment. In this detailed beginner’s guide on how to make black garlic at home, you’ll learn about small-batch prep, controlling temperatures, balancing moisture, storing at peak freshness, and working black garlic into everything from guacamole to brownies to Caesar salad. Ready to dive in?
Understanding Black Garlic and Its Unique Appeal
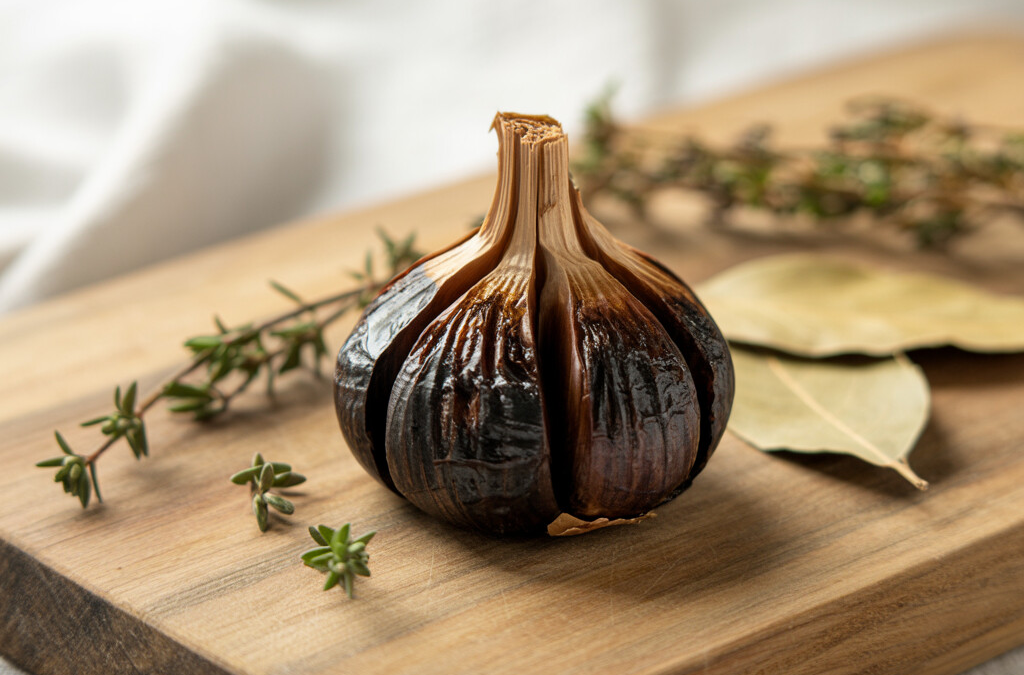
Black garlic is not just a trendy ingredient; it’s a time-honored treat bursting with flavor and full of surprises. If you’ve never had the good fortune to try it, you, my friend, are in for a serious treat. Picture ordinary garlic, but sweeter and tangier with a deep, almost balsamic intensity. Now imagine the result: snowball white cloves turned jet black, more tender and chewy than brittle. Instead of the punch of raw garlic, you get something dark and complex with notes of fruit, smoke, and soy sauce. Imagine taking a bite of something fancy in a high-end restaurant, but it came right out of your kitchen.
The Story and Flavor Profile of Black Garlic
Black garlic has lived a rich life, well before it made headlines as “the next big thing.” People across Asia have been making this ancient specialty since long before food blogs filled the internet with hacks. The transformation comes from the Black Garlic Fermentation Process, where whole garlic bulbs gently heat for weeks with nothing but humidity and unhurried patience. Over time, a subtle symphony plays out behind the scenes as enzymes mellow flavors, convert sugars, and reveal a soft, silky texture.
The taste is what really sets black garlic apart. It’s not that wild, zingy hit of fresh garlic. Scooping a clove out of its papery skin, you get a candy-like, umami-rich treat, perfect for elevating plain foods to new levels. Toss it into cheeseboards, mash a clove into butter (and you have an instant appetizer), swirl it into mashed potatoes, blend it with olive oil to finish pizza or steak, or let it bring depth to ramen noodles. The possibilities for black garlic are simply endless.
You might see the word “fermentation” and think you need a chemistry lab. Good news: you don’t. (Hint: A rice cooker or slow cooker set to warm with humidity for two to four weeks does the trick in many home kitchens.) In fact, Black Garlic Preparation Techniques are both easier and more forgiving than most would assume. You’re not so much “cooking” as you are tending to the slowest roast of your life with much of the care handled by the machine.
For those who struggle to find top-notch black garlic in stores or online, take heart: Black garlic is one of the easiest specialty foods to prepare at home with a bit of curiosity and time. Embrace these Black Garlic Preparation Techniques, and you’ll not only enjoy an affordable, truly delicious ingredient, but you’ll have a stamper for your culinary passport. So, grab a fresh bulb of garlic and get ready to savor a home-crafted food that’s equal parts taste sensation, conversation starter, and edible artwork.
Essential Equipment for Black Garlic Preparation
Getting your gear together to make black garlic at home may feel a little intimidating at first, but it’s all about using what you have. Just peek in your kitchen and improvise. At a minimum, you need black garlic preparation techniques that revolve around slow, steady heat and a way to keep moisture in. Ninety percent of my own early homemade black garlic came out of a trusted old rice cooker. Lower tech, yes, but it gets the job done just fine.
Top Tools for Homemade Black Garlic
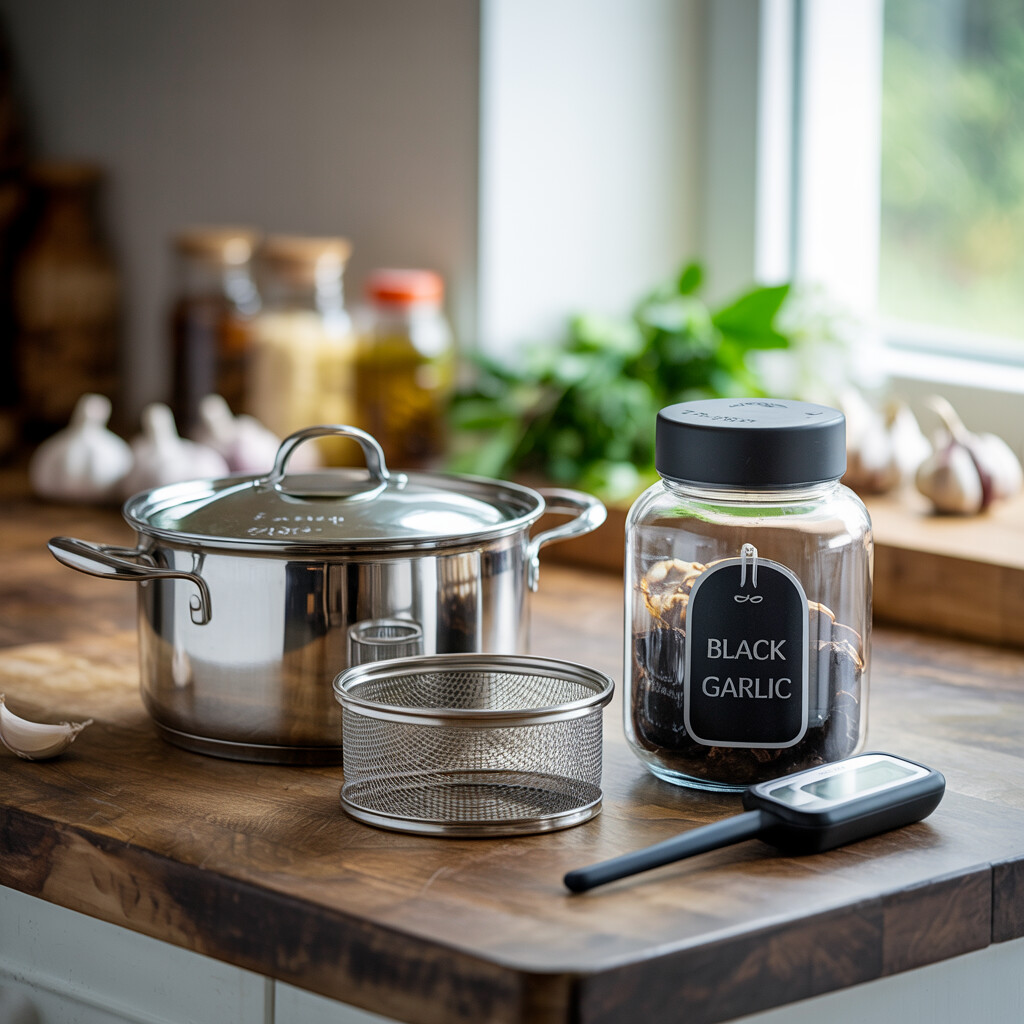
The classic tool most folks swear by is a rice cooker with a “keep warm” setting. This gentle heat is what you’re after. Set the bulbs in, leave it cracked just enough for some air, and be prepared to play the slow game. Seasoned black garlic makers sometimes use a slow cooker, food dehydrator, yogurt maker, or even a bread proofer. The trick is control. If you use the slow cooker, I suggest tucking in one of those little digital thermometers to make sure you stay between about 130 and 170 Fahrenheit.
A handy cooling rack protects your cookpot liner, and a layer of paper towels loosely draped makes mess less of an issue. This same setup is ideal for black garlic preparation techniques that need major humidity. Good heat and saturated air make all the difference for rich, jammy flavor.
No fancy tech in the house? Folks get creative. A simple oven (set on its absolute lowest) or even an insulated box with a good, reliable heat source (think seedling heater) is better than nothing. Sniff around after week one, and if the bulbs already smell like balsamic and roasted garlic are best friends, you’re on the right track.
Have at least two spare towels—they help keep in moisture and either block light or tell nosy roommates “that’s not burnt popcorn, I promise.” I also use gloves when I check the bulbs every week, just because—even after years of cooking—removing hot garlic shells is still not my favorite pastime.
Don’t get lost shopping online for special black garlic makers, especially when home appliances can replicate pro-level results at a fraction of the cost—plus you feel like a mad scientist without the wild hair. Advanced black garlic storage tips do help when your stash is done: glass jars, reusable silicone bags, or a sealed container keep airtight and fresh flavor.
Go with whatever gear your American kitchen gives you, keep things clean, and remember patience levels are the number one “tool” for black garlic success. Soon enough, you’ll have rich black garlic destined for homemade wonders. Now, onward to the actual step-by-step process, where you put all these tools to work.
Step-by-Step Guide to Black Garlic Preparation Techniques
Ready to get your hands on some sticky, sweet, homemade black garlic? Luckily, making black garlic from scratch is definitely doable at home. You might have to wait a bit, but it’s simple to control the quality and, trust me, the patience pays off when that aroma hits your nose.
Step-by-Step Instructions for Making Black Garlic at Home
The classic way to prepare black garlic uses nothing fancy: tight whole bulbs, steady heat, and high humidity over several weeks. Don’t bother peeling your garlic—leave the skins on so the cloves turn black gently and evenly. A dedicated rice cooker works best because it can keep garlic cozy and moisture-rich for weeks. (If you use a slow cooker or old-school oven, make sure you can adjust the temp and avoid drafts.)
Cleaning and prepping count for a lot. Brush loose soil gently from bulbs but skip the soap. Pat bulbs completely dry so they won’t rot. Line your cooker with parchment. Clip on a probe thermometer or keep your cooker set to “Keep Warm.” Your target is between 135–170°F—that magic range encourages tasty changes inside the garlic.
Black garlic preparation techniques are hands-off from here. Place bulbs in a single layer rather than stacking them. Close the lid and tuck in for 2–3 weeks. Wipe away condensation inside your rice cooker now and then to avoid extra steam. Don’t open the cooker for long—you want all moisture to stay inside with your garlic babies.
After a few weeks, peek under the skin. A ripe batch of black garlic is soft, dark brown, and slightly shrunken within its papery wrapper. Air out the delicate bulbs on wire racks for a day to firm them up before storage.
One batch creates an entire season’s worth of flavor bombs, and, since you controlled every bit of the process, you’ll get the soft honey-sweet flavor you simply cannot find in stores. These Black Garlic Preparation Methods open up a whole new kitchen adventure for garlic lovers, especially when quality store-bought black garlic is scarce. Time to roll up those sleeves and get fermenting!
The Science Behind Black Garlic Fermentation Process
To really appreciate black garlic, you need to understand what happens to those humble cloves during the magical fermentation process. Unlike some mystical food transformation (though I’ve almost convinced myself elf chefs are involved), black garlic comes to life through a slow, controlled meeting of heat, moisture, and time. Enzymes, sugars, and amino acids interact during this process, changing the color, taste, and even the nutrition of the garlic. That raw burn turns mellow and sweet, something like tangy balsamic and prune, thanks to the Maillard reaction, which is a kind of flavor playground for cooks.
Digging Into Black Garlic Fermentation Results
When testing different Black Garlic Preparation Techniques at home, you’ll find results are totally shaped by how carefully you control your setup. A rice cooker, insulated box, or water bath can each offer different pros and cons. But they all try to do the same thing: keep garlic at a constant warm temperature with enough humidity so those natural chemical changes can unfold over a few weeks. Unlike true fermentation, this process does not rely much on bacteria or yeast, but more on enzyme action and the slow breakdown of molecules.
Don’t worry, you don’t need a chemistry degree or a fancy piece of lab gear for any of this. All you need for most Black Garlic Preparation Techniques is a plug-in appliance, a month’s worth of patience, and a simple setup inside a rice or slow cooker. Because so few stores and online shops carry quality black garlic, making your own gives you much more control over freshness and outcome.
What you get is more than just a new color and texture; the long wait pulls out hidden notes and softens the bite, almost like someone turned garlic into a magic candy. Enjoy looking forward to surprising your friends (and maybe yourself) with black garlic’s complexity, and feel free to nerd out a little as you taste how your process shapes every batch. Next up, we’ll talk about what can affect those final flavors, so hang on to every bulb.
Factors Influencing Black Garlic Flavor Development
Black garlic draws fans because of its flavor, which is deep, sweet, and tangy all at once. That flavor does not appear by magic, though. It shows up after a long transformation, which runs for about three or four weeks. And every step in the Black Garlic Preparation Techniques, from temperature to resting, pushes the flavor in a new direction. Let’s look at the biggest levers you have to pull when you want mouthwatering results.
How Preparation and Time Play a Role
Say you decide to make a batch using rice cooker or roasted garlic techniques. Your kitchen might smell like a mix of caramel and roasted onions after a few days of working through real Black Garlic Preparation Techniques. That is full-blown garlic science in action: each step can either add something special to the bulbs or destroy those subtle flavors if you are not careful.
Here is what shapes the final taste:
- Bulb size and style: Small or large, white or purple—the garlic you start with always rewrites the coming story. Plumper cloves tend to mellow more and sometimes get stickier, which can help with certain recipes.
- Heat control: Most homes use a rice cooker or dehydrator. Both have slightly different methods but similar results: you are aiming for low, steady heat, usually between 130 and 170 °F. Get it too hot, and you get bitterness, not sweetness.
- Length of fermentation: The Black Garlic Fermentation Process continues for weeks. The longer it bubbles away, the darker, softer, and most importantly, sweeter your finished garlic gets.
- Moisture: Black garlic likes some humidity during its transformation—and so will your results. Stay too dry, and you will chew through hard little pucks that taste oddly scorched. Give it a little damp air, and the umami flavor is just right.
Time, and especially temperature, is where you score big flavor wins. Add in the nature of the cloves you grab at the store, and soon you have a creation that is nothing you would ever see in a store.
Once you get through making a batch, let yourself taste from different cloves: some will be nearly molasses-sweet, others more plum-like with that balsamic edge. Gifting a few black, tender bulbs bring smiles you simply can’t get with store-bought. That homemade touch spreads joy and gives you a secret superpower in the kitchen.
Black Garlic Storage Tips for Maximum Freshness
Once you’ve patiently waited through the black garlic fermentation process, and you finally get to open a fresh clove, nothing’s worse than watching it go bad. Maybe you’ve had this disappointment before, but don’t let poor storage spoil the reward this time. With some simple tweaks, you can enjoy your homemade black garlic at peak flavor for weeks or even months.
Best Black Garlic Storage Practices for Home Chefs
First rule of keeping black garlic: don’t let moisture crash the party. Store your finished cloves in a clean, air-tight glass jar or a vacuum-sealed bag. Glass is great because it won’t grab or share flavors, keeping your black garlic tasting rich and sweet. If you’re curing a larger batch, collect the soft cloves in smaller containers. This keeps anything that goes funky contained. Always grab with clean, dry hands or a spoon!
Colder temps slow down any spoilage. For the best flavor and safety, store your container of black garlic in the refrigerator, ideally in a crisper drawer or toward the back. Some people freeze black garlic, but it can change the taste and texture, making it mushier and hard to slice. I’d save freezing for the hardcore preppers.
Got a dehydrator? If you’ve explored some creative black garlic preparation techniques, it’s okay to dry out your cloves for longer storage. Expect the punchy molasses flavor to fade a little, and keep a paper towel in the jar to absorb any lingering moisture sneaking in. Always label your batches with the date and type of prep if you’re getting fancy with multiple batches or techniques.
Keep in mind that each step, from prep to cool-down, can shape the final flavor and shelf life. If you mastered proper timing, thorough drying, and sterilized storage, you’ll stretch the magic of that black garlic fermentation process.
Finally, if you’ve used certain black garlic preparation techniques (like blending or chopping), try to use those forms within a few days, as breaking open the clove exposes more surface to air and can accelerate spoilage. If that’s you, congratulations on your creativity—just don’t let all your hard work fade with a careless storage mistake.
Creative Culinary Uses for Homemade Black Garlic
The first time I peeled open a bulb of homemade black garlic, the scent hit me: sweet, mellow, earthy, and unlike anything I had ever tasted before. If you have ever tried to buy it at a specialty store and gotten sticker shock at the price tag, you will appreciate how easy and affordable it is to make your own black garlic at home. Plus, by using good Black Garlic Preparation Techniques, you are guaranteed to have the freshest stock every time.
So what is the secret to showing off your home-fermented treasure? If you did not know where to start or just need some inspiration, here are some easy ways to unlock its flavor in your daily cooking.
Creative Black Garlic Flavor Enhancements for Everyday Dishes
Maybe you think only chefs can blend Asian or Mediterranean flavors at home. Good news: you are the chef now. A simple pasta, roasted veggies, or even fried rice can transform just by tossing in thin slices or chopped cloves of black garlic. Love steak, brisket, or roasted chicken? Mash black garlic and mix with a little olive oil for a glossy, sweet-and-savory glaze. You do not have to go beyond weeknight comfort food—the flavor boost is huge.
Homemade black garlic prepared using good Black Garlic Preparation Techniques adds boldness to salad dressings, creamy potato or squash soups, and especially sandwiches. Tuna salad, BBQ chicken salad, egg salad—try swapping one or two mashed cloves instead of regular garlic for a flavorful twist. Black garlic’s umami also shines bright in homemade compound butters for bread or shrimp boils.
And do not forget: Black garlic was almost made for pizza. Create an instant gourmet pie by spreading pureed black garlic on your baked dough, then topping with mozzarella, blue cheese, walnuts, or a few spicy greens.
Experiment. Raid your spice rack (try chili, rosemary, dried mushrooms, or lemon zest) to see which black garlic flavor development profiles you enjoy most.
I always tell friends: if you feel shy about your first attempts at Black Garlic Preparation Techniques, start simple. Try a dollop on ramen, stir into yogurt or sour cream for a dreamy sauce, or serve on warm bread with sea salt and cracked black pepper.
Homemade black garlic punches way above its weight in the kitchen and proves that good things happen when you take bold steps with local ingredients and a little patience. When you run out, remember: more is just a rice cooker (or slow cooker) away. Let’s see how far your tastebuds want to travel!
Health Benefits Associated with Black Garlic Consumption
Black garlic might taste like a treat, but it’s actually great for you. It may look dramatic on your counter, but it’s gentler on your palate and your body than raw white garlic. Bringing out these benefits starts with the right Black Garlic Preparation Techniques.
How Black Garlic Supports Well-Being
The fermentation process ramps up black garlic’s antioxidants, which are linked to heart health and reduced inflammation. This age-old approach transforms the tangy sharpness of white garlic into layers of caramel, rich umami, and molasses. That mellowed-out bite makes life easier on your digestion while possibly packing a stronger punch against fatigue.
You won’t need much training in Black Garlic Preparation Techniques to start experimenting. Use three or less cloves a day, adding them to salad dressings, butter spreads, or straight-up snacks. Over in Korea, people sip black garlic tea for a gentle energy lift. I once sneaked a peeled clove into mac and cheese for dinner, and it added so much flavor without any strong aftertaste.
This preparation even spikes compounds that can help promote healthy liver function. Studies raise the possibility that the root may lower cholesterol under certain diets. Each batch of homemade black garlic is a little flavor-packed capsule with no messy oils or trick labels. Simple slicing or mashing of one head covers several meals for the week, even in a tight kitchen space.
Recap? Black garlic is good for the body and easy to include in your routine. It fits with your effort to take control of what you eat and try something new in home cooking. Who knew the Black Garlic Fermentation Process could be this fun and useful?
Troubleshooting Common Issues in Black Garlic Preparation
Making black garlic at home feels a little like a science project meets slow cooking. While Black Garlic Preparation Techniques aren’t difficult, there are a few things that can trip you up along the way. Let’s work through them together, so you end up with a batch that would impress any food lover.
Black Garlic Problem Solving: What Went Wrong?
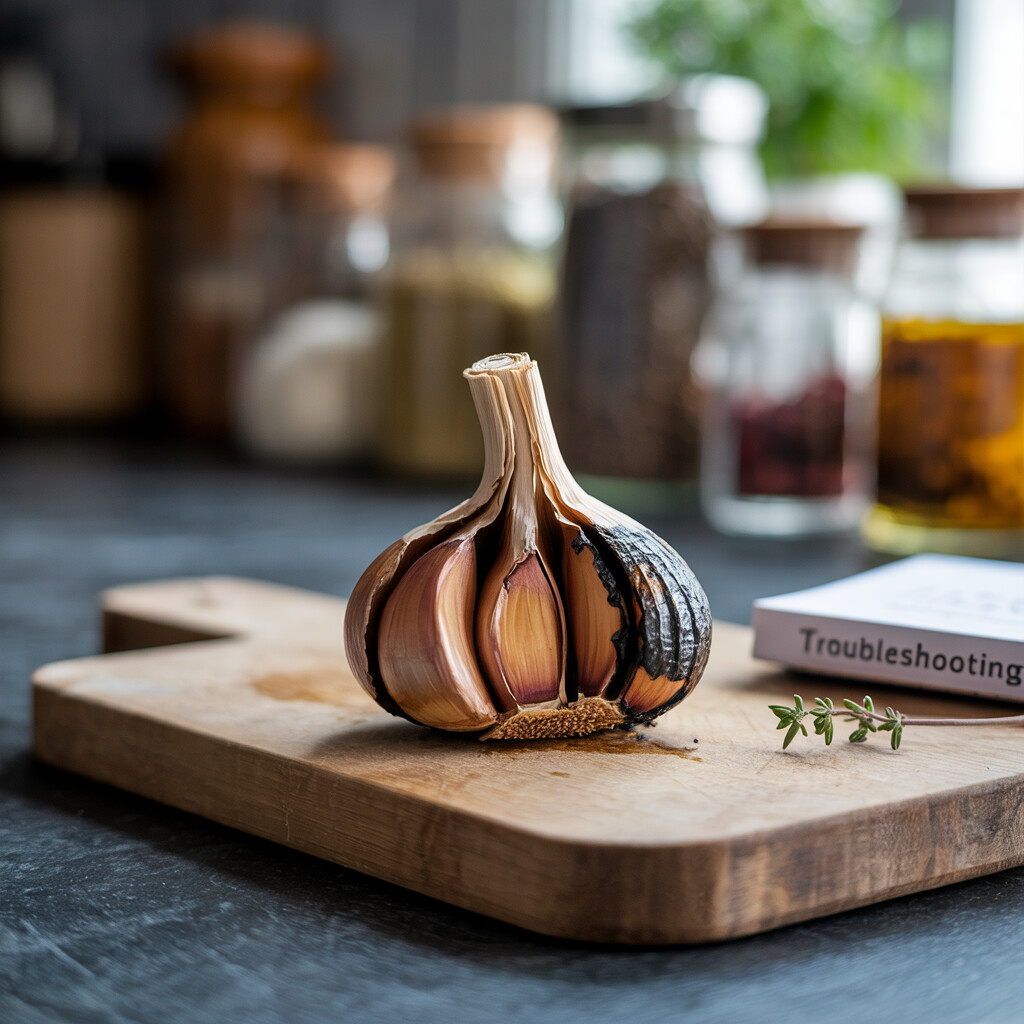
Sometimes, your batch doesn’t turn out the way you expect. Maybe the cloves are hard, there’s a funky smell lurking in your rice cooker, or the final product tastes odd. These things happen, and none of them mean you should give up on trying again. Here’s where most folks get stuck and what you can do about it.
Hard, dry cloves usually mean your heat crept a bit high for too long or you let too much air in. Keep your temperature steady around 140–170°F, and seal things up tight with plastic wrap or a silicone lid. Remember, patience is key. Opening the device lets in air, which zaps all that precious moisture and flavor, so peek less. If you must, do it once around week two and check for stickiness, not crispness.
A strong, unpleasant odor can fill the kitchen, and while black garlic should smell earthy and a bit sweet, it should not reek. Too much moisture or not enough airflow causes the wrong bacteria to thrive. Try using whole, firm bulbs and set a plate or pan to catch drips. If you stacked up too many densely packed bulbs, spread them out next time and allow for some movement alongside proper sealing.
If your batch ferments fine but tastes bitter or sour instead of sweet, odds are the starting garlic quality, wrong type, or off fermentation timing is to blame. Varieties with high sugar, like California Softneck, tend to develop the richest flavor. If yours is consistently off or never gets deep in color, test shorter or longer cure times, or try a new garlic type. This is where your Black Garlic Preparation Techniques really come in handy: start tracking times and details on your batches for foolproof flavor next round.
Don’t forget about food safety. If you see visible mold or the cloves feel mushy and not just sticky, toss out the batch. Better to lose a batch than get sick, trust me on that one.
The cool thing about working with black garlic? Every batch brings you one step closer to finding your groove, especially as sourcing quality black garlic in stores stays tricky. Take notes, treat garlic like a pet (they like it warm and cozy), and embrace “failures” as part of the flavor development journey. Before you know it, you’ll have developed a set of Black Garlic Preparation Techniques perfected for your own home setup—no specialty shop required.
Conclusion
You now have all the know-how you need to master the art of Black Garlic Preparation Techniques and create your own batch right at home. Look back at the science behind the Black Garlic fermentation process and review those savvy storage tips so you will always have this flavor-packed ingredient on hand. No more scouring specialty stores, crossing your fingers for availability, or paying too much for jarred black garlic. With just a patient stretch of time, you can enjoy this rich, complex magic as much as you want.
Ready to find out what your signature black garlic flavor development tastes like? Try adding it to pasta, pizza, or roasted veggies and watch your family ask for seconds. Go bold, get creative and let black garlic turn your home cooking into unforgettable meals worth sharing!
FAQ
How long does homemade black garlic stay fresh?
Homemade black garlic retains its best flavor and texture for up to three months when properly stored. You can keep it in an airtight container in the fridge, where it even ages gently, deepening its flavors over time. You may also stash individual bulbs in a paper bag in your pantry for up to three weeks if you plan to use them soon. These simple black garlic preparation techniques help you extend the shelf life while still enjoying that rich aroma and almost candy-like sweetness. Make sure the bulbs are completely cooled and dry before packing them away so you do not invite mold. I always tuck mine in a quart jar by the cheese—the dreamy funk plays well there!
Why did my black garlic turn hard and dry instead of soft?
Hard or dry black garlic usually results from low humidity during heating or keeping the bulbs at too high a temperature. Your black garlic preparation techniques matter—the trick is mimicking the natural fermentation environment and keeping temperatures steady around 140 degrees Fahrenheit with gentle, moist heat. Try wrapping each bulb firmly in plastic wrap or vacuum-sealing, then arranging them loosely in your warming device to trap moisture. Nothing beats cutting open a bulb and finding soft, tangy cloves ready to eat; when I experimented with my first batch, I discovered sealing in moisture made all the difference.
Can I use any rice cooker or slow cooker to make black garlic?
Most basic models with a “warm” setting are great for black garlic preparation techniques—no tech upgrades necessary! You will want your device to hold a steady, gentle temperature for weeks, so avoid high-powered gadgets or those with timers that auto-shut down. Try the classic black garlic fix: turn your cooker on warm and check with an instant-read thermometer. Some days, my slow cooker gently filled the house with roasted aromas that had my neighbors wondering what was for dinner (and, no, it was not chicken and dumplings!). A less-temp-controlled setting might still work, just check it often until you discover your black garlic’s sweet spot.
Does homemade black garlic taste as rich as gourmet versions?
The best black garlic preparation techniques can yield a homemade treat that rivals or even surpasses gourmet, store-bought brands. With patience, you’ll develop those signature soft, luxurious cloves bursting with umami and playful balsamic notes. The process is customizable; you can try different garlic varieties, tweak your “fermenting” time, or experiment with storage for new flavors. The first time I used my own black garlic in a sturdy beef stew, my whole kitchen exploded with flavor. Every bite of the soft, aged clove sung with depth and complexity—a taste I still struggle to recreate. Your homemade batch can be every bit as chewy, sweet, and savory—and it connects you to your recipe in a way store-bought never could.