

Black Garlic Aging Process: A Simple Guide
Did you know a single bulb of black garlic takes up to 21 days to transform from its humble origins? That funny fact blew my mind last weekend when I bit into my first homemade batch and tasted an almost chocolatey sweetness against a mellow, tangy background. If you’re an experimenter in the kitchen, you might already picture your knife slicing through glossy, sticky cloves. The Black Garlic Aging Process is your ticket to flavors that are every bit as unforgettable as they sound.
High-end black garlic can go for over $30 a pound, yet it only takes some patience, basic equipment, and good timing to turn regular garlic into a rich, deeply savory treat. Once you understand the Black Garlic Aging Process, you’ll see why fine restaurants and home cooks love stashing these soft, inky black nuggets for everything from buttered popcorn to roasted meats. The easy steps in this How to Make Black Garlic at Home guide will take your pantry game to the pro level and get you thinking up recipes that go way beyond roasted garlic. Ready to dive in?
Understanding the Black Garlic Aging Process
If you have ever tasted black garlic, you know why so many people hunt it down. That sweet tang and savory nuttiness make the search totally worth it. But many home cooks just want dependable black garlic without paying boutique prices or ordering sketchy stuff online. To get there, you have to unlock the science and patience behind the black garlic aging process.
What Happens During Black Garlic Maturation?
The magic of black garlic comes from its ignore-the-clock approach to fermentation. Ordinary garlic bulbs get their dramatic makeover by resting at a gentle heat with lots of moisture for several weeks. We are talking sixty to ninety percent humidity and temperatures above one hundred and twenty degrees Fahrenheit. Thanks to the Maillard reaction, a slow, flavor-building dance between sugars and amino acids, black garlic gets its midnight color along with those addictive notes of molasses and aged vinegar.
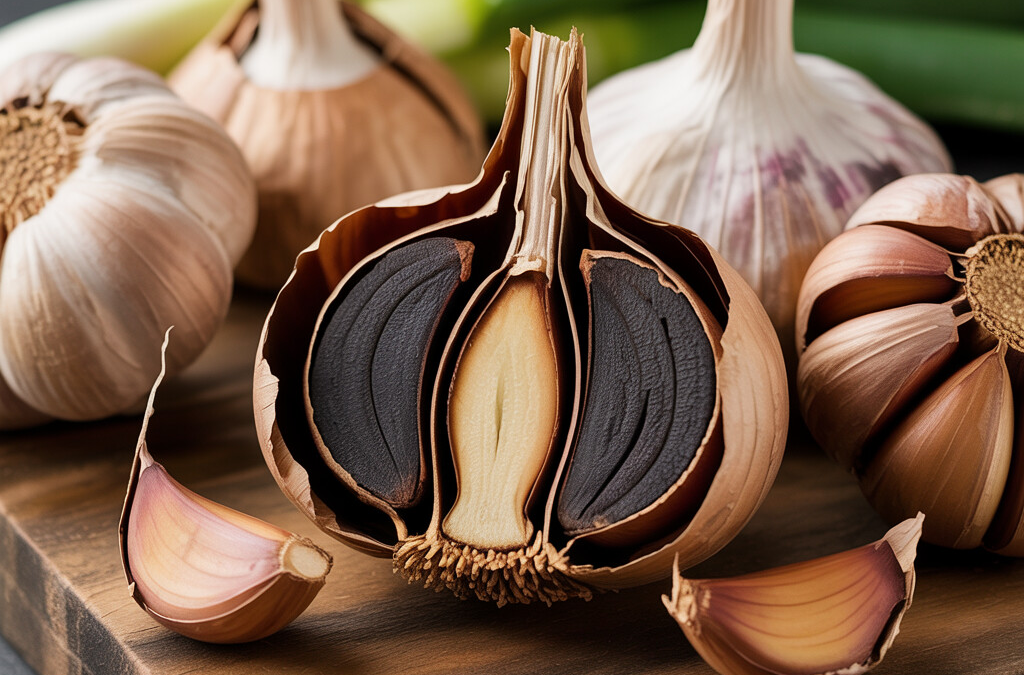
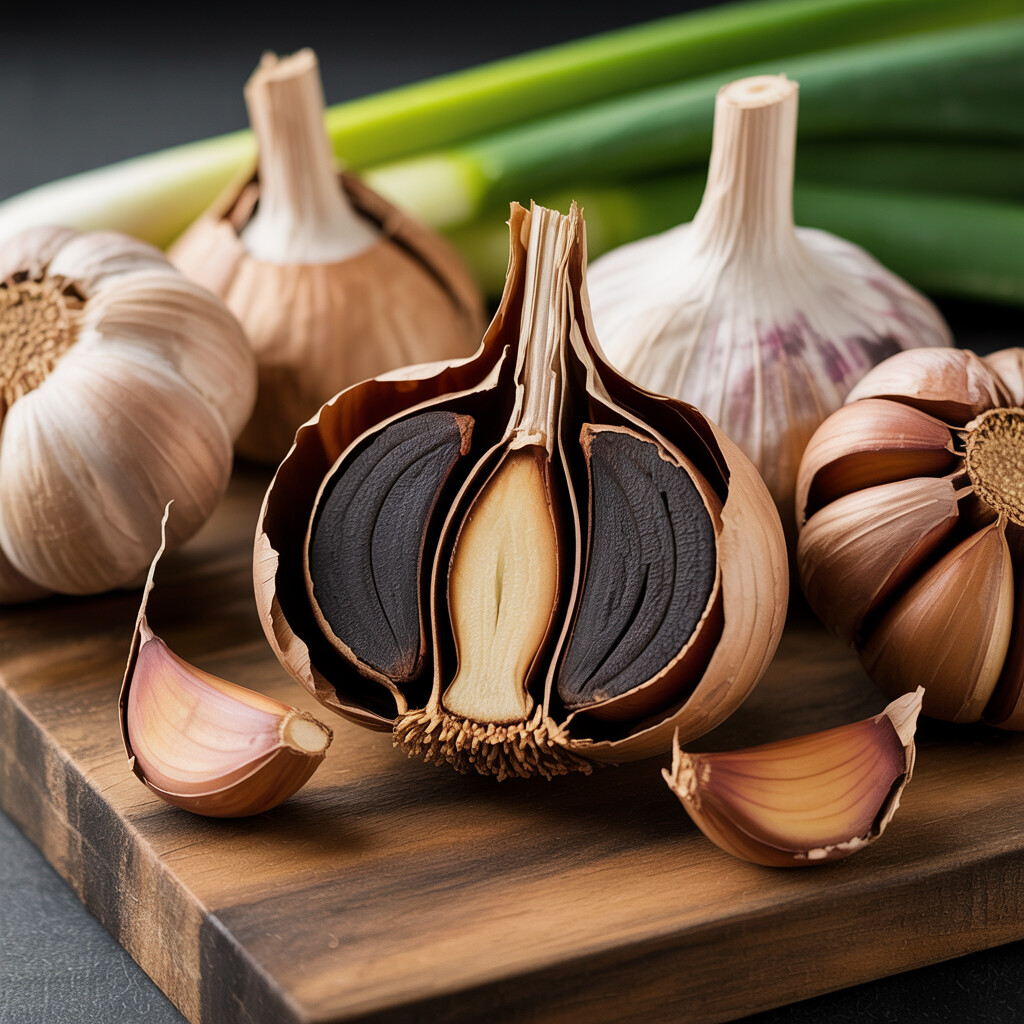
During the full Black Garlic Aging Process, each clove transforms from sharp and stinky to something soft and almost fruity. All this might sound scientific in an intimidating way. The good news? You do not need a chemistry degree or anything fancy to get great results in your own kitchen.
If some of those nutty or balsamic hints remind you of fudge, brownies, or even dried figs, you are not wrong: the Maillard reaction does a similar trick in roasted coffee, seared steak, and crispy toast. That means learning to harness the black garlic aging process is really about controlling what any home cook knows deep down: Time. Heat. Moisture. Then you let the garlic do its thing until you can barely stand the wait.
Tweak the time and temperature just a bit – say, a few processed garlics sneak up out of impatience, or the set point drops a few degrees – and the difference comes through both in texture and taste. For me, watching (and smelling) my first batch slowly wobble from white and harsh to black and mellow converted me from dabbler to diehard.
The secret to unlocking all the culinary benefits of black garlic at home is understanding this gentle alchemy. Forget strict “fermentation rules” or waiting on an obscure shipment from overseas. Queue up some old cloves, a little time, and your favorite rice cooker or smart slow-cooker. Then start daydreaming about the sauces, spreads, and health benefits in your future. This is where the real adventure into DIY black garlic truly begins.
Essential Equipment for Making Black Garlic at Home
Making black garlic at home is a hands-on journey, not just a recipe you throw together. Getting the Black Garlic Aging Process right depends a lot on your setup. Let me break down what you really need—no fancy chef tricks, just good sense and easy-to-find gear.
The heart of black garlic magic is finding a warm, humid environment that stays steady for weeks. Some people used to start with a slow cooker or homemade heat box, but hands down, a rice cooker with a keep-warm setting is King of Garlic Town. It holds a reliable temperature, which is key because the Black Garlic Aging Process demands patience and low, even heat—not too high, not too wild. Waffle makers, yogurt makers, and dehydrators get honorable mentions for the very determined, but you’ll need to baby those setups with gadgets like a thermometer and timer to keep the temp and time on target.
Black Garlic Gear: What You Need for Fermentation at Home
Here’s my shortlist of gear for making black garlic at home. Start with a rice cooker or slow cooker that has a keep-warm function. You’ll need whole bulbs—don’t break the cloves apart. Skip wild farmer’s market garlic; for a first attempt, pick sturdy white local garlic because the peels will soak up moisture. You’ll want a tight-fitting lid. If your rice cooker is ventilated, line it with foil to keep in the humidity, but don’t cover the garlic itself. Toss in a cheap kitchen thermometer to check that things hover from 135 to about 170°F. Finally, grab some patience, because starter batches can take about three weeks—sometimes longer.
Don’t forget, this process gets smelly. Your kitchen might smell like funky garlic bread for a few days as things get rolling. Pick a spot where the garlic won’t haunt your whole house or get the buy-in from loved ones. The reward? Gorgeous, soft, charcoal-colored garlic bulbs you can smudge onto toast or blend into dressings whenever you need a dash of savory, sweet magic. With just a few basics, you’ll outshine the grocery store black garlic—and I’ll bet you’ll become a little obsessed by your second batch.
Step-by-Step Guide to the Black Garlic Aging Process
Ready to get started with the Black Garlic aging process? Just imagine opening your rice cooker and smelling that deep sweet aroma drifting over your kitchen table every night, promising a payoff worth bragging about to every guest who strolls through your door.
Your Foolproof Path through the Black Garlic Preparation Steps
First, gather your materials: fresh whole bulbs of garlic (the fresher the better), a rice cooker or fermenter, a wire rack or mesh tray for airflow, and a small bowl of water. Give each garlic bulb a gentle brush to remove the dirt. You do not want any soil getting trapped in the crevices, but don’t peel them or wash with water, since they should stay dry.
Set your garlic bulbs on the rack, spacing them out enough so air can move around all sides. Place the rack inside the rice cooker, and add a shallow dish of water below the garlic, settling it on the heat plate but not touching the bulbs—this dish helps keep the level of humidity just right all through the Black Garlic fermentation.
Select the “Keep Warm” function on your cooker. The internal heat in this mode hovers around the sweet spot for the Black Garlic Aging Process (between 125 and 175°F), simulating that controlled and even warmth black garlic makers cherish. Close the lid. Then replace your usual cooking timer for slow patience: let those bulbs ferment untouched for 14 to 20 days. High-altitude, extra fat bulbs, or smaller cookers can extend the variation by several days, sometimes up to a month for intense complex flavor.
You know you’re getting close when you detect the syrupy vinegary air reminiscent of deeply roasted shallots with a whisper of balsamic vinegar. If your top few bulbs show dry patches on the outer rinds, spritz them with a small mister for extra humidity, but avoid drenching, or you’ll risk mold.
Here’s a look at the main steps all in one spot:
About every few days, peek through the rice cooker window (if you have one) just to check that all still looks right. If mold appears—blue, fuzzy, or white patches—discard those bulbs right away to keep the batch safe for your table.
Stash your fresh-made treasure in a sealed jar in the pantry for a few weeks or in the fridge for a few months, letting the packed sweetness mature even further as you keep discovering what it adds to your favorite dishes.
This little home-brewing tradition will put factory-farmed store garlic to shame, giving you fresher, healthier black garlic ready anytime your food needs a bright, savory upgrade.
Managing Black Garlic Fermentation Time and Temperature
Let’s get right into the heart of the Black Garlic Aging Process: timing and temperature. These are what separate chewy, sticky, fudge-like black garlic from sad, dried-out bulbs better left in the compost. When we talk about fermentation, what we really mean is a slow, gentle heat transformation that makes garlic magically sweet and soft. You’ve probably heard a few wild tales online about the “best” tricks for getting it just right, but there’s no real shortcuts.
How to Dial in the Perfect Black Garlic Ripening Time
The process for homemade black garlic takes patience, but boy, is the payoff worth it. Most folks aim for an aging window of three to five weeks. (A solid month is my go-to.) During this time, you’ll hold the garlic bulbs at a steady ninety to one hundred and seventy degrees Fahrenheit. The lower end helps keep things juicy; the higher end will move things along but can dry out your cloves or even scorch their sugars.
To get black garlic that’s spreadable and bursting with molasses-like flavor, don’t rush it. Check in at the three-week mark by slicing open a clove: it should be jet black and a little sticky inside. If it’s brown or rubbery, or if it still tastes sharp, set the timer for another week. The Black Garlic Aging Process wants you patient and a bit obsessive. Remember, slow means smoother, sweeter notes and an umami aroma that turns the most humble dinner into something you brag about later.
If you’re using an oven with a very low “warm” setting, a rice cooker, or a dedicated fermentation box, consistency is your friend. Fluctuating heat can interrupt the chemical changes that make black garlic so wonderful. The goal is not just for the bulbs to “cook,” but for them to mellow out, lose their edge, and harness all the natural sugars deep in each clove. Some folks tuck in a bale of rosemary, thyme, granny smith apple peels, or a splash of wine to alter the flavor, but—cross my heart—plain good bulbs and consistent, low, gentle warmth make the magic most reliably.
Set it and check it. Monitor, but don’t poke or prod. Get your heat source right, and the savory-sweet Black Garlic Aging Process shines every time. I know the urge for results nudges fast, but the reward, especially when you have trouble finding quality black garlic at stores, is taking the time to get it done just right.
The Role of Humidity Control in Black Garlic Production
If you’ve been curious about what gives black garlic its signature jammy sweetness, humidity deserves a standing ovation. Getting that soft, spreadable texture takes more than just time and low heat. Proper humidity control is a big factor in the whole Black Garlic Aging Process.
Smart Tips for Balancing Black Garlic Humidity
So, why does humidity matter in the Black Garlic Aging Process anyway? While fermentation time and temperature seem pretty straightforward, Black Garlic Humidity Control can honestly make or break your batch. Too little moisture and you’ll end up with rock-hard cloves no one wants to chew. Too much, and it might become slimy or risk unwelcome mold.
Many home cooks worry that aging black garlic requires a big investment in fancy, climate-controlled gear. Here’s a little truth from my kitchen: all you need is a stable setting and a sense of curiosity. The goal is to keep the environment at about 80 to 90 percent humidity. The best way I’ve found to do this is pretty simple—putting a container of water right inside my rice cooker or slow cooker while the garlic slowly ages. Watch now and again, since conditions might shift depending on your house’s natural humidity or how often you peek in.
Check for condensation on your vessel’s lid, but don’t let water pool on the garlic. Wipe drips if needed, especially if you live somewhere damp. If you’re in a dry climate, a damp paper towel lining the bottom—even under the wire rack—is a trick I turned to last winter. Just change it regularly so it stays fresh.
Small adjustments to humidity protect your investment and lead to a tangy, almost fudge-like texture. And that’s what helps homemade black garlic shine, especially if you only get one shot each batch. Partnering good Black Garlic Humidity Control with the tips shared earlier, your Black Garlic Aging Process will go from beginner’s experiment to confident, gourmet success.
Now, pat yourself on the back and let your friends know: not only are you making black garlic, you actually know how to tend it along like a true kitchen scientist! If you are curious about the nutritional perks, peek at the health benefits of black garlic next.
Safety Considerations During the Black Garlic Aging Process
Safe & Smart: Black Garlic Aging at Home Before you shut yourself in with a pile of garlic and your rice cooker, let’s talk safety. Home cooks know one thing: Comfort brings confidence, especially if this is your first run at the Black Garlic Aging Process. We want sweet, aged cloves, not any science project gone wrong. Here’s what to keep in mind so every batch finishes strong and safe.
Safety Tips for the Black Garlic Transformation
Keeping mold and odor in check is a must for home black garlic aging. Any visible fuzz, odd color, or heavy sour tang can signal a batch-gone-bad. Check your bulbs every couple of days, especially if you’re working with unfamiliar devices or homemade fermentation boxes. Always trust your senses: If your nose tingles and your eyes water from something other than the sweet, deep balsamic scent, toss it and start over. Undercooked garlic during aging may not taste great but over-fermented stuff is just unsafe.
Manage humidity carefully within the Black Garlic Aging Process. Too much moisture leads to mold, while too little can dry out those precious cloves. An easy, cheap digital thermometer (try the stick-in-compost type) will also track humidity, making it easier. Get in a habit of checking the temperature too: If things spike over 200°F or sag near 120°F, adjust quickly or you’ll disrupt both aging and safety.
You also want to keep equipment spotless. Don’t skip washing your rice cooker insert and lining it with fresh foil or parchment for every round. An airtight seal during the sluggish, weeks-long Black Garlic Aging Process helps prevent bacteria and insects from wandering in for a look. Long story short, act like your kitchen is running a little backstage pass to garlic’s greatest transformation concert, where only the clean, well-behaved guests make it inside.
Set realistic expectations too. Black garlic is fermented but is not like pickles sitting under vinegar or kraut in brine. You need it to hit the right safe-for-storage level—soft, sweet, dark, and caramelized—before you stop the process. When finished, store cloves in the fridge to keep things from spoiling and preserve black garlic’s funky, savory-sweet flavor as long as possible. That way, the only surprise in your next gourmet meal will be your guests’ delighted faces.
Creative Culinary Uses for Homemade Black Garlic
Black garlic almost begs you to get creative in the kitchen. Once you tried the Black Garlic Aging Process for yourself and tasted the magic, you might feel stumped: “Now what do I do with all this black gold?” Turns out, this soft, savory treat loves making classic recipes new again.
Bringing Depth and Flavor with Black Garlic: Cooking and Meal Ideas
First, try swapping homemade black garlic anywhere you usually use roasted garlic. Mashed potatoes turn richer when you fold it in with milk and butter. It boosts scrambled eggs too, giving that mellow punch of tang right when you need it.
If impressing guests matters more than kitchen experiments, shred some black garlic into homemade aioli. The blend makes burgers, sandwiches, or veggie dips taste like something from a swanky bistro. Even toast gets fancier. Try buttered sourdough with smashed black garlic in the morning.
Salads are fair game, too. Crumble a few cloves and toss them with vinaigrette. It breaks up the olive oil tang and brings that sweet, earthy balance no balsamic ever could. Meanwhile, mixing soft clove pieces in hummus, peanut sauce, or yogurt dip takes snack time up about ten notches. I have even whipped it in with creamy cauliflower soup, and wow, does it taste amazing served next to crusty bread.
Homemade black garlic sits comfortably with steak, grilled fish, or a big bowl of pasta, especially when you pepper in the cloves at the end. Many fans even pureé black garlic with honey for glaze or caramelize it as pizza topping with cheese and arugula, which, if you have not tried it yet, is a flavor bomb.
One last thought: homemade black garlic works far beyond dinner hour. Anywhere you savor umami or want a touch of gourmet, it rises to the occasion. Thanks to your own Black Garlic Aging Process and a little excitement in the kitchen, you forced open a door for hope and inspiration but also health and happiness with every bite. If you are ever curious about those unique health perks, we can geek out about those too.
Conclusion
Making your own black garlic at home is more than just a kitchen project; it’s a journey toward richer flavors and better control over your ingredients. By mastering the Black Garlic Aging Process and managing fermentation time and temperature, you now have the keys to unlock a new world of culinary magic. With the knowledge you’ve gained here, you never have to worry about limited access to premium black garlic again.
So take that next step and try your hand at another batch for a sweet, tangy, and umami-packed twist on your favorite dishes. Share your results, trade ideas with friends, and inspire other home cooks to embrace black garlic’s delicious versatility—starting in your own kitchen.
FAQ
What is black garlic, and how is it made?
Black garlic is regular garlic that’s been aged through controlled heat and humidity. You transform the cloves by slowly heating whole bulbs at about 140°F (60°C) for three weeks or so. During the black garlic aging process, the sharp flavors mellow out into sweet, sticky magic—I call it onion jam on a good day. This happens because the garlic’s natural sugars and amino acids create new flavors and that signature dark color. It blows away regular garlic in roasted veggies or salad dressings. Don’t let the dark look trick you; it isn’t burnt, it’s caramelized. Everyone’s first bite feels like eating candy as an adult, only you don’t need to sneak this snack.
How long does black garlic fermentation take at home?
Your patience will get a workout; black garlic fermentation time typically ranges from 14 to 28 days. The magic window depends on your heat, humidity, and personal taste. Don’t open the cooker every night—you’ll lose humidity and slow down the black garlic aging process. I peeked too often my first batch; it tasted like soggy wood chips. At around 21 days you’ll notice a soft, sticky garlic texture and the layers will appear as black as licorice. That’s the moment you start checking for the sweet, fruity funk that makes black garlic so fun. It’s like aging your own cheese or curing jamón—patience makes every bite worthwhile.
What equipment do I need for homemade black garlic?
Most black garlic lovers start off with a basic rice cooker or a slow cooker. Both control the steady warmth you need for the delicate black garlic aging process. Fancy folks love a fermentation box—I use an old-school rice cooker. If I want to double the batch, I’ll wrap my bulbs in paper towels to help trap heat and humidity. It’s a lot like fermenting whisky—you need constant conditions. Don’t mess with the temperature once it’s rolling. Stick jars into corners if you’re in a drafty basement and your set-and-forget method will bring you fragrant, Japanese-restaurant-style cloves in about three weeks.
What temperature works best for aging black garlic?
Black garlic ages best around 140°F (60°C). This warm, not-too-hot temperature encourages a smooth black garlic aging process. If you crank up the heat you risk bitter or burned cloves—I learned the hard way with scorched onions, so I don’t mess with high heat anymore. Most kitchen gadgets can keep things stable with a “keep warm” setting. Don’t turn your home into a sauna aiming for the perfect fungus; you want warmth, not scorching. Once you lock in a batch and hit that blazing aroma, your kitchen will smell like Molasses-on-steroids. That’s when you know it’s working right.
How do I control humidity during the aging process?
The right humidity makes the black garlic aging process easier on you and tastier on your tongue. Place bulbs on a bed of folded paper towels or in small trays, and cover loosely in your rice cooker. A little steam surrounds the garlic, keeping the cloves moist and sticky, not shriveled. Too little humidity produces crumbly or dried-out garlic—more dried lumber than black gold. A friend outfitted his rice cooker with a wet towel and won an office chili contest with that batch. Stretch plastic wrap across the inner pot; you don’t want cheating steam escaping, but you don’t want swamp conditions either.
How do I know when black garlic is ready?
Black garlic is ready when the cloves are ebony, sticky, and soft—not hard or leathery. The best way to judge the black garlic aging process is to check the color at two-week intervals with your nose and tongue. Fish out a bulb, cut it open, and see if the insides look and taste like sweet tamarind or molasses. My batch goes until the aroma floods my house with brown sugar and balsamic vinegar or reminds me of soy sauce on fried rice. Pull your batch too early and the flavor depends more on “toasted garlic chips.” Leave it in too long and the cloves may dry out.
What are some creative ways to use black garlic in cooking?
Homemade black garlic’s unique taste works wonders in classic recipes and flavor bombs. Spoon a clove into your stir-fry, mince it onto pizza, or stir it into scrambled eggs; your kids may finally eat eggs thanks to the aged tang from the black garlic aging process. Blend a tablespoon into sauce, soups, or creamy dressings—it packs in background umami, plus caramel sweetness. I once swapped minced black garlic for anchovy paste in Caesar dressing and my salad winched up a hundred flavor points. The only wrong way to enjoy black garlic is to save it so long that it molds, so eat it while it’s memorable.