

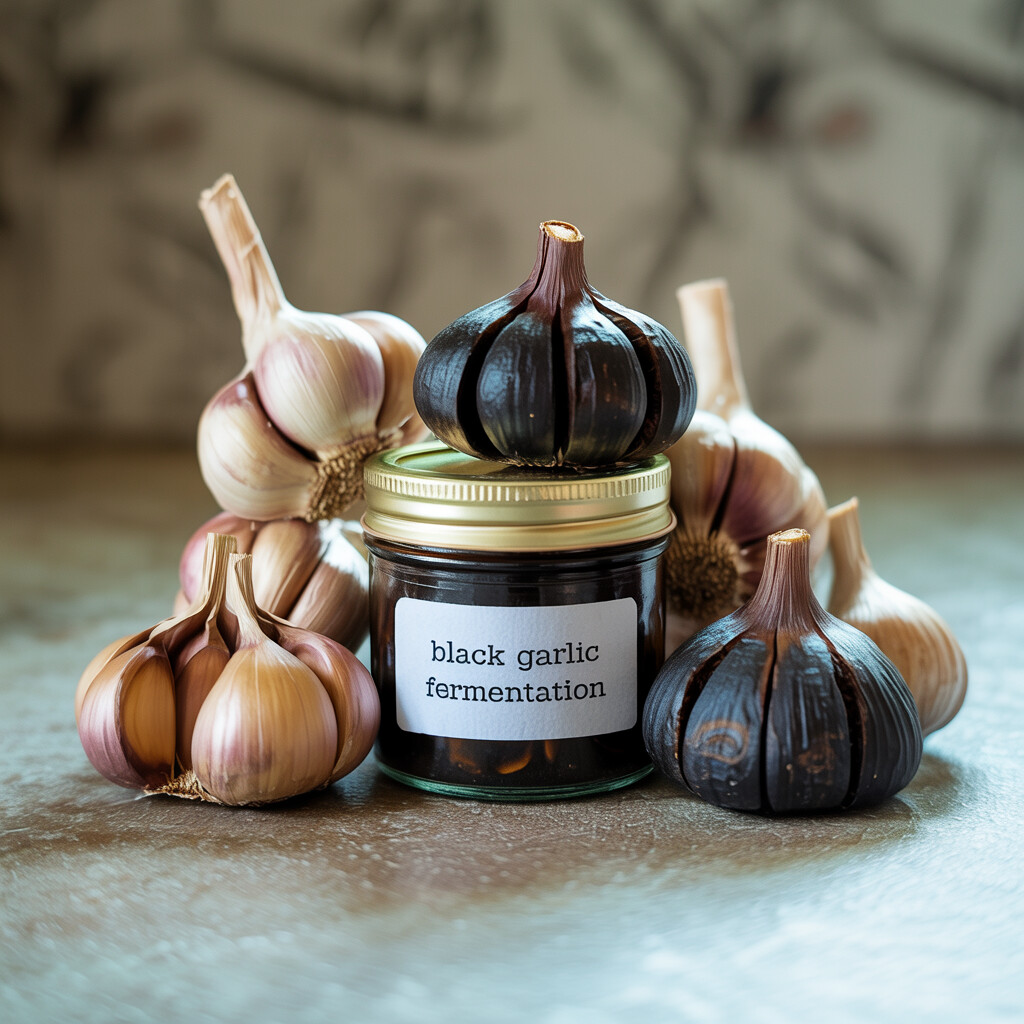
Black Garlic Fermentation: A Home Guide
Did you know that “Black Garlic Fermentation” turns ordinary garlic into a supercharged kitchen ingredient? Talk about a culinary Cinderella story! Just last weekend I peeled open a sticky-sweet black garlic clove and bent close to catch the scent. If you’re a fan of mellow, earthy, deeply savory flavors and that juicy satisfaction from a bit of kitchen magic, keep reading: You’re about to discover the secret process that transforms raw, sharp bulbs into soft, fragrant nuggets of umami.
Black Garlic Fermentation is the culinary glow-up your taste buds didn’t know they wanted—and wow, is it fun to make at home. More and more home cooks are trying fermenting garlic, which has become 15 percent more popular in the last year. The result adds surprising subtlety to stews, deviled eggs, and even cream cheese for your morning bagel. This beginner’s guide on how to make black garlic at home will get you set up and comfy with the essentials. Ready to dive in?
Understanding Black Garlic Fermentation: The Science Behind the Transformation
There is something almost magical about black garlic fermentation, how it works quietly behind the scenes to turn plain white garlic into something sweet, savory, and as tender as a dried date. It almost feels like you are witnessing an ordinary vegetable find new meaning. Let’s look at why this transformation leaves chefs and home cooks I meet so inspired and a little obsessed.
At its core, Black Garlic Fermentation is a slow change driven by warmth, steady humidity, and patience … lots of patience. No yeast, starter, or vinegar is added. When fresh garlic bulbs sit in this cozy, slightly steamy world, their natural sugars and amino acids react, giving the raw cloves a complete makeover.
Black Garlic: Compounds and Culinary Uses
What is really happening inside as garlic ferments? As garlic sits for weeks under low heat, a process called the Maillard reaction takes over. The sugars and amino acids naturally present in garlic start to link up, breaking down starches, changing colors, and developing new flavors. At every stage, the compound allicin (what makes fresh garlic so bold and sharp) shifts into all sorts of different, harmless sulfur compounds. These new compounds, plus subtly sweet sugars, are what give black garlic that incredibly rich, mildly earthy flavor.
Once this transformation completes, the result you hold in your hands is nothing like fresh garlic. The bitterness of raw, raw garlic vanishes, making way for mellow caramel notes, mild nuttiness, and a background savory sweetness you could almost mix into dessert. You can read more in our full dive on Black Garlic Fermentation Process A Simple Guide.
So why bother making the transformation at home? Here in the States, finding good quality black garlic at the grocery store is hit-or-miss, and often costly. But home fermenting solves that problem while keeping you close to the action … and, let’s be honest, it smells amazing. If you want to wow yourself (and others) in the kitchen, all you need is curiosity, a steady heat source, and about a month of anticipation. The best part? Once you start, you will know exactly what magic happened inside that slow cooker or rice machine.
Essential Equipment for Fermenting Garlic at Home
Creating homemade black garlic gets easier when you have the right tools for the job. The good news is you probably own most of what you need already, or you can snag it for a reasonable price. If finding high-quality black garlic near you is tough, making your own lets you pick every detail from the bulbs themselves to how rich and sweet you want the flavor to be.
Must-Have Tools for Garlic Transformation
If you like cooking gadgets, this is your time to shine. Here are the basic items you need for Black Garlic Fermentation at home:
- Rice cooker or slow cooker: This is the heart of your operation. You mainly want one with a “keep warm” function, not a cook mode. That steady heat is exactly what you need for weeks of garlic magic. In a pinch, some people use yogurt makers or dehydrators that stay close to 140-170°F.
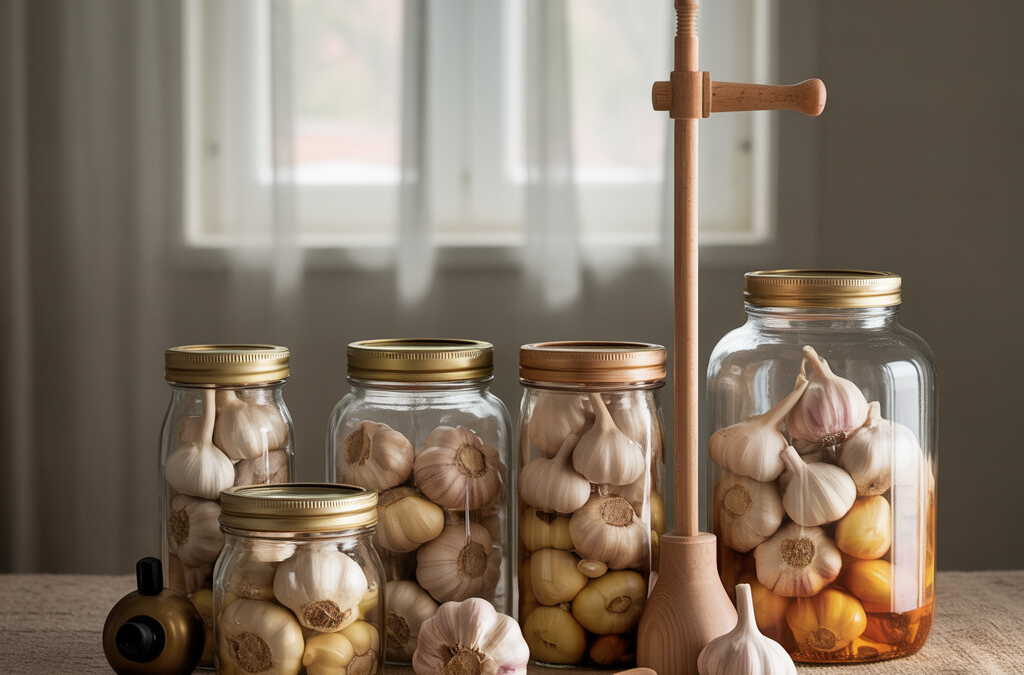
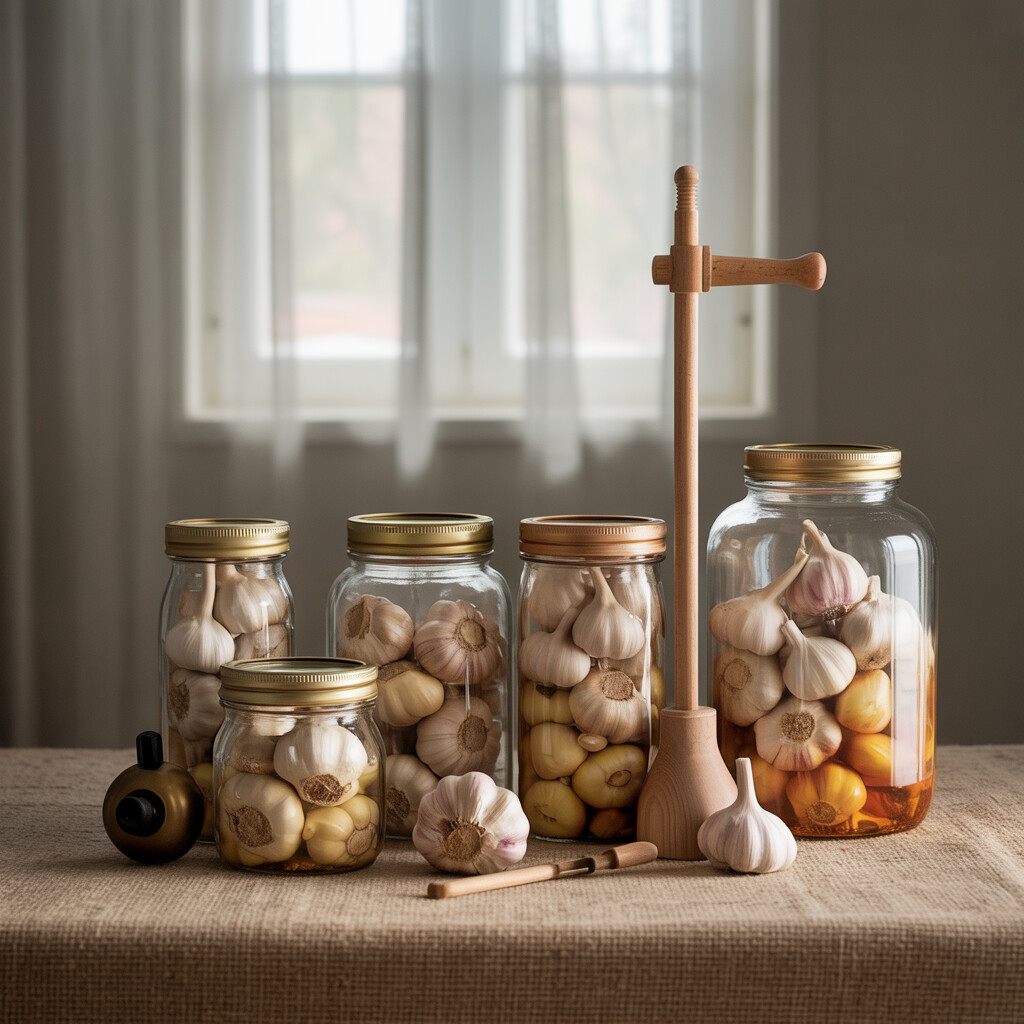
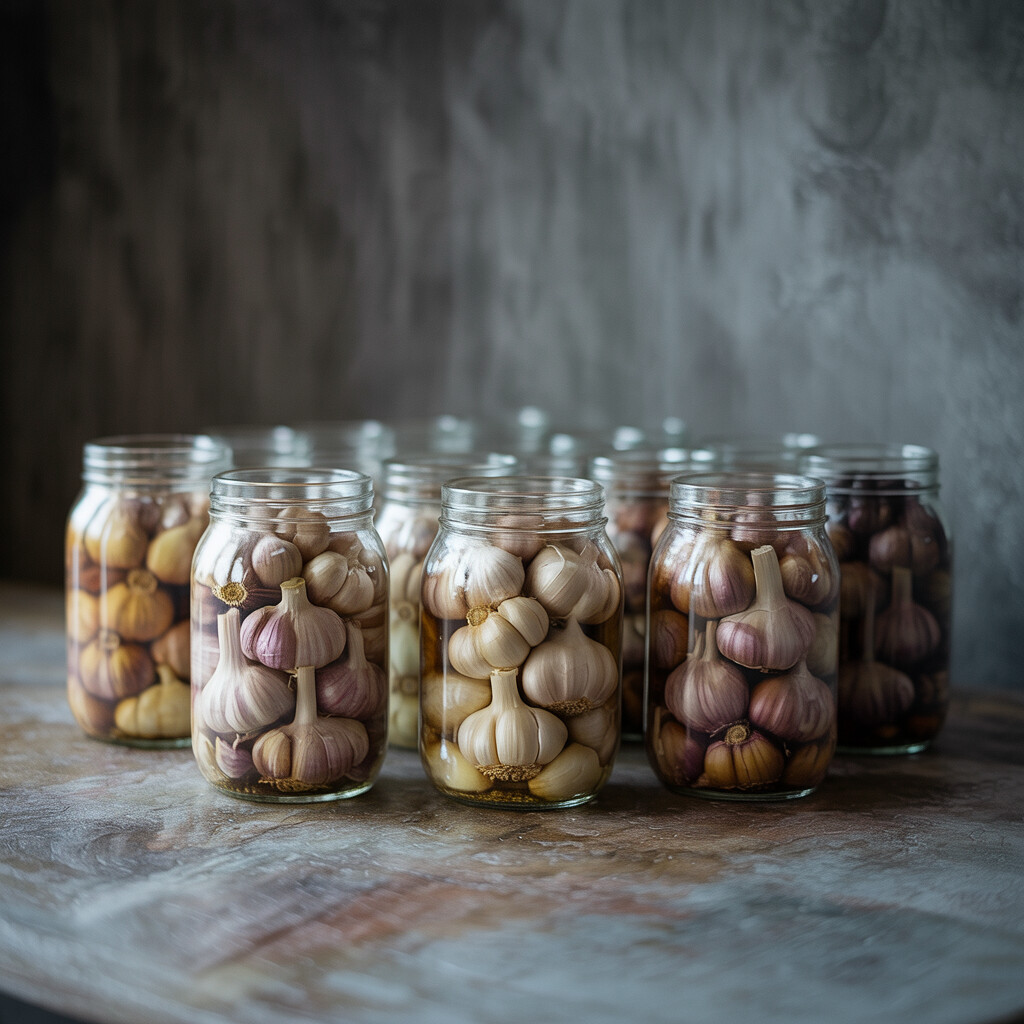
- Multiple heads of fresh, firm garlic: The fresher, the better. Don’t use pre-peeled or jarred stuff—look for firm, plump heads.
- Wire rack or steamer basket: These help keep the garlic from sitting right on the hot bottom, so air can flow around each bulb evenly.
- Aluminum foil or parchment paper: This is optional but wrapping each head keeps moisture in and makes cleanup a little less tedious.
- Thermometer: If you want precision, you’ll want to check that “keep warm” function sits between 140-170°F.
- Good ventilation: Let’s be real. Black Garlic Fermentation and slow-cooked garlic makes your kitchen (and honestly, your whole house) smell super strong for a few days. Sorry, there’s no way around it, but an open window or garage space helps.
By setting yourself up with these black garlic basics, you control every part of the Fermenting Garlic At Home experience: the Black Garlic Fermentation time, the garlic fermentation temperature, even how deep and fudge-like the final flavor gets. Once you taste your own deeply caramelized, balanced garlic, store-bought stuff will never taste the same. Up next, I’ll walk you through the process itself step by step. If you’re ready to start, open the windows for fresh air, pop in a podcast, and get solving that hard-to-find black garlic problem.
Step-by-Step Guide to Black Garlic Fermentation
Ready to dip your toes into the world of black garlic? You might have heard this myth: making it at home is too hard. Well, let’s bust that one right away. The process asks for a little patience but not much brain-bending kitchen science. With the basics, you can walk away with sweet, earthy homemade black garlic after a few simple steps. This is the joy of black garlic fermentation—it takes a bit of hands-off time, not expert skill.
Easy Home Black Garlic Preparation: A Step-by-Step Method
Get started with whole heads of fresh, firm garlic. First, gently wipe away any dirt but leave the outer paper skins in place. Next, wrap each bulb in a single layer of parchment or foil. This keeps moisture in and protects the cloves, creating the temperate “spa” environment black garlic needs. Place your garlic in a rice cooker, slow cooker, or other controlled-heat appliance that can maintain a steady 140 to 170 degrees Fahrenheit.
Now comes the “low and slow” part. Set your device to its “keep warm” setting, double-check the temp, and make sure the bulbs are not touching metal parts. Check your garlic every few days, making sure they haven’t dried up and that no mold is forming. You’re looking for an even transformation. Some batches go from white or tan to jet black slowly, but steadily. Your main job: avoid air drafts, keep it gently warm, and wait.
For a quick glance, see the easy steps below. This table covers your “must-have” steps for successful black garlic fermentation:
When you start to catch bittersweet, tangy scents in your kitchen, you know the magic is happening. It’s a food project that pretty much forces you to slow down, watch, and wait until the payoff. If you’re eager to know more before you start, check out this handy how-to: How To Make Black Garlic At Home A Simple Guide.
Optimal Black Garlic Fermentation Time and Temperature
It can feel a bit risky leaving garlic bulbs in a warm spot for weeks on end, just waiting and watching for transformation. That’s where a dialed-in time and temperature guide can save your patience and prevent any kitchen heartbreak. Black Garlic Fermentation doesn’t require exotic gear or rare knowledge. Just some patience, a controlled environment, and the faith that the result will make every waiting minute worthwhile.
How Long Does It Take to Make Black Garlic at Its Best?
For that sweet, savory, umami punch, Black Garlic Fermentation time and garlic fermentation temperature are key. The gold standard most home cooks aim for is a steady temp of about 140 to 170°F. This is warm enough to boost the Maillard reaction, that science magic behind caramelized goodness, while not risking burning or drying out your prized cloves. A rice cooker or slow cooker with a “keep warm” setting usually gets the job done without fancy equipment.
Your garlic needs at least three weeks, but some diehard food nerds let their bulbs go as long as 45 days, tracking the umami development like watching a favorite bread dough rise. Check after about 2-3 weeks. If the interior is deep brown and tastes sweet with no hint of raw garlic bite, you’re in the happy zone. If it’s still firm or a bit beige, button up and stick it back near the warm spot for another week.
Some cooks find that after about 28 days, the flavor settles into black garlic’s famous sweetness and earthy savoriness, with a fudge-soft texture. Open a bulb and you’ll catch a whiff that’s almost as tempting as chocolate.
For Black Garlic Fermentation, two variables—time and temperature—truly make the magic.
Because most store-bought black garlic came through large-batch, commercial processes, making your own lets you fine-tune every batch. Set your rice cooker (or a slow cooker or proofing box) on “keep warm” for 66-77 hours (3 to 4 weeks), at the recommended temp range. Track the days on your calendar and, when you’re amazed at the change from pale yellow garlic to glossy black, savor the good feeling that you did it yourself.
Not sure if your garlic is ready? Pinch the cloves. If they yield with a gooey, soft texture and taste sweet with a gentle tang, you’ve nailed the Black Garlic Fermentation Time and reached your flavor sweet spot. As for the temperature, close counts, but avoid going higher than the top range or you risk a burned, shriveled mess instead of a kitchen masterpiece. If your cooker gets hotter, vent the lid slightly to bleed off extra heat and lower the temp by a few degrees.
Take notes—no, seriously. You’ll thank yourself next time.
Ready for the next phase? Dive in and start experimenting with your homemade black garlic in sauces, spreads, or as a flavor accent for honey-roast chicken or hot toasted sourdough bread. Welcome to the black garlic fan club.
Troubleshooting Common Issues in Garlic Fermentation
Every batch will face a few bumps in the road. Whether you’re a first-timer or a garlic pro, fermenting garlic at home takes practice. Sometimes things just don’t turn out as you hoped. Here’s how to troubleshoot like a scientist who also loves a good meal.
Black Garlic Fermentation Pitfalls and Fixes
If you open your rice cooker or fermenting vessel and find rock-hard cloves, a fridge smell, or strange white fuzz, don’t panic. These cues can help you course-correct for the next batch.
-
Rock-hard, dry, or cracked garlic: This usually means your Black Garlic Fermentation setup ran too hot or without enough humidity. Make sure the cloves stay in their papery skins to trap moisture, keep the vessel tightly closed, and check that the fermentation temperature never exceeds about 170°F. If your appliance loses moisture fast, adding a small cup of water (refilled every few days) can help.
-
Garlic that’s brown instead of black: Fermentation needs both time and warmth. Most cloves darken gradually and get a glossy finish if left long enough. If yours don’t, double-check your temperature and be willing to wait another week or two before pulling the plug. Rushing the Black Garlic Fermentation Time can rob you of complex, sweet flavor.
-
Odd garlicky odor or ammonia scent: Some pungent smell is normal at first, but it should mellow by week three or four. Revolting ammonia vibes could signal too much heat, while persistent sharpness can also mean underfermentation or old, past-prime garlic.
-
White fuzzy stuff: If mold pops up, spruce up your process by letting less moisture condense on the top layer. Wipe away the fuzz, eat all unaffected garlic, and sterilize your fermenting vessel with vinegar between uses.
Like most good projects, black garlic can be a little pickier one batch to the next. Be patient with yourself, monitor those time and temperature settings closely, and you’ll nail the art of Black Garlic Fermentation. Trust your senses—taste during the last week, sniff regularly, tap for that springy bounce, and keep trying if at first, things fall a little short.
Storing and Using Your Homemade Black Garlic
So you took the big step and handled the Black Garlic Fermentation at home, and now you have a gorgeous stash in your hands. You want to get the most out of it, and the last thing you want is for your hard-earned black gold to dry out or mold. Storing this treasure requires just a bit of planning, but the reward is sweet, sticky, umami-packed cloves ready for anything.
Keeping the Magic Going: Storing Black Garlic Properly
Think of black garlic like a fine cheese or artisan chocolate: moisture and air can both be friend and foe. If you finish the fermentation and have not removed the loose papery skins yet, do it now. Put the peeled cloves into a clean, dry glass jar. An airtight container is perfect for tucking the jar away in a cool, dry pantry. Some folks swear by vacuum-sealed bags if you have a big batch. It can rest in the fridge for a few months, but honestly, mine has never lasted that long. The fridge keeps the cloves extra sticky and soft, so do not be surprised if they feel squishy when you pull them out.
Avoid freezing, if possible, because it makes the cloves lose their texture and sometimes the deep molasses-sweet flavor from black garlic fermentation. If you caught a garlic bug and created a mountain of black garlic you will not get through fast, then freezing works in a pinch.
Amp Up Everything: How to Use Your Homemade Black Garlic
This ingredient shines almost everywhere regular garlic fits and some whimsy spaces too. Drop a few cloves into mashed potatoes or warm pasta and let them melt in, giving it browned butter vibes. Mash up some with mayo for a savory-smoky sandwich spread. If your breakfast needs a lift, try folding it into scrambled eggs or smashed avocado toast. Black garlic adds a magic, mellow tang to any cheese board too.
One of my favorite tricks is using paste from black garlic fermentation for sauces and roasted veg. It is lush spread on a steak fresh from the grill, and it makes even budget pizza taste like a chef’s special.
If you substituted black garlic in anywhere you usually use roasted garlic, buckle up. Umami fever might take hold. Do not forget: share some with a garlic-curious friend and keep the obsession growing.
Running low on stash sooner than you thought? Jot down your black garlic fermentation time and tweaks so you can make an even better batch next time. No more staring at empty shelves or long ingredient lists at fancy stores when you control the supply yourself.
Health Benefits and Culinary Uses of Black Garlic
From the first tangy bite, black garlic’s charm jumps out. The dark, sticky cloves taste almost otherworldly, mingling sweet plums, smoky molasses, and a hint of classic garlic. But does black garlic do more than stand out on the cutting board or in your next meat glaze? You bet—it brings some impressive health perks to the kitchen table too, which help explain its growing fans.
Black Garlic’s Health Guarantees and Effortless Culinary Upgrades
First, let’s talk nutrition, because the Black Garlic Fermentation process changes more than flavor. When you heat garlic low and slow, the original allicin—the compound that drives garlic’s punch and strong aroma—morphs into new compounds, mostly S-allyl-cysteine. This has made black garlic quite the superfood across the world, boasting higher antioxidant levels than fresh garlic. These antioxidants may help reduce inflammation, guard against cell damage, and back up your immune system, according to current research.
Black garlic is easy to add to daily meals, even if you don’t always love the bite of fresh garlic. Mash it on toast with a thin smear of butter. Swirl it into mashed potatoes or a creamy sauce for a deep, almost balsamic-like profile. Or, roll black garlic in sliced chicken, dot it atop grilled steak, or stir it into a steaming bowl of ramen. If you’re more into vegetables or fish, this ingredient gives new life to your favorite recipes. Anyone can become a giddy inventor in the kitchen with black garlic.
That’s the payoff to Black Garlic Fermentation: flavor and function in one sweet-smoky package. When other black garlic isn’t handy or the store simply can’t keep it in stock, making your own gives you both control and creativity. Tomorrow’s steakhouse secret could come right from your garage or basement: just some fresh bulbs, a little time, and the culinary courage to try something totally extraordinary.
Conclusion
By now, you’ve walked through the essential equipment and steps for Black Garlic Fermentation right in your own kitchen. With a little patience and the right temperature, making black garlic at home is less intimidating than tracking down expensive, store-bought bulbs. No more hunting for rare finds or settling for subpar flavors.
Mastering these simple fermentation techniques puts gourmet black garlic just steps away. So grab those fresh bulbs and let your kitchen be the science lab for something truly unique. Enjoy the sweet, complex magic of black garlic in everything from sauces to snacks, and spread the word about this culinary powerhouse. Your pantry, your flavor, your rules.
FAQ
What is Black Garlic Fermentation and why does it matter?
Black Garlic Fermentation is the process of slowly heating and aging fresh garlic bulbs until they transform into soft, sweet black garlic. You expose the garlic to low heat and high humidity over several weeks, letting simple sugars and amino acids react to create a rich, complex flavor. You do not have to add anything special except patience and the right conditions. If you love exploring new tastes or enjoy expanding your kitchen skills, handling the Black Garlic Fermentation process at home is a great adventure. Try a thin slice on warm bread or blend it into a simple vinaigrette, and you will taste a mild, balsamic-like sweetness that brightens up dishes without overwhelming them.
How can you get started fermenting garlic at home?
You do not need much equipment to try Black Garlic Fermentation in your kitchen: it takes fresh garlic, some patience, and a warm, humid place to age the bulbs for a month or longer. Most people opt for a dedicated rice cooker or slow cooker that can maintain a steady temperature between 140 and 170 degrees, which is critical for successful fermenting garlic at home. If you are feeling experimental, check the digital display when you make your next batch of long-cooked oats or yogurt to see if your slow cooker can hold a consistent temperature. Even if you do not plan to make black garlic all year, knowing which appliance works best for you can save a lot of guesswork right from your first batch.
How long does the Black Garlic Fermentation process take?
You need at least three weeks, but four to six weeks is typical for the best Black Garlic Fermentation results. Patience is key—you cannot rush the time it takes for the deep, dark flavors to fully develop. You should check your garlic bulbs often: as you approach the end of your garlic fermentation time, give the cloves a gentle squeeze to make sure they feel soft and gelatinous before calling it done. Leaving the bulbs a few days longer won’t hurt and can make all the difference. The first time I tried this process, tasting a clove at week five felt like biting into molasses-scented happiness with none of the raw garlic bite.
What’s the ideal temperature for fermenting black garlic?
The optimal garlic fermentation temperature sits between 140 and 170 degrees Fahrenheit. If you can, pick a rice cooker or heated box that lets you set or monitor the temperature digitally, because even small shifts can affect how quickly your garlic changes color and flavor. You should check every few days, as some devices run hotter on low and might speed up or overcook your batch. To ensure even heat, cluster bulbs in an even layer and avoid overcrowding. At the gentler end of garlic fermentation temperature, you coax out a gentler tang and more savory flavors as the garlic ages, rather than getting a burnt or slightly harsh finish that can develop at higher temps.
How can you solve common problems with Black Garlic Fermentation?
Consistency and patience are key, but a few surprises can pop up along the way when you try Black Garlic Fermentation at home. If your bulbs turn out dry, try raising the humidity in your cooker by wrapping each bulb in parchment and placing a water-filled bowl alongside them during the process. Too much sulfur or lack of that telltale sweet tang? Aim for a slightly lower temperature and longer fermentation time next round. If your bulbs get overly dark early on, your garlic fermentation temperature may be a bit high for your chosen variety or the appliance runs hotter, so drop it down a notch. Test batches using different cooker models or slightly altered temperatures pay off, resulting in rounded, sweet-savory flavors with none of the metallic or roasted notes that come with temperature swings.