

Black Garlic Cultivation: A Home Guide
Ever stopped at a food festival and wondered how chefs transform plain garlic into glossy black nuggets that taste like fruity balsamic magic? Here’s a secret: unless the garlic is black, most Americans are flavor-deficient dreamers. One out of five trendy restaurants already offers a black garlic item—maybe you haven’t just noticed. Black garlic cultivation at home gives you chef-y gadgets and homemade gifts with Instagram cool points. Last weekend I left bulbs in the corner of my warm oven, expecting average garlic spread, and came back to caramel-smelling pieces of love that looked like licorice and tasted like grilled plums.
You won’t even have to wave your passport—the tools (think rice cooker) live in everyone’s kitchen. Black garlic cultivation picks up where regular gardening ends and impossibly delicious umami begins. Before you become the neighborhood’s black-garlic influencer, let me walk you through how to make black garlic at home and address what happens if you, like me, forget to label your “bait” drawer in the back fridge. Ready to dive in?
Understanding Black Garlic: What It Is and Why It’s Worth Making at Home
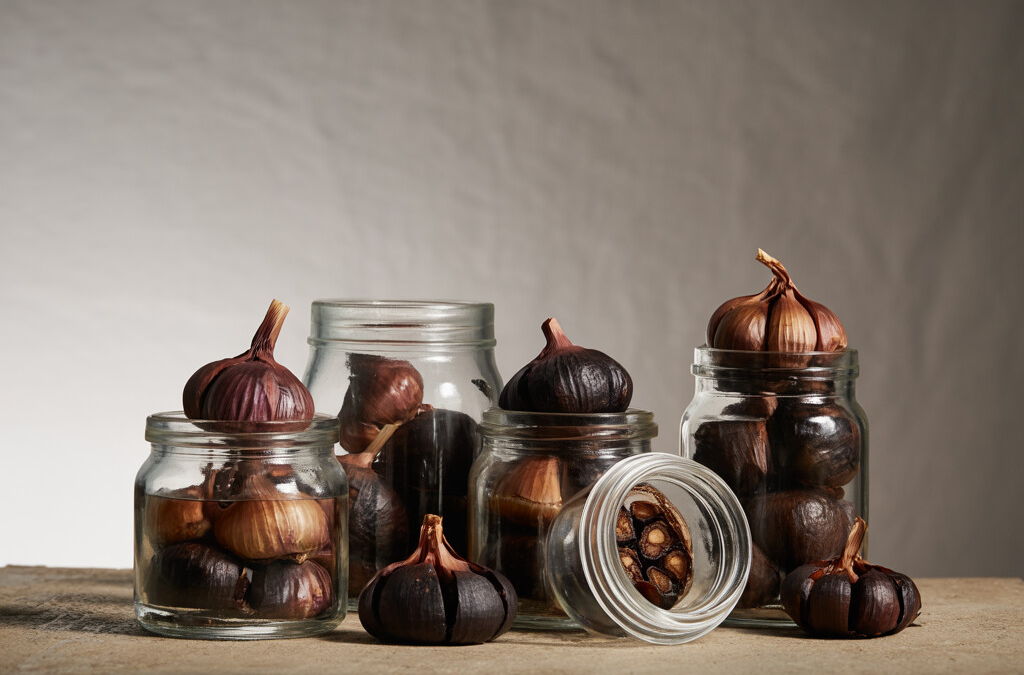
Black garlic seems mysterious when you first see it. Picture a fresh white garlic bulb but after a long nap in a warm, humid chamber, it wakes up sticky, jet-black, and glossy. The flavor is mild, sweet, and complex. Imagine the rich smell of balsamic vinegar and the taste of licorice or fig, but with none of the sharpness you find in raw garlic. This transformation is thanks to a special process—the magic of patience and carefully controlled heat.
The reason so many people chase after black garlic is simple: The flavor is out of this world. Chefs love to mash it into pasta, blend it with butter, or spread it on roasted meat. When you try it at home, you will likely think of even more ways to use it.
Why Grow and Make Your Own Black Garlic?
Most grocery stores only stock fresh garlic; if they have black garlic, it will likely be expensive and arrive in tiny jars. That puts a damper on anyone who wants to experiment with bold new flavors. By exploring black garlic cultivation techniques at home, you solve a few problems quickly. First, it opens the door to a nearly endless supply of black garlic. Next, you control the quality. No more worrying about whether it was made to your standards or grew moldy in shipping. And you get more for your money in the long run. Plus, there is a real thrill in turning something simple into one of the most luxurious pantry items you can find.
Ready to jump in? I promise: Black garlic farming looks complicated at first, but once you see how it happens, it becomes almost routine. Over the long haul, you might even get hooked on growing black garlic in your own space. If you have been hunting for fresh black garlic near you with little luck, your DIY black garlic cultivation strategy will save you every time.
Essential Equipment and Conditions for Black Garlic Cultivation
Falling for black garlic at first bite is easy, but growing your own definitely takes more than a dash of curiosity. Creating black garlic at home isn’t the same as planting cloves and waiting for a miracle in your garden. Most of the time, black garlic cultivation starts in your kitchen, where you turn regular garlic into rich, chewy treasure, especially when the store-bought stuff is less than inspiring.
To transform garlic into black garlic, you’ll want a space that stays toasty—think 140 to 170 degrees Fahrenheit. Now, before you clutch that garlic bulb in one hand and your hairdryer in the other, take a deep breath. No need for fancy gadgets, but two things are absolutely essential: even heat and dependable humidity. Heating mats, rice cookers with a “warm” setting, or a low-temp slow cooker can do the trick. One neighbor even converted an old-school bread box into a garlic sauna by rigging a small space heater with a thermostat.
Ideal Tools and Home Setup for Black Garlic Cultivation
Here’s my short, must-have equipment list for black garlic cultivation:
- Humidity: 60% to 80% is the sweet zone. Too dry equals dried husks and a rock-hard chew. Too wet leads to old gym socks level problems: mold.
- Humidifier or water tray: Some DIY setups need a tiny bowl of water or a small ultrasonic humidifier inside your units.
- Steady temperature control: Invest in a digital thermometer. You really don’t have to go full laboratory-style, but if it swings over 180 degrees, you’ll toast the garlic, not age it. Below 130 and you risk nothing but disappointment.
- Shelf or rack: Let air circulate. Stacked cloves get less sticky, and fewer peel-to-flesh mysteries lurk in the shadows.
Got all your supplies? Find a garage, laundry room, or basement shed. Garages lead the pack because the setup hums along for three weeks straight, and you won’t want that signature garlicky warm aroma trailing through your house around the clock.
More hands-on black garlic growing tips are coming up, but rest easy: once you’ve set your home up, all you need now is patience. You’re not just cooking; you’re aging—kind of the way cheese and friendships get better with time. If you’re curious about why this works with garlic, check out the science and backstory behind black garlic production while things are warming up.
Step-by-Step Guide to Cultivating Black Garlic at Home
Getting started with Black Garlic Cultivation at home is way less complicated than you might think. If you’re a newcomer and have trouble scoring quality black garlic at stores, making it yourself is totally doable. Here’s your guide to turning regular garlic bulbs into those sweet, tangy flavor bombs right in your own kitchen.
First up, pick your garlic. For the highest yield, you’ll want big, healthy bulbs, but any garlic will do. Trim off the roots if they’re wiry, but keep the skins on to help each clove hold its shape as it ages. Set your cleaned garlic aside while you prep your DIY “fermentation” setup.
Simple Aging Options in Home Black Garlic Cultivation
A slow-cooking appliance like a rice cooker or dehydrator will be your best (and easiest) friend for at-home black garlic farming. Even a tightly wrapped slow cook in your oven can work if you keep your kitchen well-ventilated. The trick is to keep temperatures steady, between 140 and 170°F, and seal in all the humidity you can with foil or a snug-fitting lid. Check your appliance for features that fit the job. Here’s a quick view for comparison:
Pop the bulbs in the rice cooker/oven/dehydrator and leave them there for at least 2 to 3 weeks. Be ready for a funky, earthy garlic smell: it’ll fill your kitchen and probably convince your neighbors you’re a short-order chef. Don’t be tempted to dig in too soon. Black garlic needs that time to turn its signature black. Press the bulb now and then through the paper—if it’s sticky and soft, you’re almost there.
After about three weeks, loosen the vessel and let your garlic cool somewhere dry and dark, so it continues to firm up and mellow. Black garlic keeps exceedingly well thanks to its dense, syrupy nature. It’s ready as soon as it’s shiny, black, exotic, and almost jelly-like at the core.
Tackling Black Garlic Cultivation at home, even on your first try, can open up a world of creative cooking. What started as a grocery shortage might just become your new kitchen habit.
Tips for Growing Black Garlic Successfully in Your Garden
If you have browsed the limited shelves of black garlic at your local market and come away disappointed, here’s your moment to shine in the garden. Creating beautiful, good-quality heads begins with healthy soil and a little patience.
I always begin by choosing strong, large garlic heads, preferably organic and free from soft spots or green sprouting. Make sure to use only hardneck varieties: softneck will work in a pickle, but the cloves are fiddlier. Plant your garlic cloves, pointy-end up, in a sunny spot and in deep, well-drained soil. Nine inches apart, about two inches deep, gives them enough room to plump up without crowding.
Mastering the Art of Successful Black Garlic Cultivation in the Garden
With black garlic cultivation, watering should be thorough (I like the “deep soak” method, which means fewer, heartier waterings) and you only need to fertilize at the start and again when shoots reach two inches tall. Keep the bed free from weeds, which compete with your crop. Mulch is a must—mise en place, garlic version: a thick layer keeps soil cool and warded from wild temperature swings.
By the time late spring arrives, you’ll see shoots: snap off the curly scapes (they’re delicious sautéed) to channel all the bulb’s energy underground. Once about 40 percent of the leafy tips yellow and dry, harvest with a hand fork and let them cure in a dry, covered, ventilated space for a few weeks, leaves intact. Now your homegrown garlic is ready to transform with heat into soft, black cloves.
Growing black garlic from scratch isn’t just satisfying, it makes the final flavor a hundred times more rewarding. Whether you farm on a windowsill or till five raised beds, with a bit of forethought and these simple garden tips, you’ll never want for those sweet, black treasures again.
Storing and Preserving Your Homemade Black Garlic
So, you have created that first batch of black garlic. It smells amazing and looks even better. Now, you might be wondering how to keep all that earthy-sweet goodness fresh until your next big dish or charcuterie board mural. Not long ago, I made what I thought was a brilliant stash, only to fall victim to the dreaded funk of improper storage. After a lot of trial and some sticky fingers, these are my go-to steps for storing and preserving those little fermented bulbs.
Caring for Your Homemade Black Garlic for Freshness
First up: Always let your garlic bulbs cool off and fully dry in an open, airy spot. If any are still wet or soft, pop them straight into your mouth or give them a little more time to finish fermenting. Once you have solid, glossy cloves, slip them out of their skins (see also: garlic peeling hacks on TikTok) and store in a sealable glass jar, the kind you’d use for spices or pickles. Plastic containers work as backups, but glass helps avoid moisture and smells soaking into the container walls.
Keep the jar packed with sweet, sticky bulbs on the center shelf of your fridge, right where the temperature stays steady. Chilling is like the golden rule of the black garlic universe; it stops microbes, preserves that syrupy texture, and wards off the dreaded “off” smell you totally don’t want to discover weeks later.
Low on fridge space? Black garlic will keep for a week in a cool, dark corner of your pantry, tightly wrapped in parchment or wax paper. Air is the enemy here; if they start to get too hard or dried-out, pop a slice of apple or a damp paper towel in with the cloves for a few hours. I learned this after pulling out totally crispy black garlic for a planned Fourth of July steak dry-brine. Yes, I still cried into the fireworks.
If you jump into big-batch Black Garlic Cultivation now or in the future, you can freeze bulbs whole or peeled—just bring back to room temperature and smash with a fork, and they come back to life beautifully in aiolis, sauces, and pasta.
Once you break the seal, homemade black garlic keeps for about three months with proper storage. After that, the aromas change, and at some point it’s just…not that delightful any more.
Your patience during Black Garlic Cultivation pays dividends when you take care of your harvest. Put the cloves in the fridge, show them love, and you will always have that intense flavor on hand for salsas, honey, spreads, or a pizza topping. Believe me, it is a flavor shortcut worth the fridge space—even if you have to move the apple pie to make room.
Creative Culinary Uses for Your Home-Cultivated Black Garlic
There are almost endless ways to use your home-cultivated black garlic in the kitchen. Because the stuff can be hard to find at grocery stores, harvesting your own gives you total control over its taste and texture. I’ve been amazed at the little ways I sneak it into meals. Black garlic supports all sorts of flavor adventures, too. Let’s pick a few favorites.
Tasty Ways to Use Your At-Home Black Garlic Harvest
Mashed into a roasted garlic paste. Because it’s so sweet and mellow, black garlic makes the perfect spread for crispy bread. Stir it into butter or olive oil or just press soft cloves straight on slices of baguette for a simple treat.
Whipped right into dips. One of my go-to moves is to fold mashed black garlic into yogurt with lemon juice for a luscious sauce. Or skip the lemon and go bold with blue cheese for veggies and wings. If you’re feeling saucy, scoop it into a creamy ranch for pizza crusts or sandwich dipping.
Mixed into main dishes. You can swap your usual raw garlic for black garlic nearly anywhere. It offers a deep, even sweet/umami flavor. Chop the dark cloves and add them at the end to stir fried veggies, or cook them into risotto for nutty, sweet depth. They blend nicely into hummus or potato salads.
Hit up your basics for an upgrade. Try putting homemade black garlic slices in grilled cheese or pancakes, or fold them directly into sandwich fillers.
So if you once struggled with limited access to high-quality black garlic, now you can slip it onto pizzas, into meatballs or burgers, or blend it into vinaigrettes and think: wow, I made this. Convenient, right? Black garlic cultivation lets you dive into all kinds of creative culinary play, especially once you realize just how little of its complex flavor can transform a meal. If you want more inspiration, browse our home cook’s guide to black garlic preparation or check out fresh techniques to elevate your dishes with black garlic.
Troubleshooting Common Challenges in Black Garlic Farming at Home

Troubleshooting for Growing and Making Black Garlic at Home
If starting black garlic cultivation at home has a few hiccups, no worries, it happens to the best of us. One minute you think your garlic’s on the path to dark sweetness, the next you realize it’s sticky, spotty, or just…well…wrong. Let’s look at a few common snags and how to unfuss them.
Ever find a batch that’s not jet-black? Often, heat fluctuation or short cook times are the culprits. Your crafting process should keep garlic heads steady at a low 140–170°F for at least 2-4 weeks. If your results are tan, sticky, or goopy, there’s a good chance the temperature swings too wide or your time isn’t long enough. Consistency is everything.
Humidity can feel like a catch-22. Too little and the cloves dry out; too much and you’re basically slow-roasting instead of fermenting, leading to mush or mold. Try wrapping bulbs in paper towels or parchment, then a loose foil tent before tucking them into your rice cooker, slow cooker, or dehydrator. Check daily for that balanced humidity you’re after. If you see white fuzzy stuff, don’t panic. That is usually yeast and can be wiped off easily. Black or green mold, on the other hand, means that batch is a loss, sadly. Clean your gear before the next round.
Black Garlic Cultivation Trouble Spots and Quick Fixes
Off smells are another sore spot for home garlic cultivators. Black garlic should smell powerfully but pleasantly sweet and tangy. Anything sour, rotten, or unsettling probably signals bad airflow or over-wet conditions. Crack the lid slightly next time or swap your towels. Fruit flies and gnats are drawn to that aroma, so check your setup if they’re dropping by.
Give yourself (and your garlic) grace and a little wiggle room, especially for your first experiments with cultivating black garlic at home. The rewards are rich, funky, sweet, and savory all at once. Think of it as a slow-food adventure; a useful tip is to label your containers and experiment with smaller batches at first. Jot down easy mistakes and spark-of-genius ideas as you go. Every batch brings you closer to mastering delicious homemade black garlic even grocery store shelves can’t match.
Conclusion
Whether you dove into the basics of equipment and conditions or picked up clever tips for growing black garlic in your own garden, you’re now ready to jump into Black Garlic Cultivation. You no longer have to hunt down specialty shops or expensive online stores to enjoy this delicious ingredient. With each bulb you transform, you’re not just making an ingredient; you’re creating new moments around your table.
Now that you have the tools and inspiration, make black garlic part of your kitchen experiments. Explore its subtle sweetness and share what you learn with friends and family. Example: Top your morning toast, spice up your sauces, or try something you’ve never done before. Black garlic has a way of revealing joys you might not have seen coming. I’m rooting for you. So get those gloves on: let’s get our hands a little dirty and make something amazing.
FAQ
What does Black Garlic Cultivation mean for home cooks?
Black Garlic Cultivation means you take raw garlic bulbs and age them in a warm, controlled space to create a sweet and complex flavor. Black garlic isn’t actually grown this way; you transform white garlic into a deep, savory ingredient. When you make black garlic at home, that signature color and taste blossoms after just a few weeks in a rice cooker, slow cooker, or even an old bread machine. Take it from me: Making your own batch gets your whole house smelling like savory caramel candy! You’ll always have a supply for use in risottos, sandwiches, or even decadent dressings. The black garlic process is magic you can create yourself, not just something you buy.
Can you actually “grow” black garlic in your backyard garden?
Nope—Black Garlic Cultivation isn’t about planting it. You grow regular hardneck or softneck garlic in your garden. When the bulbs mature and dry, you cure them by slow roasting at a warm, steady temperature. Think of it like how bread turns brown gold in the oven. Once garlic is harvested, you control the simple black garlic process from start to finish in your kitchen. Plant garlic cloves in fall, then flip them into black bombs of savory flavor by summer. If you’ve grown too much garlic—and if you garden, you will—black garlic offers a wildly creative way to preserve and use your yield.
Do you need special tools for home Black Garlic Cultivation?
You don’t need fancy gear for Black Garlic Cultivation, though there are gadgets out there. Most home cooks rely on re-purposed appliances: a rice cooker, multicooker with a “keep warm” setting, or even an old slow cooker does the trick. Keeping a steady temperature (about 135–175°F, aiming for somewhere in the middle) is key. Cover your bulbs loosely in foil—some go for a little parchment paper hat for good measure—then wait three to four weeks. My rice cooker is the same one I graduated college with. If it dies in the process, no big loss, but if it lives, it makes the house permanently celebrate Thanksgiving.
What common mistakes should you watch for in Black Garlic Cultivation?
Mistakes mostly stem from temperature swings, moisture, and over-eager opening of your magic chamber. In Black Garlic Cultivation, getting the setting just right often takes a batch or two. Go too hot and garlic will char. Store bulbs carefully; if you get impatient and pop the lid or your appliance leaks too much, bulbs can dry out, dehydrate, or, worse, rot. When you forget to check the fill level in the cooker, a little pot of sticky fossil can greet you. Stick with a steady temperature and trust the process. The scent may tease you for weeks, but patience wins the day.
Will homemade black garlic taste different than store-bought?
Black Garlic Cultivation at home usually offers a rounder, bolder result hand-selected for your taste buds. Store-bought black garlic sits sealed in sacks for months to years. Homemade black garlic delivers fresh, chef-powered umami that’s dramatic by comparison. Keep batches small, pack in foil, and try testing the sweetness and texture along the way. You control the wacky aroma that can fill your kitchen or garage. There’s always some warbly accidental jazz that happens. You can double up flavor in everything from butter to roasted chicken. If you have friends or neighbors, you may discover black garlic makes a magical trade or gift.
How should you store homemade black garlic for best results?
The main rules of Black Garlic Cultivation storage are to keep the bulbs dry and out of direct air or sunlight. Tuck bulbs, peeled or unpeeled, into loosely sealed glass jars or Ziploc bags, then pop them in the fridge, not the counter. Humidity, which happens faster in the open, is the enemy of that soft jet velvet inside. If you slip up, a layer of sugar syrup may crust on bulbs, but over time, forgotten bulbs can mold or pyrite-desiccate. Free supplement—I use mine in everything—beans, cornbread, porch hangouts, even as a “bonus vegetable” on cheese plates. Guardianship ensures the richest reward.