

Using A Rice Cooker For Black Garlic: A Simple Guide
Did you know black garlic has almost twice the antioxidants of raw garlic? It’s wild, right? When I first read about using a rice cooker for black garlic, I thought it couldn’t be that easy. Last weekend, curiosity won out. My kitchen filled with that sweet, caramel-like tang, and I realized I might never go back to store-bought again.
Using a rice cooker for black garlic is an easy home hack that brings this “black gold” within reach. While up to now I used to shell out big bucks for black garlic at fancy markets, tinkering at home gave me fresher flavor and more control. In this guide to how to make black garlic at home, you’ll find beginner proof methods, pro secrets, and fun ideas. The best part? Breaking a clove open is wildly satisfying: the inky garlic is gooey, earthy-sweet, and loaded with mysterious depth. Ready to dive in?
Understanding Black Garlic and Its Culinary Appeal
So, what’s all the buzz about black garlic, anyway? If you’re picturing your tried-and-true spicy white garlic, think again. Black garlic transforms those sharp, fresh cloves into something mellow, sweet, and a little mysterious. Traditional garlic goes through a weeks-long aging process where time and warmth do their thing. The garlic darkens to an inky black, each clove gets sticky and spreadable, and the flavor blooms. Instead of sharpness, you taste molasses, balsamic, and even a hint of tangy fruit. It’s almost candy-like in richness—a far cry from its fiery roots.
Getting the Most Out of Black Garlic Flavor in Your Kitchen
What makes black garlic so appealing in the kitchen? The flavor pairs beautifully with just about everything: pasta, risotto, roasted meats, even veggies. It slides right into salad dressings and spreads, too. Any cook who wants to upgrade basic meals will love how it melts right in and brings dramatic, sweet-savory depth to sauces and stir fries. If you’ve got a picky eater at home, no sweat; black garlic’s flavors don’t have the bite of raw garlic, so it’s great for families.
The only snag? Finding good black garlic in the U.S. can be tricky. Imports or boutique brands are usually expensive or hard to source. That’s where making it at home comes in handy, and that is also where Using A Rice Cooker For Black Garlic really shines. Learning how black garlic is made might sound overwhelming at first, but the rewards are totally worth it.
Passing up on black garlic is like skipping the best topping on your pizza. Most home cooks have a rice cooker tucked in the cabinet, and that’s all you need to make this ingredient yours. Using A Rice Cooker For Black Garlic is a low-cost, easy way to get something delicious without the luxury market price.
Overcoming those access struggles is enough to make any home cook champ at rolling up their sleeves and inviting friends over for a creative dinner night. Trust me, the first time you spread a dab of homemade black garlic on your favorite dinner roll, you’ll want to keep experimenting and cooking with it everywhere you can.
Benefits of Making Black Garlic at Home
If you have ever wandered into a specialty food shop, you may have spotted those tiny jars of black garlic hiding in the corner. The price tag for a handful of cloves? Yikes. Access to quality black garlic can be tough, even in big cities or well-stocked groceries. If you actually find some, it may be months old or not as flavorful as you hoped. What is a garlic lover to do? Making your own black garlic at home saves you money and makes sure you get the best possible flavor from the freshest bulbs.
Savory Advantages of Making Your Own Black Garlic Batch
Creating black garlic at home means you have full control over everything: the variety, the size of the heads, and the storage. Pick up a pound of raw garlic, create a batch the exact way you prefer, and pat yourself on the back when you store it all up for future recipes. Plus, talk about being eco-friendly; you are skipping all the shipping and extra packaging that comes with store-bought versions.
Using methods like the oft-cited Rice Cooker Black Garlic Method takes most of the guesswork out of the process. Once you try it, you will find yourself using a rice cooker for black garlic every single time. The instructions for black garlic in a rice cooker are simple. With their “set and forget” convenience, rice cookers keep the process mess-free and reduce the chance of accidentally burning or drying out your garlic. The slow transformation boosts flavor while preserving nutrients and natural sugars, producing sweet, almost balsamic-tasting cloves great for dining at home.
Making A Black Garlic In Rice Cooker batch is easy and satisfying on its own but it will also kickstart your creative kitchen experimenting. Sprinkle silky cloves over your dairy-based spreads or use slices to top crostini and roasted veggies. If you are curious about black garlic at home, start with smaller batches and ramp up for parties, gifting to friends, and holidays. Making your own means you are never far from a recipe upgrade, and toss in the fact that homemade just tastes better.
Choosing the Right Rice Cooker for Black Garlic Preparation
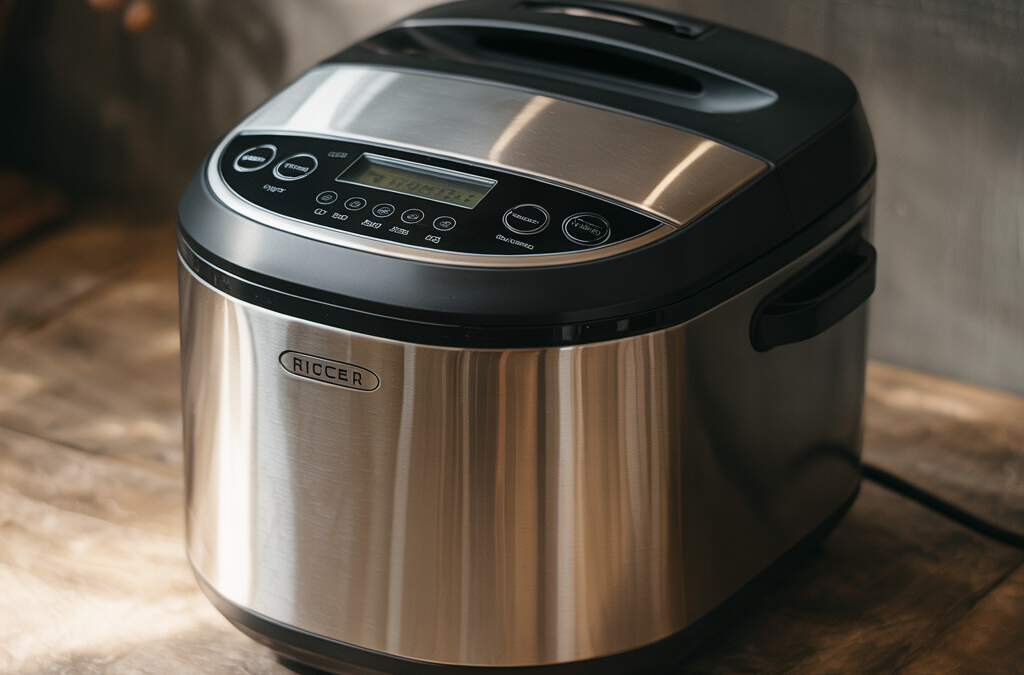
Not all rice cookers are created equal, especially when it comes to using a rice cooker for black garlic. This handy kitchen trick can help you finally score that restaurant-level black garlic, even if your store shelves have let you down. Since making black garlic is a slow process, your machine needs to reliably keep a low, steady temperature for days. Most basic rice cookers stick around the “keep warm” setting only, so they’re ideal for a set-it-and-forget-it approach.
Matching Your Cooker to the Task: Best Rice Cooker Black Garlic Method
While it might be tempting to dust off the old rice cooker hiding in the cabinet, take a peek at its settings first. Fancier cookers with automatic shutoff won’t work as well since they may turn off before your garlic is ready. What you really need is a classic, straightforward rice cooker – no digital timers, buzzing alerts, or auto-shutoff beeps, just a reliable “keep warm” button. Most garlic home chefs use 6-16 cup models, but small personal cookers can also do the trick for batches under 10 bulbs.
Here’s a quick look at what matters most when choosing a rice cooker for black garlic:
Deciding on your appliance is all about consistency. You need your rice cooker to hold a steady warmth — not cook the garlic, just gently aging it. If you are unsure if your beloved brown-and-tan reliable will handle the long run time, try it for just a couple of hours with a small bulb. Then, check the temperature with a probe. Most kitchens shoot for the 140°F to 170°F range for making black garlic in rice cooker models.
If high-quality black garlic has always seemed out of reach in your local grocery store, using a rice cooker for black garlic brings this foodie dream into your own kitchen. For a peek at a similar process, see which option fits you best in Black Garlic Preparation Methods A Home Cooks Guide, then grab that trusted gadget and get ready to say goodbye to pre-made jars with prices that make your eyes water. Next up, let’s see how to transform those fresh garlic bulbs to deep, crave-worthy black magic right on your kitchen counter.
Step-by-Step Guide: Using a Rice Cooker for Black Garlic
Getting started with black garlic at home can sound like a serious commitment. If I show you the rice cooker tucked away in my pantry, will you believe you’re one quick plug-in from a fresh batch? Using A Rice Cooker For Black Garlic is easier than you might think. Trust me, once you see those cloves caramelize, you’ll feel pretty slick. Before you start, let’s talk details.
Black Garlic Rice Cooker Instructions: Step-by-Step
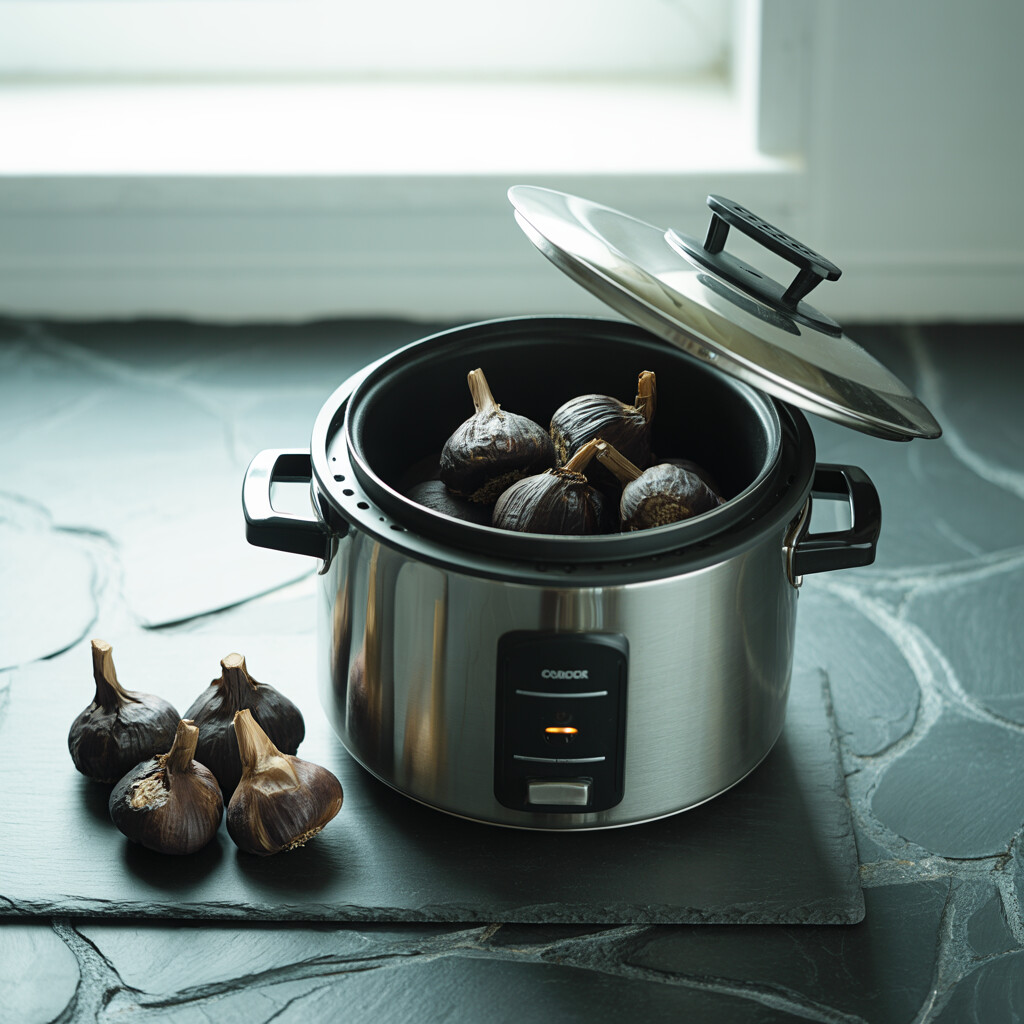
Wipe down the inside of your rice cooker with a dry towel and pick out fresh, firm bulbs of garlic. Don’t peel the bulbs—black garlic needs that cozy papery jacket during the aging process. Place as many bulbs as will fit without stacking them (about a dozen for a standard-sized model). Cover, set to the “keep warm” function, and prepare for the slowest—yet most rewarding—countdown on your kitchen clock.
Plan to leave those garlic bulbs undisturbed for 3 to 4 weeks. Yes, weeks! Don’t give in to temptation and open the lid; that breaks up the subtle humid heat the magic needs. I grab a roll of masking tape, stick a note on the lid, and remind myself, “No peeking until July 11.” When Using A Rice Cooker For Black Garlic, patience is just as important as your appliance. And heads-up: prepare for a strong, earthy scent to fill your kitchen. Let your household know so they don’t try to rescue your mystical batch thinking it “went bad.”
After three weeks, unplug the cooker and let the bulbs cool before handling. What you’ll have inside is a handful of beautifully dark, sweet, and tangy cloves—ready to revive lazy leftovers or zhuzh up a bowl of rice.
If you’re worried this all sounds too simple, know that thousands of home cooks have succeeded by staying hands-off and trusting the alchemy. Making Black Garlic In Rice Cooker mode means you’re in complete control—no mystery chemicals or odd flavors lingering behind. Once you discover the complex flavors that sweet, fermented garlic can unlock, you’ll never be at the mercy of store-bought black garlic again.
For a more visual rundown on methods, altitudes, and troubleshooting, I love this How To Make Black Garlic At Home A Simple Guide. Your responsibility is almost finished—a few more simple steps and you’ll be reigning as the black garlic expert of your block, answering neighbors’ questions at barbecues and teaching your kids how smelly things can be delicious, too.
Tips and Tricks for Perfect Black Garlic Every Time
If this is your first rodeo working the rice cooker black garlic method, you might wonder if it will taste as good as the pricy store-bought bulbs. Here is the good news: a little patience (oh, and a few cloves of time-tested know-how) will have you cooking up rich, savory black garlic as tasty as anything you can order online. These tips and simple tricks can make that happen, no matter your skill level.
How to Master the Rice Cooker Black Garlic Method And Get Foolproof Results
First, lay the groundwork. The real key to using a rice cooker for black garlic is keeping a steady, warm, and moist home for your garlic. Avoid lifting the rice cooker lid or peeking more than you must, or you will risk losing valuable steam.
Be picky about your garlic, too. Choose fresh, firm bulbs all about the same size, and resist the temptation to break them apart—they work best whole. Laying parchment or cheesecloth inside your rice cooker before loading the garlic prevents sticking or scorching, and cleanup is a breeze.
Have you ever wondered, “How will I know when it is done?” The nose knows. When you get that whiff of sweet tang (not burnt, not raw), it is on track—they should turn soft and very dark.
Take control of humidity. Many rice cooker models seal well, but not always. Keep a kitchen towel draped over the lid (being careful with the cord) to help lock in moisture, which supports the magic reaction that creates the color, flavor, and aroma black garlic is famous for.
Rotate the bulbs if you are in for the long haul, especially with bigger cookers. Every three to four days, swap the bulbs’ positions top to bottom for even aging.
Last but not least, the most valuable tip for making black garlic in a rice cooker is not complicated: have patience. You will want to taste prematurely, but resist. The reward is worth the wait. As a bonus, the sweet, yeasty scent of savory caramelized garlic will fill your whole kitchen.
No room for mistakes? Double check how to extend shelf life with extra black garlic storage tips. Trust your senses, treat garlic like baby chicks in an incubator, and using a rice cooker for black garlic will grant you an earthy, umami-packed treat every single time.
Storing and Preserving Your Homemade Black Garlic
Once you’ve gotten the hang of using a rice cooker for black garlic, the next (and crucial) step is making sure your hard-earned garlic stays fresh and tasty. The secret to good storage, in my book, is to keep it somewhere dark, dry, and cool. Think pantry or a kitchen cabinet, not the hot window ledge where your store herbs go to die. I tuck mine into an airtight glass jar or a reusable storage container lined with a paper towel. It needs to breathe just a little, so skip the zipped plastic bag. If moisture collects, the garlic might mold before you get to show it off at your next dinner party.
Black Garlic Storage Solutions: Getting the Best Results at Home
You can also refrigerate any leftover black garlic if you haven’t used it up after a week or so. Just put the cloves in a sealed container and let them chill out in the fridge for up to a month. If you want to save a large batch, freezing works too: sort the gooey, sweet cloves into small portions, pack them into freezer bags or little silicone trays, and defrost as needed. If you ever peel more than you can use right away, give this trick a try.
The best part about making black garlic in a rice cooker is being able to control every step from clove to table. Store it right, and you’ll enjoy that deep umami, tangy-sweet punch in your risottos, vinaigrettes, or even bagels for weeks to come—no specialty store trip, shipping madness, or waiting for a tiny delivery needed. Once you master using a rice cooker for black garlic, it pays off over and over again, right in your home kitchen.
Creative Ways to Incorporate Black Garlic into Your Dishes
Go on, open that jar of black garlic you just made in your rice cooker and set it right next to your cutting board. Whether you’re a curious home cook or a card-carrying foodie, it’s time to make some kitchen magic. Black garlic has that gently sweet tang and umami hit that not many other ingredients can touch. Here are a few easy ways to work it into your favorite meals.
Easy Wins and Fresh Ideas for Cooking With Black Garlic
A simple smashed clove worked into store-bought mayonnaise makes an instant sandwich spread you’ll eat straight from the spoon. Try mashing black garlic cloves on your pizza as a rich, sticky topping and see how it turns the ordinary into something unforgettable. Homemade salad dressings or marinades slip right into new territory with a single clove blended in. Mix one or two into butter with a pinch of honey, then dollop on seared steaks, corn on the cob, or roasted veggies. Black garlic folded into mashed or roasted potatoes has the power to get everyone at the table fighting for seconds.
If soup’s on tonight, rich, aged garlic stirred into lentil, roasted tomato, or chicken soups will work its sly, flavor-layering trick. Blend it into hummus, baba ganoush, white bean dips, or even cream cheese spreads for a mellow, soy-like hit. Sprinkle chopped black garlic into restaurant-style stir-fries just before serving or tuck it beneath the skin of a plump chicken before roasting. Try some in deviled eggs, sprinkle onto popcorn, or thinly slice and tuck onto burgers. Even basic snacks are ready for a remix: add pieces to grilled cheese sandwiches or fold into ricotta on toast.
If you’re piling up batch after batch from using a rice cooker for black garlic, remember you can always freeze extras and pulse in a food processor for an effortless seasoning base. I’ve snuck this into chili, mixed into beans and rice, snuck it onto sushi, and pureed it into vinaigrettes. It’s like tomato paste’s misfit cousin: earthy, quietly sweet, umami-packed, and totally addictive.
With the use of a rice cooker black garlic method, suddenly you can have a big stash to inspire you to experiment. Once you go through your first batch using a rice cooker for black garlic, the wheels start turning about what to cook with it next. If you need even more ways to get creative, check out our favorite Black Garlic Dishes Quick Easy And Delicious or see more Black Garlic Culinary Applications Elevate Your Dishes for inspiration. Almost any recipe that could use a little depth will welcome it—and you’ll probably never go back to plain raw garlic again.
Troubleshooting Common Issues in Black Garlic Production
Just when you think you’ve cracked the code for home black garlic, the universe likes to keep things interesting. Some glitches can pop up, especially when you’re using a rice cooker for black garlic. But don’t sweat! Knowing what can go wrong (and what to do next) will have you back on track before anyone at home starts asking, “What’s that smell?” or wonders where the fancy black garlic supply has gone.
Pinpointing Common Problems When Using a Rice Cooker for Black Garlic
An unexpected drop in temperature, humidity that’s just a bit off, or that ancient head of garlic you found hiding in the back of the crisper: They’re all possible saboteurs. Here are a few common hiccups and sanity-saving solutions to each one:
• Black garlic feels dry, hard, or crumbly: Overcooking or drying can cause this. Increase your humidity by placing a small bowl of water (safe for rice cookers) in with your garlic, or cut a day off your usual timer if needed.
• Moldy spots or an off smell: Too much moisture or poorly ventilated garlic can lead to this. Start with heads that don’t have moldy spots, use a paper towel to catch condensation during the process, and if you see or smell active mold, it’s safest to toss that batch and restart with clean, healthy bulbs.
• Flavor comes out sharp or not sweet enough: Under-fermentation might be to blame. Keep the rice cooker running (but monitored) for another day or two, and review your temperature settings: 140-170 degrees Fahrenheit is the magic range for the Maillard reaction. Lower gets faint flavor; higher risks burning those sugars right out.
• Wrinkly, uneven, or not jet-black: This can signal uneven heat or a cold patch in your rice cooker for black garlic. Shuffle your garlic halfway through, or choose heads that are all pretty close in size.
Many folks hit up forums wondering if making black garlic in the rice cooker takes too much power, raises electric bills, or somehow jams up fancier high-end cookers. In my experience with using a rice cooker for black garlic (and regretting only leaving the window open), most rice cookers do the job just fine for two or three weeks without any glitches. If your machine gets cranky or timer functions don’t run that long, it’s OK to switch off then restart daily so you keep things simple.
With just a little extra attention, you’ll turn any bumps into nothing more than a good story to share at your next dinner party.
Conclusion
At the end of the day, diving into homemade black garlic opens up a world of flavor and possibility. Using a rice cooker for black garlic lets anyone bypass the hunt for pricey store-bought bulbs. With our step-by-step instructions and a few helpful rice cooker tips, you’ll be set to start flexing your new culinary muscle.
You now have everything you need to bring this unique ingredient to your kitchen as often as you like. Whether you fold it into homemade aioli, swirl it onto pizza, or spread it on toast, black garlic can wow friends, family, and your own taste buds. Go experiment, get a little creative, and watch how this one simple process can unlock your food’s full potential!
FAQ
What type of rice cooker should I use for making black garlic at home?
If you’re committed to using a rice cooker for black garlic, choose a simple model with a keep warm function. Fancier cookers with digital menus or pressure cooking don’t work as well because they cycle on and off. Your basic no-frills rice cooker provides the low, steady heat black garlic loves. I use a decades-old one I found at the back of the cabinet. Using a plain cooker makes it easy to set and check your garlic daily. You’ll find that the slower, quieter approach wins here—it almost feels like you’re giving your rice cooker a new hobby.
Do I need special garlic or can I use any kind?
Good news—you can use everyday garlic from the grocery store when using a rice cooker for black garlic. I look for plump, perfectly dry garlic heads, ideally with the skin still tight and even. Don’t spring for pre-peeled garlic; those have a tougher time transforming. Purple or hardneck varieties also work, but access may depend on the season. My favorite is sturdy California white garlic because the cloves stay juicy, but whatever you have on hand does the trick. Using a rice cooker for black garlic lets you experiment to find the flavor profile that fits your kitchen best.
What does homemade black garlic taste like compared to store-bought?
Homemade black garlic made in your own rice cooker has a soft, jammy texture with a deep, molasses-like sweetness and tons of umami. Even after making black garlic in a rice cooker dozens of times, I still get surprised by the aroma—a mix of balsamic vinegar, browned butter, and roasted chestnut. You lose the tingle and sharpness of raw garlic, and in their place you get complex notes of tamarind and dried fruit. You can spread it, chop it, or snack on a clove to taste the magic. Using a rice cooker for black garlic lets you control the flavor much more than with expensive store-bought brands.
How long does black garlic take to make in a rice cooker?
Using a rice cooker for black garlic is a real test of patience—it can take anywhere from two to three weeks to reach full, dark, sticky bliss. You want to keep the rice cooker on the keep warm function the entire time, letting the cloves transition from white to caramel to black. About a week in, your kitchen smells like the best steakhouse in town. Don’t lift the lid more than you have to, but weekly checks are smart to look for dry or scorching cloves at the bottom. That first taste is worth every single day of anticipation.
Will making black garlic in a rice cooker stink up my house?
I’ll be upfront—when using a rice cooker for black garlic, you’re basically slow-cooking the aroma of roasted garlic for several days. The smell is strong at first, but it dulls as the weeks go on. Some folks love the inviting, toasty aroma. If you’re sensitive to odor or share walls with neighbors, put your rice cooker on a porch or in the garage. Thanks to experiments with patio power strips, my porch now has a permanent whiff of barbecue joint, and I’m not mad about it.
How do I know when my black garlic is fully done?
You know black garlic is finished when the cloves feel soft, squishy, and jet black when peeled. You’ll notice the garlic fragrance fades to something sweeter and deeper over time. Using a rice cooker for black garlic lets you lift the lid to check on your cloves after about 2 weeks; just be careful with the steam and moisture loss. If they still look tan or tough, keep going another week. Everybody’s climate and rice cooker varies, so patience and your nose will guide the way.
Can I reuse my rice cooker for regular rice after making black garlic?
Full disclosure: using a rice cooker for black garlic does ghost your appliance with that deep roasted sweetness. The inside of the rice cooker develops a sticky coating that may cling to the next round of rice and probably the one after that. If you can dedicate a cooker to back garlic duty, do it. For me, it’s a small price to pay instead of buying a fancy machine. My best tip is to use a removable inner pot or line your cooker liner with foil or parchment, then clean thoroughly with soap and plenty of elbow grease before going back to rice.