

Black Garlic Maillard Reaction: A Flavorful Transformation
Did you know over 5 million pounds of garlic are grown in the U.S. each year, but only a tiny percentage ever transforms into black garlic, with its sweet, umami-packed depth? If you love garlic’s savory kick and enjoy kitchen experiments, you’ll want to know the secret behind that signature dark color and rich taste: the Black Garlic Maillard Reaction. Picture unassuming white bulbs turning sticky-sweet and dark brown as their sugars and amino acids mingle, toss in a little heat and time, and out comes foodie magic.
Last weekend I tinkered in my own kitchen with a rice cooker and a head of garlic tucked neatly inside. Every day that I checked on the cloves, an earthy, sugary aroma filled the house. That is the transformative effect of the Black Garlic Maillard Reaction at work—a delightful science project disguised as dinner prep. This guide on how to make black garlic at home gives you all the details, tools, and tips, so you don’t have to shell out a fortune buying black garlic online. Ready to dive in?
Understanding the Maillard Reaction in Black Garlic
If you have ever looked at a bulb of raw garlic and wondered how it can turn into a savory-sweet treat with notes of aged balsamic, the secret lies in the Black Garlic Maillard Reaction. This process is science at its tastiest, working quietly behind the scenes as your garlic transforms from sharp to mellow. It’s not magic, but chemistry at work — and this guide is all about making that science work for you right in your own kitchen.
The Science Behind Maillard Reaction in Black Garlic
So, what is the Maillard Reaction in black garlic, and why should you care? Well, this intricate chemical dance begins when you gently heat whole garlic bulbs for weeks with a steady, low temperature and high humidity. The sugars in garlic meet up with its amino acids, creating a wild mash-up of fruity, earthy, and slightly tangy flavors. That’s the Maillard reaction – an effect that browns bread crusts, chars marshmallows, and yes, creates black garlic’s inky color and complex flavor profile.
The Black Garlic Maillard Process isn’t fermentation, like with sauerkraut or kimchi. Instead, it’s similar to what happens when you sear a steak, only stretched out over many days instead of minutes. The result? A smooth and sweet clove with an umami kick. Compared to the nose-tingling bite of fresh garlic, black garlic is mellow enough to eat whole, perfect with cheese, tucked into sauces, or just spread on good bread.
Even if your local store doesn’t carry it, understanding the Maillard Reaction Black Garlic Explanation helps you realize just how possible it is to make black garlic on your own. Give those raw bulbs a little patience and coax them toward their deepest, richest selves. By harnessing chemistry like a pro, you’ll soon enjoy one of the most versatile and crave-worthy flavor boosters right from your kitchen. Try it once, and trust me: You’ll start inventing new ways to use this bold ingredient every chance you get.
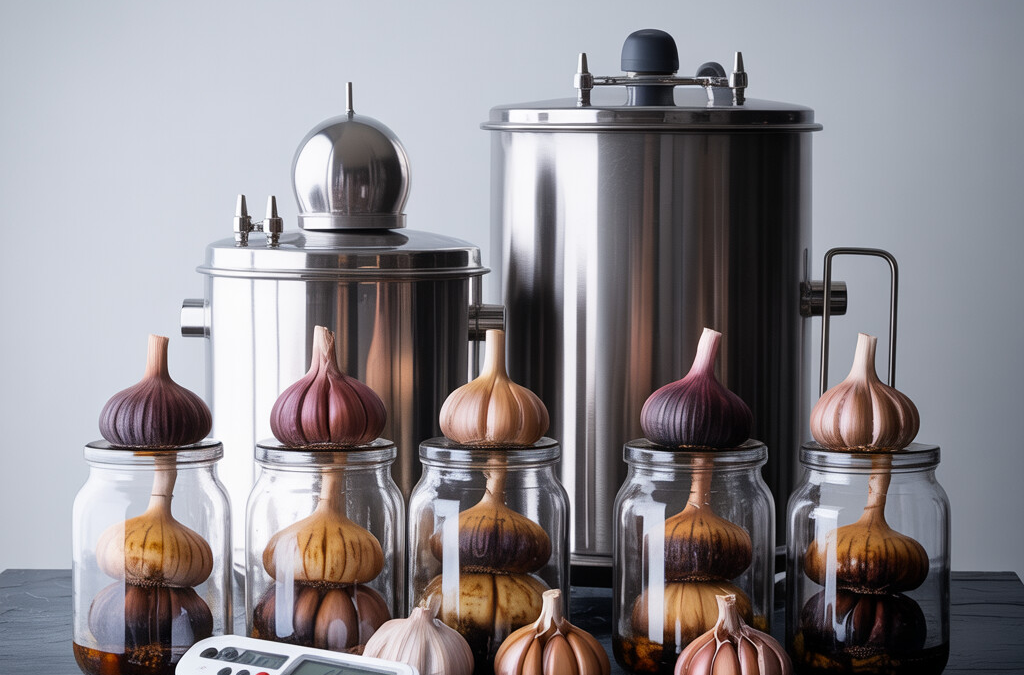
Essential Equipment for Making Black Garlic at Home
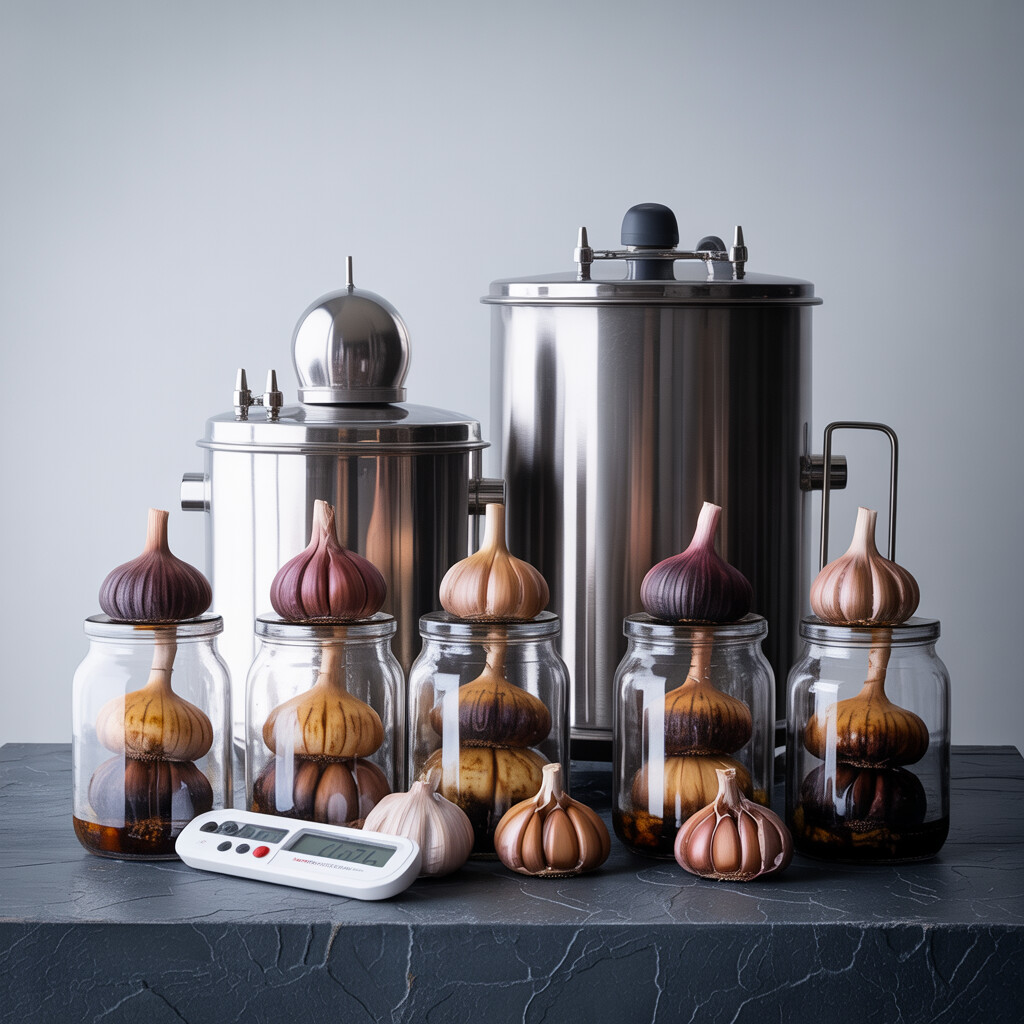
Getting set up to make black garlic at home is less intimidating than you might think. With the right gear and a little patience, you can nail that rich, complex flavor the Black Garlic Maillard Reaction is known for—all without breaking the bank. You have most of what you need in your kitchen already, but there are a couple specialty items that make the process easier and more reliable.
The Must-Haves: Basic Tools for Home Black Garlic Creation
First up, you will need a reliable way to keep a steady temperature low and slow enough for weeks. Think rice cooker, slow cooker, or a specialized ‘fermenter’ box. I have used a cheap rice cooker with a “keep warm” function and it managed to deliver pretty luscious bulbs, though a newer bread proofer is on my wish list. Just remember: your device needs to hold the garlic at a steady heat of about 140 to 170 degrees Fahrenheit. Too hot or too cold and you risk missing out on that signature Maillard Reaction Black Garlic Explanation that gives it those deep notes and sweet aroma.
You will also want a rack or trivet to lift the garlic up, allowing easier air circulation inside the cooker. If your device gets a little humid, a tiny wire rack ensures the bulbs do not sit in their own juice and steam into mushy disappointment.
The distinctive scent gets pretty strong after the first week, and it sticks around for at least a couple more. So, wrapping your cloves or bulbs in layers of parchment, or placing them in a clean paper bag, keeps them tidy and easier to handle. Use a glass container if you want to trap the aroma a bit more.
Black garlic only fakes being delicate. The Black Garlic Maillard Reaction transforms everyday garlic into a magic, jammy powerhouse, but it still deserves a gentle touch. A clean workspace, gloves (if you have sensitive skin), and curiosity are all welcome companions. But do not worry if you do not have every gadget—you can improvise with what you have.
One small warning: once word gets out you’re making black garlic, neighbors may ask if you are opening an artisan deli inside your garage. Just pat your trusty rice cooker and let the Black Garlic Maillard Process roll on. Over time and practice, the Maillard Reaction in Black Garlic will make you the neighbor they adore, not avoid, even if your kitchen smells a bit savory for a few weeks.
Step-by-Step Guide to the Black Garlic Maillard Process
Making black garlic at home is much easier than you might think. Since high-quality store-bought options can get expensive or just plain hard to find, a DIY approach is your ticket to unlocking all that savory, jammy goodness.
Home Technique for the Maillard Reaction In Black Garlic
First up, you need whole heads of fresh, firm garlic. Give them a quick wipe down so there’s no visible soil or loose skin, but keep the cloves nice and snug in their papery jackets. Set your garlic inside a rice cooker, slow cooker, or even a food fermenter, making sure it’s set to “keep warm.” That gentler, consistent low heat gives the Black Garlic Maillard Reaction plenty of time to work its magic, coaxing all the subtle sweetness and deep umami out of the humble bulb.
Space things so the garlic isn’t crowded. Wrap each head loosely in foil. If you’d rather not use foil, a single layer in a lidded vessel also keeps heat and moisture circulating. Now, seal them inside and get comfy: let your appliances do their thing for three to four weeks. No peeking, which lets the temperature and humidity ramp up the Maillard Reaction in Black Garlic for max flavor and that telltale, jet-black color.
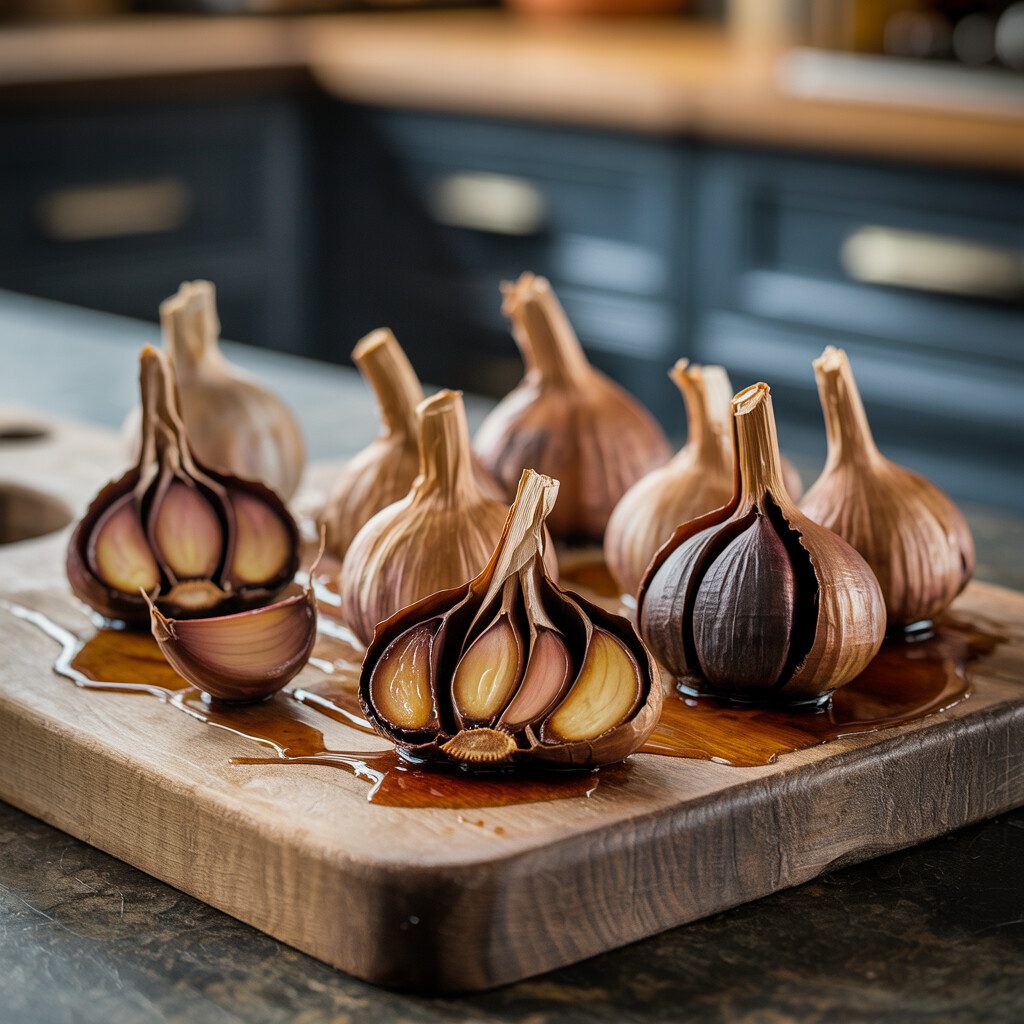
Every few days, quickly check for any weird smells just to spot any heads that might have gone bad. You’ll know your garlic is done when the cloves turn shiny black, go soft, and taste almost like Balsamic caramel with a hint of aged garlic.
Here’s an at-a-glance comparison of popular home appliances for kickstarting the Black Garlic Maillard Reaction:
When you’re done, cool the heads on a rack before using or storing. This slow aging lets the Black Garlic Maillard Reaction really shine, bringing you a home batch that’s rich, mellow, and ready to amp up your next meal. If you want to dive further into all the nitty-gritty preparations, this home cook’s guide will be your next favorite read.
Optimal Conditions for the Maillard Reaction in Black Garlic
Perfecting the Black Garlic Maillard Reaction takes some patience and just the right setting. In my little kitchen adventure, I learned fast that black garlic is all about temperature and humidity. To get the best results, you need a slow and steady warmth, a bit like a fall afternoon, not a hot summer blast.
Creating Conditions for the Perfect Maillard Reaction in Black Garlic
Black garlic needs a low, consistent heat, usually around 140 to 170 degrees Fahrenheit. Lower and you end up waiting forever. Higher and you may fry the stuff instead of gently transforming it. Add a cropped towel around your setup or pop a bit of water in a small bowl inside the rice cooker, slow cooker, or fermentation box. That helps keep the garlic humid so the Black Garlic Maillard Reaction can push through every clove.
Don’t rush the process or you risk ending up with shriveled, hard nuggets. The true Maillard reaction in black garlic loves time, heat, and just enough moisture to keep things moving along. Dry air is no good: garlic needs to sweat a little if you want it mellow, sweet, and sticky.
It also pays to pack your garlic heads loosely. Airflow matters. Give each head a little space, then seal the cooker but don’t suffocate the bulbs. A little air movement lets the sugars caramelize—or at least, helps them become magical. I’m always surprised by the patience it takes to get that deep jammy flavor but the reward at the end is totally worth it. The right setting means cloves are soft rather than crunchy and the flavor hits all the right notes.
In some climates, you might need to nudge the humidity by checking your setup every few days. In drier interiors, tune in more water or seal lids a hair tighter. Trust your nose: if you smell that grape-balsamic aroma, you’re on the money.
With the right heat and a cushion of humidity, you’ll kick off the Black Garlic Maillard Process. Give it three weeks and let science work its sweet, dark magic. Loving black garlic at home lets you forget about hunting for pricey products at specialty stores—your own batch might even top the stuff you find on the shelves.
Common Challenges in the Black Garlic Maillard Process and How to Overcome Them
With black garlic, most troubles boil down to a few key places: moisture, too much heat, low humidity, nose-pinching smells, or just waiting past the point of patience. If your batch is sticky inside or dry as toast, you are not alone. Plenty of home cooks accidentally nail shoestring garlic texture on their first (or second) try. Play around with your tools. Tweak what your rice cooker or fermentation box can do, and you will soon figure out if the temperature is running too hot or if the climate in your kitchen is messing with air flow. The Black Garlic Maillard Reaction relies on steamy, consistent humidity and a Goldilocks range for warmth: not too much, not too little. If your bulbs dry out, try double-wrapping them next time in foil, or even placing a cup of water alongside them in the unit.
Navigating the Black Garlic Maillard Reaction
Atmosphere matters—which is science talk for humidity is not just for your skin. If your bulbs get pebbly or hard in spots, do not stress; this happens if the sides in your rice cooker or culturing box run hotter. For that, check sealing tightness. It holds moisture close, helping that slow and beautiful Black Garlic Maillard Process finish every clove to squishy perfection. Sharp odors that sneak into your kitchen are another sign something is off. If the whole house smells like hot dog water, your black garlic palace needs venting. Place your contraption outside or in a rugged garage for pinch-free living. Want an extra safety net? Buy a second-hand “black garlic” unit, so you can let the Black Garlic Maillard Reaction thrive minus weekday dinner interruptions.
The main thing is, be willing to watch and react. Take notes on every run, adjust heat or location, and do not trip over a surprise sour smell. Every little tweak teaches you how temperature, time, and airtight wrapping all call for balance in the Maillard Reaction in Black Garlic. Before long, you will beat those classic growing pains and indulge in the weirdest, squishiest, coin-bright caramel bulbs you never could have bought at the store.
Storing and Using Your Homemade Black Garlic
Once you have successfully guided ordinary garlic through the Black Garlic Maillard Reaction, you have a fridge treasure worth protecting. Your black garlic will be sweet, velvety, and totally different from what you started with. But it won’t last forever sitting on the counter. Let’s talk about the best ways to store and use this little black gold.
Keep your black garlic bulbs or peeled cloves in a clean, airtight container. If you like convenience, already-peeled thirds or halves are especially handy. Pop them right in the refrigerator if you want to slow down any further changes from the Black Garlic Maillard Reaction, because the cool keeps their flavor steady. Left at room temp, they really do keep developing and fermenting, so you may see puddling syrups or softening after a few weeks. If you need long-term storage, freeze them—they’ll keep for months, and defrost in ten minutes on the counter.
Black Garlic Maillard Process Uses: How to Make Meals Shine
Along with snacking (yes, they’re sweet and sticky, some folks eat them straight), here are a few favorite ways to make the most of black garlic’s magic in your meals. Toss a few mashed cloves with olive oil for a powerful spread on toast or pizza. Fold some into mayo, Greek yogurt, or cream cheese for a nutty savory dip that fixes up chips or spoonbites of carrots. Buried whole in the crust of a chicken pot pie or focaccia, black garlic suddenly emerges like a hidden treat.
Blended directly into sauces or vinaigrettes, black garlic can balance out tangy tomatoes and sweet bell peppers, while giving lifted depth (and a visual intrigue) to ordinary Caesar, blue cheese, or ranch. You can even create black garlic butter to melt onto potatoes or burger patties. It only gets better as it rests in the fridge—like good hot sauce, a little mature age lets its tang mellow and brighten.
A tiny step back: Next time you tackle the Black Garlic Maillard Reaction, double up. It’s addictive, and even freezing a hunk does nothing to dampen your learning curve with new flavors. As you learn how to get the Maillard Reaction Black Garlic taste just right, your kitchen will never settle for basic bulbs again.
Exploring Culinary Applications of Black Garlic
Get ready to upgrade just about anything in your fridge or pantry, because black garlic’s deep flavor is truly the secret all-star your dishes have been waiting for. Thanks to the Black Garlic Maillard Reaction, it transforms basic meals into something memorable. Wondering where to start? Let’s look at a few fun, easy ways to kickstart your kitchen creativity.
Sweet-Savory Combos and Umami Bombs
One of my favorite snacks is simply spreading black garlic cloves onto toasted bread with a little olive oil, a squeeze of lemon, and a dash of flakey salt. Let the rich sweetness shine by folding mashed black garlic into mashed potatoes or cauliflower mash. In salad dressings, whisk black garlic puree into vinaigrettes for hello-there boldness or mix into egg salad for a sandwich that packs a serious wow factor.
Craving adventure? Toss slices or chopped cloves right into your stir-fry near the end of cooking. The Maillard Reaction in black garlic gives a mysterious sweetness to steamed veggies and roasted chicken or invigorates marinade for tofu, pork, or salmon. Saving for later? Freeze that magic paste by the tablespoon, then cheat your way to flavor-packed soups or sauces whenever a craving strikes.
Of course, sauces and condiments dial the fun up to eleven. I whisk black garlic with regular mayo and a squirt of Dijon mustard, then spoon onto burgers or grilled veggies for a next-level creamy spread. Throw pureed black garlic straight into dips, cream cheese for your next sandwich wrap, or into a soy-sesame glaze for wings and baked tofu. Don’t overlook the sweet side, either, as these toffee-like cloves add drama to caramel, ice cream, fudge brownies, or even pancakes. If you love making aioli, dressings, or chimichurri, but want your healthiest recipes supercharged with supernatural sweetness, give the Maillard Reaction Black Garlic from your kitchen a try.
Now that you are a black garlic wizard, friends might beg you for a secret stash or let you show off at the next get-together. After tasting how the Black Garlic Maillard Reaction brings out deep caramel notes, you will see why homemade black garlic is so versatile. If you want to learn more about the differences between black garlic and regular garlic, we have that info too. No matter what you make, it will go beyond impressive. Who knew culinary happiness and invention lived in these tiny, dark cloves?
Conclusion
As you’ve seen in our step-by-step guide to the Black Garlic Maillard Process, sourcing this unique ingredient no longer depends on specialty stores or perfect timing. You now have all the details to manage each stage of the Black Garlic Maillard Reaction at home. Plus, a quick review of its diverse applications should have your creative wheels turning toward new dishes.
Homemade Black Garlic lets your curiosity shine, even if your grocery options are limited. Homemade black garlic ensures a new flavor adventure in every batch, whether you’re layering it into marinades, adding drama to pizza, or just sneaking slices onto simple avocado toast. You’ve done the work, now let every sweet, tangy bite of your own Black Garlic add a new depth to your favorite foods. Take a leap into its culinary versatility today and let it inspire flavor-forward traditions in your kitchen.
FAQ
How does the Maillard Reaction create black garlic’s color and flavor?
The Black Garlic Maillard Reaction creates deep color and rich flavor through a clever bit of kitchen chemistry. When you heat garlic slowly at low temperatures over several weeks, amino acids and sugars in each clove react in the so-called Maillard Reaction Black Garlic is famous for. This process transforms raw garlic into something sweet, savory, and dark, with subtle balsamic and umami notes. Picture biting into a gumdrop with hints of molasses and tamarind – it is mysterious and full of possibilities. If you have ever wondered why black garlic tastes nothing like the pungent stuff you chop for spaghetti night, thank this slow transformation. The Maillard Reaction in Black Garlic gives your homemade batch layers of flavor that work in everything from ramen to fancy aioli.
What equipment do I need for the Black Garlic Maillard Reaction at home?
To turn fresh garlic into black garlic, you need equipment that keeps a steady, low heat and helps contain the odor. An old rice cooker or a basic slow cooker works great since they hover around 140-170 degrees Fahrenheit and let you keep the batch going for weeks without bugs or mess. (Don’t worry, the Maillard Reaction Black Garlic creates smells wicked at first, but fans swear it is as heady as a garlic festival after a few batches.) I started by wrapping bulbs in foil to keep the mess down, but now I like using a dedicated slow cooker lined with parchment. However you do it, letting the Maillard Reaction in Black Garlic run its course gets you that sweet, sticky transformation at home.
How long does the Black Garlic Maillard Reaction take to finish?
When you make black garlic, the Maillard Reaction takes patience. Most home batches take from three to five weeks, depending on your chosen temperature, the humidity of your setup, and the age and type of garlic. If you cut a bulb open after a week, the cloves will be softer but still tan and a little harsh. Give the Black Garlic Maillard Process time, and that color deepens to brown, then black. Around day 30, look for syrupy, licorice-colored cloves. I usually start sampling pieces in week four – you want that perfect crossover of deep, floral sweetness and yielding bite. If you started with juicy garlic and steady low heat, the Maillard Reaction in Black Garlic pays off, every time.
What are the ideal temperature and humidity for making black garlic at home?
The Black Garlic Maillard Reaction works best at a low temperature (about 140-170 degrees Fahrenheit prevents burning or sprouting) with moderate humidity (to keep the garlic from drying out). At home, you can manage this by using your rice cooker or slow cooker’s warming function and wrapping garlic bulbs in foil to keep enough moisture inside. I always experiment a bit at first; depending on your climate, you might put a damp paper towel under the lid or check the bulbs weekly in the winter (when the house air is driest). Maillard Reaction Black Garlic Explanation? Too hot and the cloves burn or shrivel. Not enough dampness, and you get dried-out jerky instead of that sweet, sticky black gold.
Why does black garlic sometimes turn out hard instead of soft?
The Black Garlic Maillard Process is a bit touchy, and humidity is the main tricky part. If you cook the garlic too hot or do not make a moist little tent with foil, that Maillard Reaction in Black Garlic will zap out its juice, turning sticky cloves into sad, crumbly lumps. When I was first learning, I nearly gave up after a few rock-hard batches, but then I dialed down my cooker’s warming temp, tucked a little wad filled with water under my foil tent, and made sure the batch stayed swallowed in humidity for an entire month. Now, with that patience plus moisture in the air, the Black Garlic Maillard Reaction softens cloves so they practically spoon out into yogurt – sweet, funky, and lush every time.
How should I store black garlic after the Maillard Reaction finishes?
Once the Black Garlic Maillard Process wraps up, store your radiant, soft samples in a dry, airtight container in the fridge. There is truly nothing scarier than pulling a batch after a month straight of slow-cooking, only to find fuzzy mold. Maybe your bulbs are juicy, which makes for sticky magic, but it also means they can get slimy in any leftover humidity. I keep my batch in the fridge and toss cloves into dressings or on toast since the Maillard Reaction Black Garlic Explanation makes cleaning and storage simple. Wiping the bulbs dry and letting them cool before you seal their fate as a fridge staple preserves that fresh flavor.
What are the best ways to use black garlic at home?
After the Black Garlic Maillard Reaction gives you those sweet, chewy cloves, let your imagination run. Snip sticky ribbons on soft-ripened cheese. Fold it into mayo and swirl in slow-roasted beef sandwiches. Smash it with lemon for a steak marinade or blend it into vinaigrette. Hand on heart: I once made black garlic butter and hid it under the mashed Yukon golds at Thanksgiving. No one guessed what set the potatoes off, but forks flew. When you let your own batch of Maillard Reaction in Black Garlic inspire your next dish, anything—soups, noodles, salads—transforms from good to so good you will wonder, where was this black garlic all my life?