

Black Garlic Harvesting: A Home Guide
Can you imagine your kitchen filling with hints of caramel, balsamic, and roasted nuts all at once? That’s just a taste of what happens during black garlic harvesting. Believe it or not, about 4,000 tons of black garlic get produced around the world every year, and most folks in the United States have never tasted real, home-grown cloves. It started in our house last weekend as a curiosity, then I watched magic unfold for myself.
You’ll tap into a nifty bit of kitchen chemistry, but it’s easier than you think. Start with a few garlic bulbs, tweak the conditions, and after weeks of patience, you taste a sweet, savory treat instead of the sharp bite of a fresh bulb. If you want to control everything—flavor, quality, source—doing it at home puts you in charge of every step. This guide covers the full journey, from black garlic harvesting to the last bite, so you get rich, reliable results each time. Ready to dive in?
Understanding Black Garlic and Its Culinary Appeal
No vampires allowed on this page. Any garlic lover can tell you, black garlic puts white garlic to shame with its soft, sweet, tangy flavor and countless uses in the kitchen. But getting your hands on top-quality black garlic in the United States is harder than it should be. If you’re feeling let down by online garlic shopping or random gourmet store purchases, learning the basics of Black Garlic Harvesting might be your best bet.
It doesn’t show up on cooking shows as often as it should, but black garlic is garlic that has been “aged” under stacked, low-and-slow heat and humidity for weeks at a time. This process is basically a carefully controlled Maillard reaction, turning the naturally spicy, sulfurous bulbs deep, soft, earthy, and sweet-tart with dried fruit notes and light caramelized smoke. You don’t need special seeds or a new garden bed for Black Garlic Harvesting, since almost any hardneck or softneck head will work with the right cure and careful prep. Farmers in the United States still prefer hand-selecting the best bulbs at or soon after their garlic harvest, so any home cook, hobbyist, or seasoned veteran should do the same (don’t worry, juicy detail on this in the next sections).
You’d never guess the work it takes, but the reward more than justifies it.
Black Garlic: Culinary All-Star, Aromatic Powerhouse
Friends and family who taste home-cured black garlic usually have a huge “aha!” moment. I’ll never forget blasting caramel aromas straight at the dog while opening my oven much too early, impatiently waiting for garlic blackening magic and realizing it would not burn.
The truly time-consuming and gentle Maillard reaction, already underway in your home, fills the kitchen with a warmth you never expected from store-bought cloves. Try folding silky cloves into miso or mushroom pasta for intense umami; toss a whole head over roast chicken (skin smeared with miso paste and truffle honey) with crisp focaccia, and some black garlic magic lights up taste buds to American cities far outside any food magazine’s range. Restaurant chefs and home cooks alike all agree that properly aged black garlic can lift a simple dish into a totally different category of aromatic umami, color, sweetness, and subtle smokiness. When the quality is top-notch, always show it off—in spicy pork burgers, aiolis, classic beef empanadas, even scrambled eggs. Your imagination can run wild for Black Garlic Harvesting.
Even though black garlic looks, well, “burnt,” it’s actually very much alive and healthy. Each clove is packed with amino acid antioxidants, natural umami, gentle tartness, and signature dark-clean scent. The price for this black transformation remains your one trade-off—the process takes time, 2-6 weeks, and a working knowledge of your home oven’s tolerance for precision low-in-low, with small ten-degree increments marking start-to-finish switches in the Black Garlic Harvesting routine.
In the next sections, we’ll go over harvest time tips, suggest kitchen equipment for curing, share a practical workflow, point out potential pitfalls, and help each eager home cook bring out the very best of what grows in our local United States gardens and groceries. This small-batch Black Garlic Harvesting method sets you up for sauces, snacks, and every special dinner for years to come.
Selecting the Right Garlic for Black Garlic Harvesting
Scrolling through the produce aisle or browsing your local farmer’s market, you might ask yourself: Does it matter what garlic bulbs you grab for Black Garlic Harvesting? The short answer: Absolutely! Picking the right garlic for this flavor transformation boosts your results. I’ve been down the cheap garlic road before; my mistake really became obvious around week three when the taste just didn’t prosper. Let’s not make the same error twice.
Finding the Best Garlic for Black Garlic Production
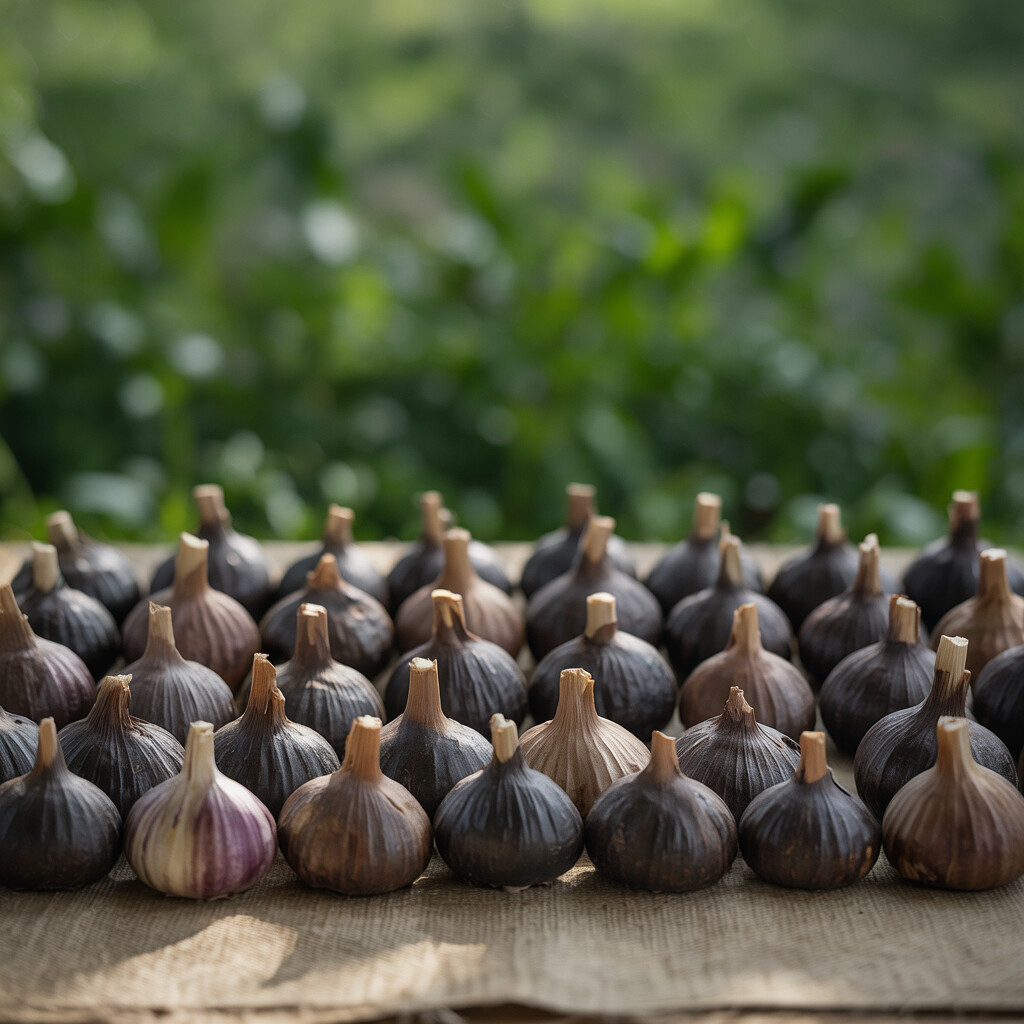
First, let’s focus on fresh, firm bulbs. Say no to anything soft, moldy, or with sprouts peeking out. Sprouted garlic doesn’t ruin the batch, but the taste nods toward bitter instead of deep and sweet.
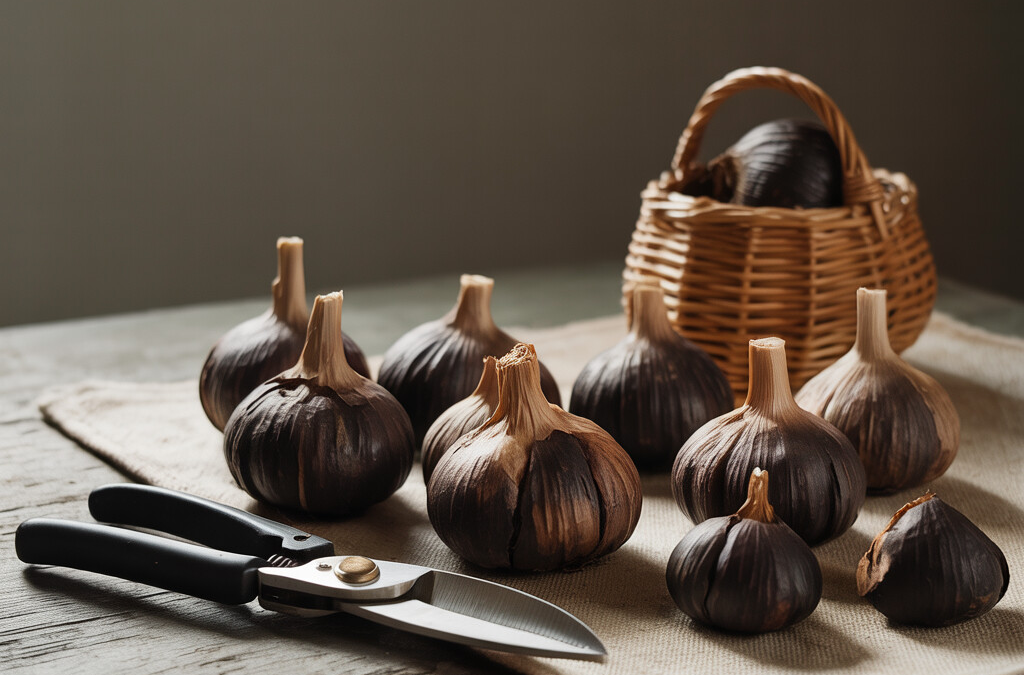
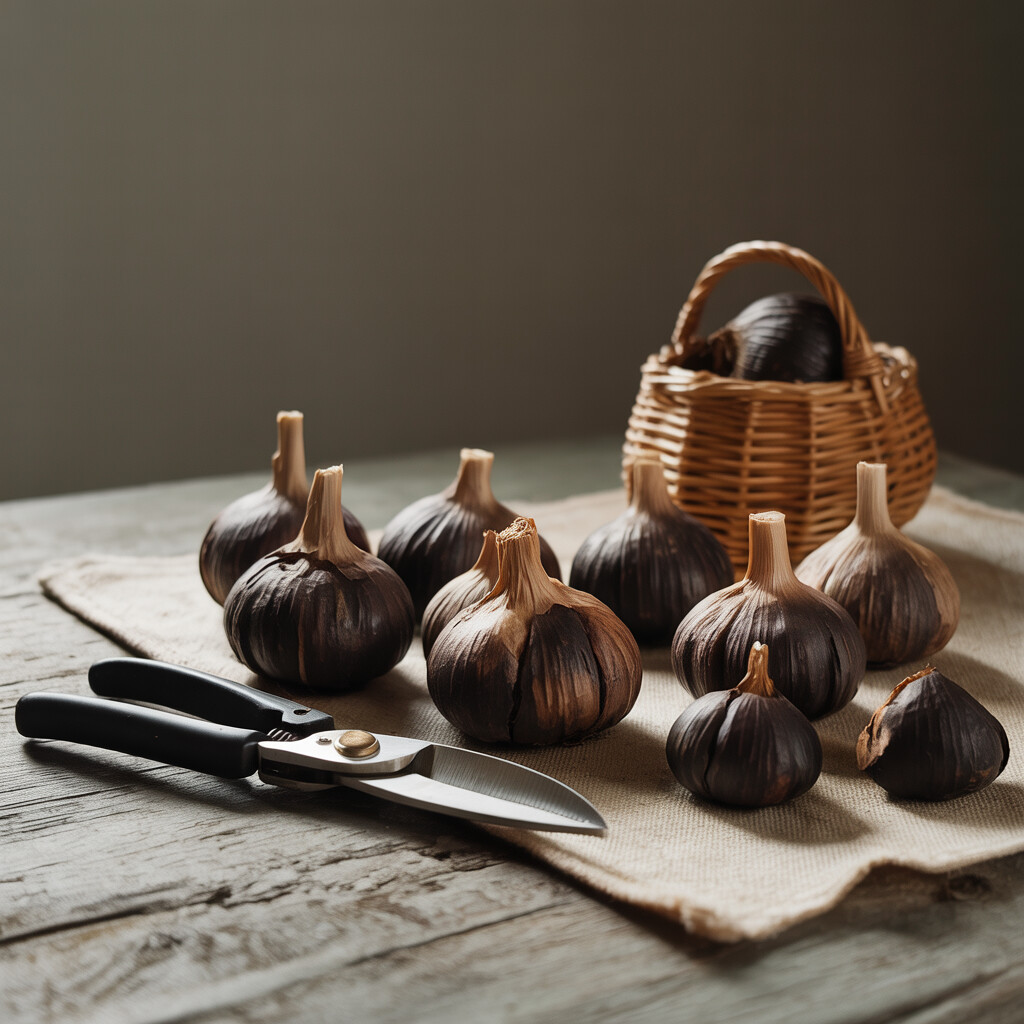
Big bulbs are best for Harvesting Black Garlic. Their larger cloves keep a moister mouthfeel, and every bite delivers more satisfying flavor. Choose bulbs with tight papery skins. If it feels flaky enough to make confetti, leave it.
Most supermarket garlic in the US is the softneck variety—what you usually find in a plastic clamshell. It is reliable and simple for Black Garlic Harvesting at home. Hardneck garlic, while a bit trickier to find, matures into spicier, more complex black garlic, which is my personal favorite for anything special like a birthday meal or ignored leftovers I want to revive. Both types work because it’s how you treat them over the long, slow weeks that delivers that iconic tang and shine.
Want to give your black garlic that chef-y, specialty shop feel? Go for organic bulbs. Organic usually means fewer chemicals and a fresher start, making them friendlier for those of us who care about health.
If finding quality bulbs proves a hassle—no shade, some stores just never keep the good stuff—seek out farmers markets or order from a local grower. Word to the wise: Avoid anything pre-peeled or chopped. These don’t transform the way a whole bulb does, and you’ll miss both the texture and honeyed sweetness you’re after with Black Garlic Harvesting.
Following these steps guarantees your next Black Garlic Harvesting effort kicks off in the right direction. I’ve tried shortcuts before, from whatever stragglers I could find in the crisper drawer, and trust me: That never works. Selecting the best garlic up front is worth it, I promise.
Preparing Garlic Bulbs for the Black Garlic Process
Garlic bulbs play the starring role in Black Garlic Harvesting, so how you prep them makes all the difference in the final batch. Think of it like selecting good produce for a family meal (and yes, I check every apple and potato too): The better the garlic, the sweeter the prize at the end.
Your Black Garlic Prep Checklist
Don’t wash, peel, or separate the cloves. Each bulb needs its papery shield to lock in moisture and keep the funk out for the best black garlic fermentation. Wipe the garlic with a dry cloth if needed: get rid of any extra dirt, but try not to tear the outer skin. From there, trim the roots with a sharp, thin knife. A close haircut is all you want—snip the stringy roots right up to the base but keep the bottom intact. Cutting into the base is like slicing through your tire with each turn; the bulb will fall apart as soon as the real work starts. Black Garlic Harvesting always begins with intact garlic, no exceptions.
If you’re cooking for a crowd or have loads of fresh garlic, you can bundle a month’s worth of bulbs at once. But when you’re limited to whatever your local grocer has to offer, even one nice head at a time is progress. If your area only has pre-separated cloves or peeled garlic in-store, use the bulb option for better Black Garlic harvesting results, or wait until you can get your hands on a whole bulb.
Here’s a quick glance at the garlic prep basics:
Skipping these steps creates headaches. When bulbs are cleaned, trimmed, and grouped by similar size, you’re far more likely to get a gorgeous unified color with a tender, jammy bite. The reward is all in the final Black Garlic Harvesting outcome, with sweet, umami bites in pasta, steak, or cheese. Give your garlic the TLC it needs and start black garlic off right from the get-go.
Choosing the Ideal Equipment for Black Garlic Harvesting at Home
When you start Black Garlic Harvesting at home, you need simple tools. Whether you dream big or just want to try a few bulbs, you have some affordable options. You do not need a science degree or a yard full of weird gadgets—I promise. What you want is an easy and steady way to build up heat and hold in moisture. Pretty simple, right?
Essential Tools for Home Black Garlic Harvest
Most garlic fans reaching out for tips on Harvesting Black Garlic ask about fancy gear. There is no shame in using what you have. Many home cooks use a rice cooker set to “keep warm.” You want a low, moist, steam-friendly heat; nothing too hot, or you may cook your prized garlic. If you own a slow cooker or stand-alone bread proofer, those are also good picks, since they keep things light and cozy (think tropical jungle, not summer campfire).
Before you plug in your slow cooker, check that it can run for at least 20 days without cycling off. Some home models annoyingly “sleep” after 12-24 hours, and that’s not great for Black Garlic Harvesting, since you need to keep up the warm air for two to four weeks.
Rice cookers truly shine here. If you switch on the “keep warm” option and ignore the “cook” setting, you hit the sweet spot. A friend once made 52 bulbs in their $24 mini-rice cooker, and the house soon held an earthy sweetness in the air.
Slow cookers let you pack in a hefty yield, but check if the “warm” feature stays on. If your device likes to nap, plug it in next to where you do dishes so you can reset if needed. Proofer boxes hold big batches at ideal low heat, since they warm big banks of dough in small bakery kitchens all the time.
One pro tip I wish I’d learned years sooner: If your model sends garlic smells flying, double-wrap the lid with foil, then cover with clingwrap, and check hourly the first few days for excess moisture or wild leaks. If too much water runs down, prop the lid partly open for a few hours, or lay a dry towel across the gap. Tight foil and vented plastic bowl-covers (or those lazyman silicone restaurant covers you sometimes see chefs use) put a hard stop on smell, at least for the first week (the aromas mellow soon after as sugar grows).
Starting Black Garlic Harvest at home with the right gear turns plain white bulbs into a sweet, rich ingredient you cannot buy at the store. From the hum of a rice cooker by your fridge to airtight containters, each tool plays a part. Success is less about fancy pots—even your old rice cooker, plus foil, will work just fine if you keep bulb layers thin and check daily for leaks or power cuts. If you taste garlic deep with umami and layered with hints of balsamic, you aced the timing for Black Garlic Harvest.
Step-by-Step Guide to Black Garlic Harvesting
Step-by-step, making black garlic at home is simple as long as you pay attention to some fine details. Let’s walk through how to pull off a Black Garlic Harvesting in your own kitchen without turning your whole house into a garlic wonderland.
The best part about this process is that it uses easy-to-find tools. Set your garlic bulbs (with the skin still on) in your dedicated black garlic maker, homemade rice cooker, or any slow cooker that can hold a steady, warm temperature. Tuck each bulb inside a layer of clean parchment for good measure, but keep the lid loose to help moisture escape. Gear check: the whole idea here is setting up a gentle, humid warmth – anywhere between 135°F and 170°F is the sweet spot.
Stepwise Black Garlic Harvest Instructions
Leave it low and slow: let the bulbs cook for three to four weeks without interruption. Every garlic fan I’ve met hits this first hurdle – it’s tempting to peek and sniff, but no touchy. Disturbing the steady, sticky heat affects the entire Black Garlic Harvesting journey. Patience is key! The sugars need time to mellow, and after about two weeks, the skins will start to brown and the inside cloves will turn silken and black. You can actually smell when things are happening – your kitchen fills with an earthy, tangy scent and a hint of aged balsamic.
The path to success isn’t all autopilot. Quickly check for too much humidity by making sure you don’t ever see actual dampness. A dry paper towel in the cooker will soak up excess, and a swap of the towel every seven days keeps things balanced. If things get crusty on the pan or bottom tray, it means there’s not enough moisture; slip a slightly damp towel alongside the parchment packs, but be careful not to overdo it.
You’ll know the Black Garlic Harvesting phase is finished when you press on a clove and find it jelly-like and soft as a prune. If they hold onto a pale tan color or any ordinary crunch, seal them back up and keep going for another week.
Take it from me, if this is your first batch, jot your dates on a calendar. Watching how timing and humidity play out in your house gives you the info needed to perfect your process batch after batch. Once you’ve bagged your black garlic, you’ll never want to go back to store-bought. It’s like currying favor with your future self. Sliced, chopped, or even eaten by hand, fresh black garlic is ready for the next step: creative cooking and preserving.
Monitoring the Black Garlic Harvesting Time for Optimal Flavor
Patience is the name of the game when it comes to Black Garlic Harvesting. The right time is what sets deep, rich, umami-packed bulbs apart from pale, unimpressive misses. So, how do you know when your homemade black garlic is ready? The trick is keeping a close eye on several things, like the color, texture, and aroma. The journey from raw bulb to flavor bomb is slow, but timing is everything.
Key Tips for Timing Your Black Garlic Harvest
First, get ready to play the long game. Unlike regular garlic, black garlic needs to hang out at a low temperature for several weeks. Most folks set their rice cooker or fermentation box to about 140-170°F and let it do its thing for three to four weeks. Some bulbs can take a bit longer if they are larger or hold moisture, so don’t stress if results vary.
After two weeks, resist poking open every bulb. When I was new to this, I kept opening mine too early and got sticky, brownish cloves that were halfway there but not fully done. Your job for the first couple of weeks is to maintain the temperature and humidity, making sure bulbs don’t dry out or cook too quickly. Don’t rush it. Check them (very carefully, or you release essential heat) only after three weeks.
How do you actually know it’s Black Garlic Harvesting time? Peel the outer skin and check for a uniform, deep black color. The cloves should be tender and a bit sticky, similar to a soft caramel (yet not as sweet). Smell is another big tip-off. If you get a sweet-tangy note, almost like balsamic vinegar but warm, you’re likely there.
Give the garlic another week if it’s not quite there. Keep in mind that humidity and temperature shifts (from opening too often) mess with final flavor. Trust your senses and a little gut instinct too. It’s kind of like waiting for backyard tomatoes: every minute longer in the right conditions delivers bigger rewards.
Get a batch going, monitor it, and jot notes in a little kitchen journal—what worked or didn’t—so every Black Garlic Harvesting gets better. Once you’re confident with timing, you’ll have a supply of flavor-packed gold to spark your recipes all year. No more running around looking for pricey jars at overpriced stores.
Storing and Preserving Your Home-Harvested Black Garlic
Once you’ve mastered Black Garlic Harvesting, you face the next challenge: keeping those beautiful, dark cloves just right for when inspiration strikes. If you’ve ever struggled to find fresh, aromatic black garlic at your local store, storing your homemade stash is almost magical. A simple kitchen tweak now lets you say goodbye to flavorless cloves at the bottom of the grocery shelf.
Easy Ways to Store Black Garlic for Long-Lasting Flavor
First up, a quick sniff test: your freshly harvested black garlic should have a mild, sweet aroma—not a hint of mold or sulfur. Most home cooks find that sealed glass jars work wonders for keeping cloves soft and sweet. Mason jars, leftover pasta sauce jars, or even special air-tight containers do the trick. Just keep the jar out of direct sunlight and in a cool area. Skip the fridge unless you’re in a super-humid spot—cool and dry wins every time for regular Black Garlic Harvesting storage. If you know you’ll use your garlic over many months, zip-top freezer bags (with the air squeezed out) are great. Just flatten the cloves a little for easy access, then pop them in the freezer. It’s a quick trip back to room temp when you’re ready to cook.
Plastic containers or food-safe bins can be helpful if you’ve done a massive Black Garlic Harvesting (looking at you, backyard gardeners with garlic overload). If you go this route, add a paper towel to absorb stray moisture. Some chefs swear by vacuum sealing, though I find a simple jar is usually all a home kitchen needs. Wait to peel your black garlic cloves until you’re ready to use them. It turns out the papery skin acts as a natural seal.
Not seeing all your hard work go to waste is an instant mood boost. Treat these cloves gently. With a little effort, your harvest can provide rich flavor for meals for months. Proper storage means delicious results, but it also rescues you from store-bought black garlic that has lost most of its punch by the time you find it. So go ahead and give yourself a little wink right now—the secret ingredient in your pantry is there whenever you want it.
Creative Culinary Uses for Your Black Garlic Harvest
That thrill the first time you crack open your own black garlic bulb feels almost like winning the food lottery. The real fun starts when you look at those earthy, dark cloves and think, “What in the world am I actually supposed to do with this gem?” That’s where the door flies open for creative kitchen ideas. Homemade black garlic, especially after nurturing it through the entire Black Garlic Harvesting process, turns into your secret cooking magic.
After investing weeks nurturing your garlic bulbs, it feels only fair that they dazzle on your table. Imagine the payoff drizzle earthy black garlic onto grilled veggies, fold it into pasta, or mash it into butter for fresh bread. The complex sweet-sour flavors play well in dressings, sauces, or dips like hummus. I smear it on steak, toss it in mashed potatoes, and even blend a few soft cloves into a killer aioli. The sky’s the limit really, since homemade black garlic treats you to fresh, punchy flavors without preservatives. Your hands-off investment comes full circle on everything from roasted chicken to pizza, so go wild and don’t be shy with recipes.
Creative Black Garlic Applications That Go Beyond Roasted Garlic
Your reward after the Black Garlic Harvesting time wraps up? Convenience. I always keep a jar in the fridge and reach for a few cloves when a dish needs a grown-up umami flavor boost. Here are a few favorite ways to put your garlic harvest to work:
- Blend into vinaigrette for amazing salads. Just a couple of cloves makes a tangy black garlic-mustard vinaigrette I swear by for kale Caesar and roasted Brussels sprouts.
- Upgrade your butter. Mash black garlic into softened butter and toss on hot pasta or tuck under chicken skin before roasting.
- Sneak it into breakfast. Spread on avocado toast, or toss some slivers into scrambled eggs; even humble grits go fancy.
- Brighten a burger. I roll black garlic into burger patties with fresh herbs, or mix a little into mayo so each bite pops.
I get giddy watching guests bite into dishes for the first time, then try to place that haunting flavor. If Black Garlic Harvesting feels intimidating, jump in; kitchen magic is what awaits. Those sweet-spiced, earthy flavor bombs make it all worth it.
Troubleshooting Common Issues in Black Garlic Harvesting
I am guessing you have opened your rice cooker or slow cooker, all dreamy-eyed, ready to see some sweet, inky black garlic… then there it is. Maybe a sticky mess. Maybe a batch that looks right but tastes… not quite. Relax. Black Garlic Harvesting is not always smooth sailing, but it is so worth getting right. So, let us solve the most common home black garlic hiccups together.
Black Garlic Production Problems and Easy Fixes
First up, dryness. If you uncover hard, shriveled bulbs, chances are you had too much airflow. Keep the bulbs in a closed container, with just a slight gap so moisture can escape, but not too fast.
Now, the opposite problem: sticky or soggy results with a “garlicky” kick instead of a gentle molasses sweetness. This often happens if you got ants-in-your-pants eager and cut Black Garlic Harvesting Time short or used a temp way over the sweet spot. Turn the heat down to about 140-170°F, testing with a thermometer if you can, and ride out the proper Timing For Black Garlic Harvest. Sometimes this takes a week longer than you expect, but patience pays off with flavor fireworks.
Misery moment: You open the container and get a noseful of spoiled, sour funk instead of caramelly good stuff. Mold happens, especially in humid climates. Clean every tray with boiling water before use, pat bulbs dry before starting, and give them room: crowding raises mold risk.
Got a batch that just tastes… weird? Double-check you used firm, fresh heads of garlic (avoid any with sprouting green stuff). Soft or very fresh (slightly damp) garlic never yields that roasted-sweet result.
The good news? Once you nail your home setup and your “ideal” Black Garlic Harvesting tracking system, your odds of snagging world-class results grow with each batch. No matter what, do not toss failed experiments. If bulbs are still safe and not slimy, puree them into a marinade for ribs or toss them back in for a second round.
You are running a farm-for-one with limited access to specialty ingredients, and you still managed a flavor feat most home cooks dream about. Trust your senses. With practice, you will turn humble bulbs into decadent black garlic.
Conclusion
You now have all the know-how to begin Black Garlic Harvesting at home, from selecting just the right garlic bulbs to perfecting the timing for black garlic harvest that brings out the best flavors. It’s clear that high quality black garlic can be tough to find, but you can create your own delicious supply with just a bit of patience and some simple prep. Not only does homemade black garlic taste fresher, it gives you a whole new ingredient to use in inspiring ways.
Whether you tap back into our tips for storing your black garlic or jump right to your next culinary experiment, you’re now part of a movement to make life in the kitchen a little more creative and a lot more flavorful. Black garlic truly has the power to elevate your favorite dishes with new layers of taste. Celebrate your unique harvest by introducing this versatile gem to your family table, your potlucks, or wherever there are hungry mouths looking for something different.
FAQ
How long does it take to harvest homemade black garlic?
If you are diving into black garlic harvesting at home, know that patience is key here. You need to let garlic bulbs slowly ferment in a controlled environment for about three to four weeks. You will know it is time to harvest black garlic when the cloves soften up and deepen to a dark hue. Take it from me: during my first attempt, I snuck a taste at only two weeks and was met with a sticky, not-quite-there texture. Letting it hit the full four weeks made all the difference, with a richer, molasses-like flavor in every clove. Remember, good things come to those who wait!
What type of garlic is best to use for black garlic?
Starting with the right variety can make your black garlic harvesting project a smashing success. Choose firm, fresh garlic bulbs that have tight, unblemished skins. Many home cooks find hardneck and softneck garlics both work well, but I usually grab whatever looks the healthiest at my farmers market or store. Size matters less than freshness. The fresher your garlic, the better tasting your homemade black garlic will be. The end result is a sweeter, tangier product that plays nice in everything from pasta to roasted veggies.
What does black garlic taste like when harvested at home?
Your homemade black garlic will reward you with a grown-up version of roasted garlic, only sweeter. After black garlic harvesting, each clove yields less of the sharp bite and more of a balsamic, date, or umami flavor. This is precisely why chefs can’t get enough of black garlic. I’ve whipped some into creamy dips or pureed a few cloves over grilled meats—each bite, in my opinion, tastes a bit magical with hints of chocolate, tamarind, and molasses.
Can I make black garlic with a rice cooker?
Rice cookers are one of the most common tools for black garlic harvesting at home. If your rice cooker can keep a “keep warm” feature going for 2 to 4 weeks, you are in luck. Wrap up the garlic or put it in a covered container to keep the smell contained, then just let the magic happen. One tip: tuck the rice cooker away in a garage, mudroom, or spare space, because the aroma can take over your kitchen after a few days! I once learned this the hard way—my family will never let me forget “garlic week.”
How do I know when black garlic is ready to harvest?
Timing your black garlic harvesting relies most on touch, sight, and scent. By the time you reach three to four weeks of slow heat, cut open a test bulb; if the inside is soft, black, and sticky like licorice, you are good to go. Squeeze it between your fingers—if it restores its shape after pressing and shines a bit, you have hit the sweet spot. Once, over-eager, I tried to speed up the process and harvest at day ten. The color had deepened but the flavor missed magic. Take your time and your patience will pay off.
What should I do if the black garlic smells burnt?
When you monitor your black garlic harvesting closely, the main aroma should be toasty and sweet. If you walk in to a smoky, acrid blast (trust me, you will know), your garlic probably cooked at too high a temperature. A great fix here is dialing back the temperature on your slow cooker, dehydrator, or fermenter by a few degrees the next round. Black garlic needs a gentle, slow-heating approach, just like a long spa treatment—not a hot tub. Patience keeps flavors savory, not smoky.
How can I store my black garlic after harvesting?
Store your black garlic bulbs in an airtight bag or jar after harvesting for store-bought freshness right at home. Stick your stash somewhere cool, dry, and away from sunlight, like a pantry or the back of your fridge. In my house, I sometimes wrap individual cloves in wax paper before tucking them in a jar. Use your batch within 6 to 12 months—although let’s be honest, you will likely find your new “secret ingredient” going faster than you think!