

Homemade Black Garlic Recipe: Easy Steps
Curious how chefs achieve that black garlic’s sweet tang you’ve seen on cooking shows or at fancy restaurants? If you love a kitchen experiment with a touch of science fiction, a Homemade Black Garlic Recipe might be your new obsession. Asians have been using black garlic for centuries, but in the US, this umami-rich treat jumped over 60 percent in popularity last year thanks to social media. Last weekend I made a fresh batch and was wowed by its candy-like aroma that filled my kitchen for days.
Making your own homemade black garlic recipe is surprisingly easy and won’t require buying a space-age appliance or any culinary superpowers. Best of all, you always know exactly what’s in your food and you can get creative with low-cost garlic bulbs or premium, local heads. If this sounds fun, stick around: you’ll get all the key steps for how to make black garlic at home. Ready to dive in?
What Is Black Garlic and Why Make It at Home?
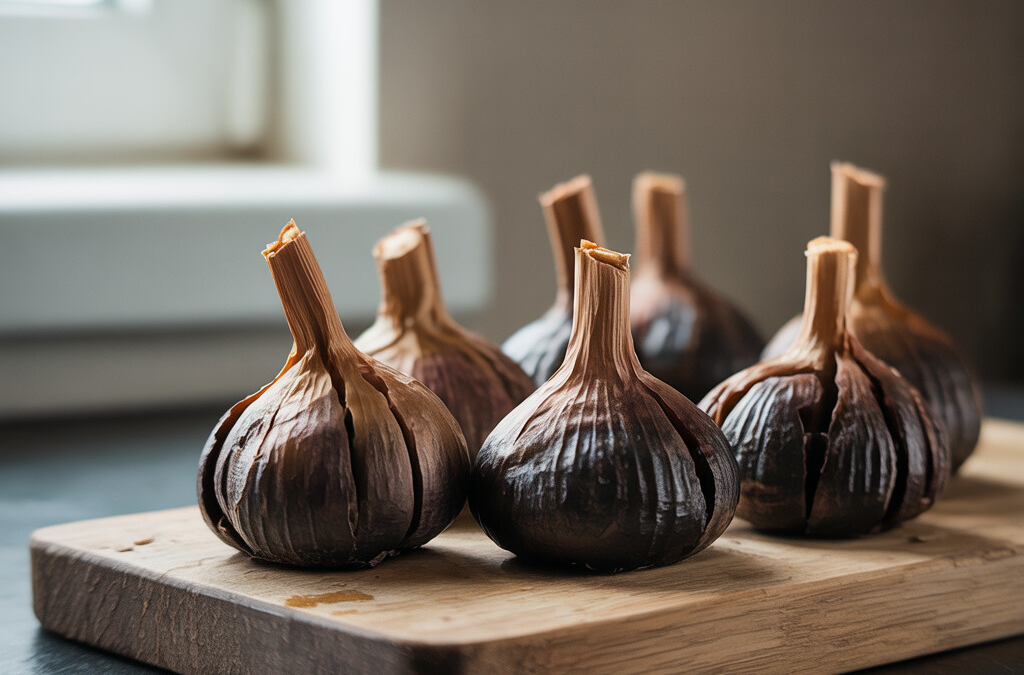
You know when you try a new ingredient and it completely changes your idea of flavor? That is exactly what happens the first time you taste black garlic. It might look a little mysterious, all dark and wrinkly, but this ingredient has a devoted fanbase for good reason. When you follow a homemade black garlic recipe, you are taking fresh garlic, adding steady warmth and gentle humidity, and giving it lots of time. You will be surprised at what happens.
What Makes Black Garlic So Special?
Black garlic starts as regular garlic bulbs, just ones we let age carefully at a low temperature. Over two to three weeks, basic garlic transforms from something sharp and pungent to something sweet and mellow, almost nutty and syrupy. If you have never powderized a mini jet of balsamic vinegar into candied fruit, you should make hilarious to see someone react when they first taste this new garlic flavor.
The real challenge? Getting your hands on good black garlic. Some grocery stores carry it, tucked among unfamiliar bags however, there can be a little sticker shock. So, when an easy black garlic recipe brings this ingredient to your own countertop, it makes sense to try it at home. The reward is a pile of savory, mysterious black garlic for using throughout the week, minus a chase across town.
A simple black garlic preparation draws a line through the trendy food world and lands you squarely in the center of flavor country. Whether you roast a bulb, slice or muddle cloves into paste, or experiment with a black garlic aioli, you grow more confident not just with garlic, term, also with your own food smarts.
Having homemade black garlic handy takes you beyond basic flavor and opens another world for everything from stir frys and salad dressings to bougie deviled eggs. Is it worth the patience? Definitely. The best part: the process itself is almost foolproof, whether this is your first bold kitchen project or you teach food science for a living.
You are curious, adventurous, and ready for black garlic to land in every stir fry and sandwich for the next couple weeks. Let us get started!
Essential Equipment for Your Homemade Black Garlic Recipe
Before I ever tried making black garlic, I pictured some sort of kitchen laboratory. Turns out, the setup for a Homemade Black Garlic Recipe is way easier than most folks think. You do need a few things to get that glossy black clove magic, but it is mostly about patience and a little heat.
Must-Have Tools for Reliable Black Garlic Sourcing
First things first, bring a rice cooker or slow cooker into the game. The key player for this simple black garlic preparation is a device with a “warm” function, not just “cook.” The goal is fragrant, melty garlic, not roasted garlic chips. Some rice cookers run hotter than others. If yours starts to brown the bulbs too much, try a simple Crock-Pot or slow cooker instead.
Next up: an airtight container. If you have ever left fresh garlic on the counter, you know what a single bulb can do to your whole house. Multiply that aroma by two or three WEEKS and, trust me, you will want to keep that smell under wraps. I slide my cooking device inside a lidded plastic storage bin and leave it out on the porch or the garage.
Another item that helps is a wire rack or basket for the garlic bulbs. It keeps air circulating underneath, stopping condensation and soggy bottoms (yikes). If you have no rack, some loosely crumpled foil will do.
Of course, for this Easy Black Garlic Recipe, you need garlic itself. There is no need for fancy stuff at first. Just grab a few whole heads—aim for organic if possible, or at least bulbs that are firm, dry, and unbruised.
Everything else is extra: a food dehydrator will speed up drying the outside once you are done, but you can always use your kitchen counter. All set? These are your power tools for black garlic greatness. A few simple gadgets unlock what people in fancy kitchens across the globe pay top dollar to get. Get those bulbs sorted, go clear a warm corner, and you are on your way.
Step-by-Step Guide: Simple Black Garlic Preparation
Ready to jump in? Making black garlic at home sounds tricky, but it’s wild how easy it actually is. Let me walk you through a foolproof step-by-step guide for homemade black garlic greatness—no fancy chef’s coat required.
Easy Black Garlic Recipe: Step-by-Step Walkthrough
Here’s how to turn regular garlic into a glossy, sweet spread that makes steak, salad, even toast feel a little more exciting:
- Set out your equipment: You’ll need fresh, whole garlic bulbs, some paper towels, and either a rice cooker, slow cooker, or a low-temp dehydrator.
- Clean the bulbs: Wipe off any dirt with a dry towel, but keep the skins. They’ll actually protect your precious cloves over the weeks ahead.
- Set your gadget onto “warm” (never “cook”). Stack the bulbs closely, leaving a bit of breathing room for air.
- Put on the lid, plug it in, and leave it. Yep, really. You want a steady heat of about 140°F. Don’t open the lid or the heat will drop off, stalling the magic.
- Check on it every few days. Wafts of balsamic goodness let you know something big’s happening, but you want to leave as much heat and moisture inside as you can. In about 3–4 weeks, try peeling one for a taste test. It should look inky dark and feel bouncy like a prune. Eat it straight or keep going, and check again after another week. A small note: This process takes patience. Your kitchen might smell like caramel-garlic heaven for weeks, but I’d argue that’s a selling point, not a downside.
Here’s a quick table with what to expect from different homemade black garlic methods:
That’s really all it takes for a Simple Black Garlic Preparation at home. Feeling extra? Tuck the bulbs in foil, or in a small tray lined with coffee filters, to keep your cooker even cleaner. There are ways to tweak temp and humidity of course, but I find this homemade black garlic recipe comes out dreamy whether it’s your first or thirtieth try.
Got a little more curiosity? Try looking into how to create black garlic at home, step by step after you make your first batch! Master this, and soon your biggest challenge will be not eating the black garlic before dinner is on the table.
Tips and Tricks for Perfecting Your Black Garlic Cooking Instructions
Good things take time, and your black garlic is no exception. Waiting two or three weeks for your bulbs to turn dark and sticky in a warm rice cooker might make you antsy, but it is so worth it. Do not try to speed things up by turning up the temperature. You will just dry your cloves instead of unlocking that deep sweetness everyone loves. If your rice cooker gets hotter than 170 degrees Fahrenheit, you are better off smoothing out a hotplate or slow cooker that can hold heat around 140–158 degrees. Let your nose guide you: halfway through, take a quick sniff near the lid (with a fan running or a window open, unless you really like robust kitchen smells). You should not get a whiff of burning, just a soft, roasted caramel note.
Some folks wrap their bulbs with parchment and foil to make a looser “oven within your oven.” I have found it helps keep them moister too. While your black garlic cooks, opening the lid often to check on it will let steam escape and dry out your garlic. So only peek once or twice to sneak a photo or grab a single clove. Wait to check texture until near the end of the Homemade Black Garlic Recipe’s timeline.
Your Essential Black Garlic Maturation Tips
Never rush: Give every bulb its full two to three weeks to go deep brown and rich.
Humidity depends on climate: Adding a cup of water to the bottom of the rice cooker (under a rack) can help keep the bulbs plump in dry spots like Denver. For the rest of us, just wrapping in parchment and foil does the trick. No added water needed.
Always let them rest: Once they finish their slow roast, unpack your bulbs and let them sit in a cool, dark spot for 24–48 hours to finish sweetening. The peels will harden and the inside will darken even further. (Cool treat: Sample one now and again in 48 hours. Big difference.)
Keep notes: Write down which garlic variety (grocery store, farmer’s market, or hardneck cloves) and how you liked the results. Over time, your Homemade Black Garlic Recipe will be dialed in just for your taste buds.
If making your own at home feels like a stretch, or something seems off in your setup, browse our Black Garlic Preparation Methods A Home Cooks Guide for troubleshooting more DIY setups. Everyone’s kitchen is a little different, but the end goal—cloud-soft, velvety pearls of black garlic to tuck into recipes—is exactly the same.
Creative Ways to Use Your Homemade Black Garlic in Recipes
Now that you have your stash of this precious homemade black garlic, let’s get cooking. In my kitchen, black garlic garlic is like the Swiss Army knife of flavor boosters: sweet, tangy, and packed with that umami punch. If you’ve never tried it before, it’s like roasted garlic’s suave cousin with soft, jammy cloves.
Black Garlic Cooking Ideas and Pairings
Slide a few cloves into mashed potatoes or blend them into cream cheese for a morning bagel that’ll make you stop and sigh. I also chuck a couple into stir-fries near the end, where they melt right into the sauce. The one time I minced black garlic and swirled it into scrambled eggs is… let’s just say my kids cheered for “cook-dad!”
You can whisk it into dressings or mayo for your next sandwich, slap it onto hot pizza or even tuck it into omelets. Try tossing torn black garlic right into a leafy green salad for a pop of sweet funk and hit it with a little lemon. That’s my “help, it’s Tuesday, what’s for dinner” move.
If you want a richer dish, mash it into softened butter then spread that combo on steak, grilled chicken, shrimp, or roasted veggies. Or, if it’s pasta night, use black garlic to help build the base of your sauce whether it’s a bright tomato bomb or something creamy, cheesy, and rich. Homemade black garlic has a soft texture and a mellow tangy taste, making it easy to mix or stir into just about anything.
Need more game-changing ideas? Aim for black garlic soup recipes or adventurous black garlic pasta classics. The links have easy formulas you can riff on with whatever is in the fridge.
And now for my wild-card favorite: I add them during breadmaking. Chopped cloves tucked into bread dough? Think garlic knots, but… leveled-up. You don’t need to wait for a special occasion to break out your Homemade Black Garlic Recipe. Just a little will take yesterday’s leftovers to next-level. Start experimenting and you’ll discover it’s far from a “one trick pony.”
Storing and Preserving Your Black Garlic for Long-Term Use
Once you make black garlic at home, you want to protect all your hard work. Keeping homemade black garlic fresh is simple if you follow a few key steps. The special flavor, sticky texture, and aroma deserve a little TLC.
Black Garlic Storage Essentials: Best Ways to Preserve Your Homemade Batch
Start by letting your black garlic cool to room temperature. Any moisture trapped during storage can cause spoilage. It will smell like balsamic vinegar and caramel, so there’s no mistaking if you skip a step!
You have a few options when it comes to storage. If you plan to use your black garlic within two weeks, toss the unpeeled bulbs in a paper bag or cardboard box and stash them in a pantry. This method keeps them away from too much light and airflow, like the root cellar approach our grandmas used for regular garlic.
For longer-term storage, I pop the cloves out of their papery skins and move them to an airtight container. You can keep them at room temperature for a few weeks or, even better, tuck them in the fridge for up to three months. If you went big with your homemade black garlic recipe, toss extra cloves in the freezer. They thaw well and stay perfectly scrumptious for future meals rescued at the last minute.
Heads up: Black garlic will continue to slowly ferment in warm temperatures. If you need your batch to last more than two or three weeks, the refrigerator will be your best friend.
Labeling and date-stamping your container helps you keep track of how old your batch is. I can’t tell you how many times I found a random jar tucked away, playing garlic roulette.
If you’re all about seeing your hard work at a glance, storing your homemade black garlic in glass jars not only keeps it fresh but also brings a little beauty to your fridge or pantry.
Think of this as preserving a tiny black gold mine in your home kitchen. By following these black garlic storage essentials, you are making sure every flavor-packed clove is ready for your next sandwich, sauce, or stir-fry. After this Sweet Transformation, when you uncover the jars, the deep aroma will prove you kept the kitchen magic alive.
Health Benefits and Nutritional Insights of Black Garlic
We all love garlic for its bold flavor, but black garlic brings even more to the table, especially when you make it yourself. A great plate isn’t the only perk either. When you dive into a homemade black garlic recipe, you’re also unlocking several potential health benefits. Talk about a treat!
Surprising Health Highlights of Black Garlic
I’ll admit that the first time I bit into a softened clove, I wasn’t thinking about antioxidants or nutrients. I just wanted that earthy, complex flavor. Turns out, I was helping my body too. Black garlic is rich in compounds believed to support a healthy immune system. Researchers have found that it may have more antioxidants than raw garlic, thanks to its slow transformation process at low heat and humidity. These antioxidants combat the effects of stress on our cells, sort of like a heavy-duty defense team.
You might also hear that the aging process responsible for turning regular garlic deep black alters its nutritional profile—many believe for the better. Enthusiasts and some scientists credit it with potentially supporting healthy cholesterol, stabilizing blood sugar, and even improving your mood. I’m not saying it’s magic, but more than a handful of studies seem to compliment these culinary claims.
Simple black garlic preparation at home also means more control. You avoid added preservatives or weird ingredients found in some store-bought versions that can be tough to track down or trust. And unlike processed black garlic that sometimes tastes flat, flavors in your own homemade batch will pop, adding funk and sweetness to your next pasta sauce, grain bowl, or cheese board.
Don’t stress if you can’t find quality black garlic near you. With just time and patience—plus your homemade black garlic recipe tools—you’ll have a personal stash in your kitchen. And your body and taste buds will both thank you.
Conclusion
Now that you have tried out the step-by-step guide to homemade black garlic, you’re set to make this unique and flavorful ingredient part of your kitchen lineup. With a few basic supplies and patience, you can say goodbye to the challenges of finding quality black garlic at the store. Instead, you’ll be making a legendary batch right at home that’s packed with health benefits.
Don’t let your delicious creation go to waste. Take another peek at our tips, try adding it to pretty much everything, and add a little creative sparkle to your favorite recipes—from pasta and pizza to savory spreads. You’ve mastered this simple black garlic preparation and its endless possibilities so share the love! Inspire your friends to taste your results or pass on your new expertise over dinner or a quick chat. Are you ready to join the growing club of home cooks who turn simple garlic into gourmet magic?
FAQ
Do I need a rice cooker for a Homemade Black Garlic Recipe?
You do not have to own a rice cooker. That said, many folks love using it because it combines heat and humidity so that whole heads of garlic won’t dry out. You can get creative, though. I know a couple in Texas who used a slow cooker wrapped in a towel on a back porch, and the results were amazing after four weeks. Your main goal is to maintain a toasty, fairly humid environment; that is the magic behind simple black garlic preparation, and it works in everything from sous vide devices to pressure cookers.
Does black garlic have to be made from a certain garlic variety?
Not really! Your homemade black garlic recipe will give you tasty results whether the cloves are jumbo or small. That said, a softneck garlic bulb holds up well through weeks of gentle heat and fermenting. I like subtle gray garlic, but robust white heads sweeten nicely too. Get adventurous and swap different varieties to compare results. I tell friends who are garlic nerds to try elephant garlic if they want a larger, milder clove. Expect wild flavors regardless of what you use!
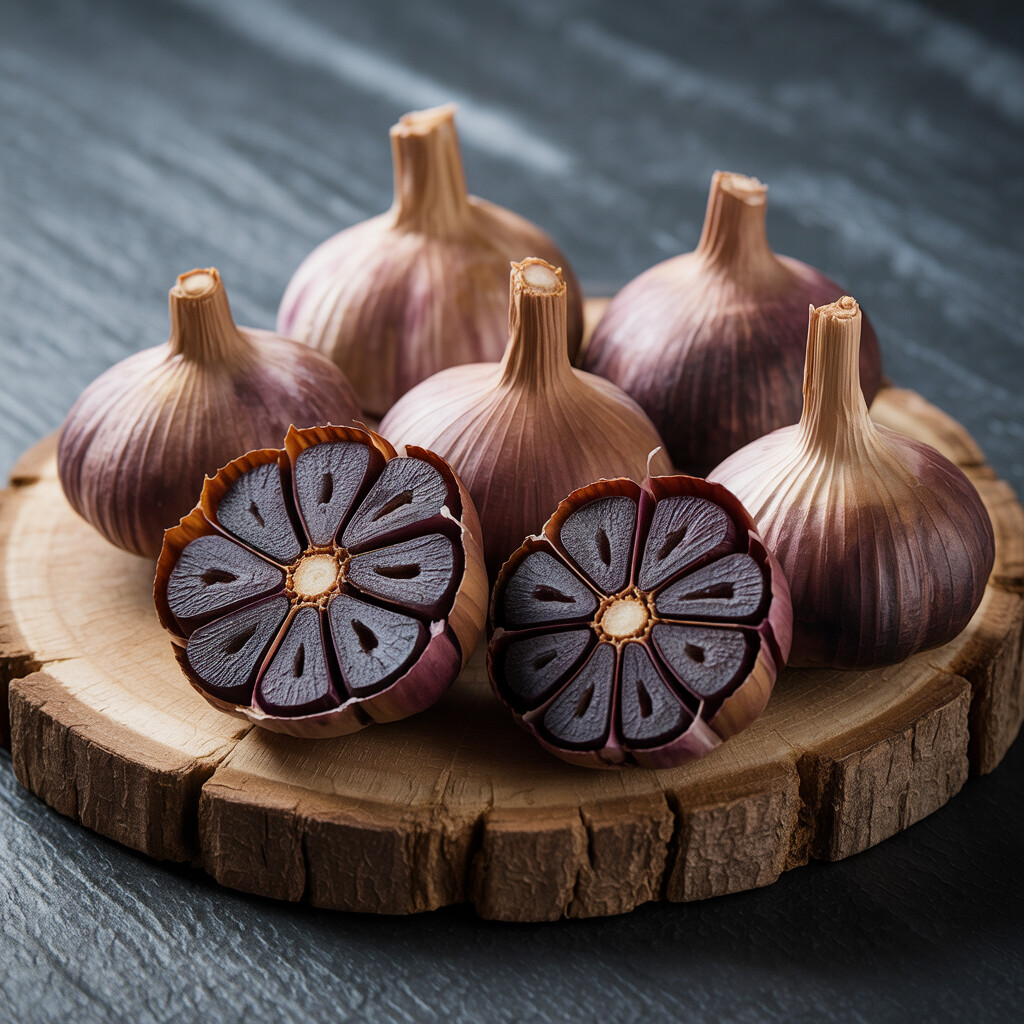
How do you know when your black garlic is done?
Black garlic cloves should look black all the way through but stay sliceable and moist. Your batch will often get shiny after a few weeks and develop a molasses aroma. Your biggest job is patience. Let the process take at least three weeks and test results every few days. I gently squeeze a clove with a clean tongs—if it gives like a gummy bear but tastes tangy and sweet, it is perfect! Let your sense of smell be your best judge, as a pesky spoiled batch smells sharp and bad.
How do you remove garlic smell from your rice cooker after use?
Getting rid of the garlic smell can take a little work, but a couple tricks can banish odors. When your first Homemade Black Garlic Recipe finished, the leftover aroma in my rice cooker filled my garage. A quick fix with lemon water helped. I squeezed the juice and used the rinds mixed with hot tap water, then let that soak overnight. Next, I rinsed with vinegar and a little baking soda and let the whole cooker air dry outside. By lunch the next day, the sharp tang was history and a batch of rice tasted sweet as ever.